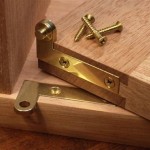
How to Safely and Efficiently Remove Bathroom Cabinet Doors
Bathroom cabinets are an essential storage solution in any home, but sometimes it becomes necessary to remove the doors for cleaning, repairs, or remodeling. While the process may seem daunting, it is relatively straightforward with the right tools and a step-by-step guide. Here's a comprehensive guide on how to remove bathroom cabinet doors safely and efficiently:
Materials Required:
- screwdriver (Phillips or flat-head, depending on the door hinges)
- drill or impact driver (optional)
- socket wrench (optional)
- hammer (optional)
Step 1: Determine Hinge Type
Before removing the doors, it is crucial to identify the type of hinges installed. The most common types in bathroom cabinets are:
- Concealed hinges: These hinges are fully concealed within the cabinet and door and require a special tool or screwdriver to adjust.
- Face-frame hinges: These hinges are mounted on the face of the cabinet frame and door and are typically secured with screws.
- Inset hinges: These hinges are similar to face-frame hinges but are mounted inside the cabinet frame, allowing the door to sit flush with the surrounding cabinets.
Step 2: Remove the Hinges
Once the hinge type is identified, you can proceed to remove the doors. Here's how to do it for each type of hinge:
- Concealed Hinges: Locate the small adjustment screws on the side of the hinge. Using the appropriate tool, unscrew these adjustment screws until the door is loose. Lift the door straight up to disengage it from the hinge.
- Face-frame Hinges: Locate the screws on the hinge plate that attaches it to the cabinet frame. Using a screwdriver, remove these screws and carefully lift the door up and away from the cabinet.
- Inset Hinges: Remove the screws on the hinge plate that attaches the hinge to the inside of the cabinet frame. Gently lift the door up and pivot it away from the cabinet. Be cautious as the door may be heavy.
Step 3: Remove the Door Stops (Optional)
In some cases, bathroom cabinet doors may have stoppers or bumpers installed to prevent them from opening too far. If present, use a screwdriver to remove the screws holding them in place, then gently pull them off.
Step 4: Clean or Repair Doors (Optional)
With the doors removed, you can now proceed with any necessary cleaning, repairs, or modifications. Use a damp cloth and mild detergent to wipe down the doors, removing any dirt or grime.
Step 5: Reinstall the Doors
Once the doors are clean and repaired, you can reinstall them by reversing the removal process. If you encountered any challenges during removal, consult your specific hinge instructions for proper reinstallation.
Tips:
- Work slowly and carefully to avoid damaging the doors or hardware.
- If the hinges are particularly tight, use a drill or impact driver to remove the screws.
- For concealed hinges, be sure to fully disengage the release lever before lifting the door.
- If you are unsure about how to remove a specific type of hinge, refer to the manufacturer's instructions or seek professional assistance.
Removing bathroom cabinet doors can be a straightforward task with the right approach. By following these steps and using the appropriate tools, you can safely remove your doors for cleaning, repairs, or remodeling, and reinstall them with ease.

Update Your Bathroom Vanity With New Cabinet Doors The Handyman S Daughter

How To Remove A Bathroom Vanity Budget Dumpster

Update Your Bathroom Vanity With New Cabinet Doors The Handyman S Daughter

Builder S Grade Vanity Revamp Remodelando La Casa

Fluted Bathroom Cabinet Refacing Diy At Home With Ashley

How To Remove An Old Bathroom Vanity Thrift Diving Blog

Update Your Bathroom Vanity With New Cabinet Doors The Handyman S Daughter

Fluted Bathroom Cabinet Refacing Diy At Home With Ashley

Fluted Bathroom Cabinet Refacing Diy At Home With Ashley

Diy Fluted Cabinet Doors I M Home
Related Posts

