How To Build Your Own Cabinets: A Comprehensive Guide
Constructing custom cabinets offers significant advantages, including cost savings, tailored dimensions to optimize space utilization, and the satisfaction of creating personalized storage solutions. The process, while demanding, is achievable with careful planning, accurate measurements, and a dedication to craftsmanship. This article provides a comprehensive guide to building your own cabinets, covering essential steps from initial design to final installation.
Planning and Design: Laying the Foundation for Success
The initial phase of cabinet construction involves meticulous planning and design. This stage is critical as it determines the functionality, aesthetics, and overall success of the project. Start by thoroughly assessing the intended location for the cabinets. Measure the available space accurately, noting any irregularities such as uneven walls or pipes. These measurements will form the basis for the cabinet dimensions.
Next, consider the purpose of the cabinets. Will they be used for storing dishes, food, tools, or other items? This will dictate the interior configuration, including shelf placement, drawer sizes, and the need for specialized features such as pull-out organizers or spice racks. Sketch out your design, indicating dimensions, materials, and hardware choices. Numerous online resources and software programs can assist in creating detailed cabinet plans.
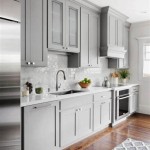
Selecting the appropriate materials is crucial. Plywood is a common choice for cabinet boxes due to its stability and affordability. Solid wood can be used for face frames, doors, and drawer fronts to enhance the appearance and durability. Consider the species of wood based on its grain, color, and hardness. Ensure the wood is properly dried and free from defects. Particleboard and MDF (Medium Density Fiberboard) are also options, but they are generally less durable and moisture-resistant than plywood and solid wood.
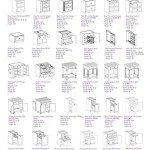
Hardware selection is another important aspect of the design phase. Choose hinges, drawer slides, knobs, and pulls that complement the style of the cabinets and provide smooth, reliable operation. Consider soft-close hinges and drawer slides for added convenience and longevity. Prepare a detailed cut list that specifies the dimensions of each piece of material required for the project. This will minimize waste and ensure accuracy during the cutting process.
Construction Techniques: Assembling the Cabinet Components
Once the planning and design are complete, the construction phase begins. This involves cutting the materials according to the cut list, assembling the cabinet boxes, and building the doors and drawers. Accuracy and attention to detail are paramount in this stage to ensure a professional and functional finished product.
Begin by cutting the plywood for the cabinet boxes. Use a circular saw or table saw with a sharp blade to achieve clean, accurate cuts. A jig saw can be used for making curved or intricate cuts. Follow the cut list precisely and double-check each measurement before cutting. After cutting, assemble the cabinet boxes using wood glue and screws or nails. Ensure that the corners are square and the joints are tight. Clamps can be used to hold the pieces together while the glue dries. For added strength, consider using pocket screws to join the pieces together.
Next, construct the face frames, if included in the design. Face frames are typically made from solid wood and attached to the front of the cabinet boxes to provide a finished look and added structural support. Cut the face frame pieces to size and join them together using wood glue and screws or nails. Ensure that the joints are tight and the corners are square. Sand the face frame smooth and attach it to the cabinet box using wood glue and clamps.
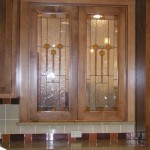
Building the doors and drawers requires careful attention to detail. Doors can be constructed in various styles, including raised panel, flat panel, and Shaker. Choose a style that complements the overall design of the cabinets. Cut the door pieces to size and assemble them using wood glue and screws or dowels. Ensure that the joints are tight and the corners are square. Sand the doors smooth and install the hinges. Drawers can be constructed using similar techniques. Cut the drawer pieces to size and assemble them using wood glue and screws or nails. Install the drawer slides and test the drawer for smooth operation.
Sanding is a critical step in achieving a professional finish. Sand all surfaces of the cabinet boxes, doors, and drawers to remove any imperfections and create a smooth surface for finishing. Start with a coarse grit sandpaper and gradually work your way to a finer grit. Pay particular attention to edges and corners to avoid rounding them over. Wipe down all surfaces with a tack cloth to remove any dust before applying the finish.
Finishing and Installation: The Final Touches
The finishing stage involves applying a protective coating to the cabinets to enhance their appearance and durability. This can include painting, staining, or applying a clear coat finish. The choice of finish will depend on the desired aesthetic and the type of wood used. Proper preparation and application are essential for achieving a professional-looking finish.
If painting the cabinets, begin by applying a primer coat to seal the wood and provide a smooth surface for the paint. Choose a high-quality primer that is compatible with the type of paint you will be using. Apply the primer evenly and allow it to dry completely before sanding lightly. Apply two coats of paint, allowing each coat to dry thoroughly before applying the next. Use a high-quality paint brush or sprayer to achieve a smooth, even finish. Light sanding between coats will improve the final appearance.
If staining the cabinets, begin by applying a wood conditioner to help the stain penetrate evenly. Choose a stain that complements the type of wood used and the desired aesthetic. Apply the stain evenly and allow it to penetrate according to the manufacturer's instructions. Wipe off any excess stain and allow the wood to dry completely before applying a clear coat finish. A clear coat finish will protect the stain and enhance its durability. Apply several coats of clear coat, allowing each coat to dry thoroughly before applying the next. Light sanding between coats will improve the final appearance.
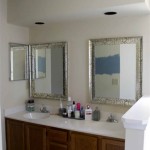
The final step is installing the cabinets. This involves attaching the cabinets to the wall, leveling them, and securing them in place. Begin by locating the wall studs using a stud finder. Mark the location of the studs on the wall. Lift the cabinet into place and align it with the marks. Use shims to level the cabinet if necessary. Secure the cabinet to the wall studs using screws. Repeat this process for each cabinet, ensuring that they are all level and aligned. Install the doors and drawers and adjust the hinges and drawer slides as needed. Install knobs and pulls to complete the project.
Building your own cabinets can be a challenging but rewarding experience. By following these steps carefully and paying attention to detail, one can create custom storage solutions that are both functional and aesthetically pleasing. The key lies in meticulous planning, accurate measurements, and a commitment to quality craftsmanship.

How To Build Cabinets The Complete Guide Houseful Of Handmade

Diy Kitchen Cabinets Made From Only Plywood

How To Build Cabinets The Complete Guide Houseful Of Handmade

How To Build Your Own Kitchen Cabinets With Pictures Instructables

How To Build Your Own Kitchen Cabinets With Pictures Instructables

How To Build Cabinets In Under 30mins The Easy Way

How To Build A Custom Diy Built In Cabinet Angela Marie Made

How To Build Your Own Kitchen Cabinets For The Home Building Diy

How To Build A Cabinet Diy Guide For Beginners

How To Build Your Own Vintage Style Cabinets Daniel Kanter
Related Posts