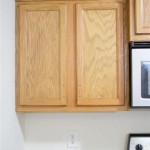
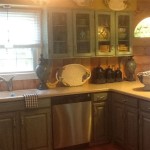
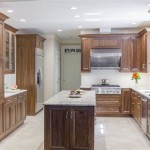
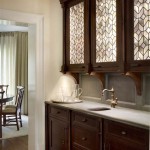
Under cabinet lighting is a great way to add a modern touch to your kitchen and update its overall look. Not only does it provide a warm and cozy atmosphere, but it also increases visibility when you’re cooking or doing prep work. The good news is that you don’t have to be an electrician to install under cabinet lighting. You can easily do it yourself with a few simple tools and materials.
The first step in installing your own under cabinet lighting is to determine what type of lighting you want to use. There are a few different options available, including fluorescent, LED, and xenon lights. Fluorescent lights are the most affordable option and have a long lifespan, but they can be harsh and the bulbs can be difficult to replace. LED lights are more expensive but are energy efficient and have a long lifespan. Xenon lights have a warm, natural glow and are the most expensive option.
Once you’ve determined what type of lighting to use, you’ll need to measure the area you want to install the lights in. Measure the width and length of the area and then purchase the appropriate sized fixtures. You’ll also need to decide whether you want to install the lights on the wall or on the underside of the cabinets. If you choose to install them on the wall, you may need to use anchors to secure the fixtures.
The next step is to connect the fixtures to a power source. If you’re installing the lights on the wall, you will need to connect them to a light switch. If you’re installing them on the underside of the cabinets, you can connect them to an outlet or a light switch. If you choose to connect the fixtures to an outlet, make sure it is a ground fault circuit interrupter (GFCI) outlet to prevent the possibility of electric shock.
Once you’ve connected the fixtures to the power source, it’s time to install them. For wall mounted fixtures, use a drill to make holes for the screws and then secure the fixtures with the screws. For lights mounted on the underside of the cabinets, use a drill to make holes for the mounting bracket and then secure the bracket with screws.
Finally, you’ll need to connect the fixtures to the power source. If you’ve connected the fixtures to a light switch, you’ll need to connect the power wires to the switch. If you’ve connected the fixtures to an outlet, you’ll need to connect the power wires to the outlet. Make sure all connections are secure and then you can turn on the switch or plug in the outlet and enjoy your new under cabinet lighting.
Installing your own under cabinet lighting is a great way to update the look of your kitchen and create a warm and inviting atmosphere. With a few simple tools and materials, you can easily do it yourself and enjoy the benefits of under cabinet lighting for many years to come.


Related Posts