Creating The Ultimate DIY Garage Cabinet System
The garage, often a repository for tools, equipment, and miscellaneous items, can quickly devolve into a chaotic space. A well-organized garage not only enhances usability but also increases the overall value and appeal of a home. One of the most effective methods for achieving garage organization is through the implementation of a comprehensive cabinet system. This article provides a detailed guide on creating the ultimate DIY garage cabinet system, focusing on key design considerations, material selection, and construction techniques.
Planning and Design
The initial phase of creating a DIY garage cabinet system involves careful planning and design. This stage is critical as it lays the foundation for a functional and aesthetically pleasing storage solution. A thorough needs assessment, precise measurements, and a well-defined layout are essential for success.
First, conduct a comprehensive assessment of storage needs. This involves identifying the types of items that will be stored, their dimensions, and their weight. For example, power tools, gardening equipment, automotive supplies, and seasonal decorations all require different storage solutions. Categorizing these items will assist in determining the number and type of cabinets needed.
Second, take precise measurements of the garage space. This includes the length and width of the walls, the height of the ceiling, and the location of windows, doors, and electrical outlets. Create a detailed floor plan, either manually or using software, to visualize the cabinet layout. Consider maximizing vertical space by utilizing tall cabinets or overhead storage options. Leave sufficient clearance for walkways and vehicle access.
Third, determine the overall layout of the cabinet system. Common layouts include wall-mounted cabinets, floor-standing cabinets, and a combination of both. Wall-mounted cabinets offer the advantage of keeping items off the floor, making cleaning easier and protecting against moisture. Floor-standing cabinets provide stability and can support heavier loads. A well-designed layout should optimize storage capacity while maintaining accessibility and functionality. The layout should consider the workflow within the garage, placing frequently used items in easily accessible locations.
Finally, consider incorporating modular components into the design. Modular cabinets offer flexibility and can be easily reconfigured as storage needs change. They are available in various sizes and configurations, allowing for customization. Plan for adjustable shelves, drawers, and specialized storage options such as tool racks and pegboards. This adaptability ensures that the cabinet system remains useful and efficient over time.
Material Selection
The choice of materials is crucial for the durability and longevity of the garage cabinet system. The garage environment often presents unique challenges, including temperature fluctuations, humidity, and potential exposure to chemicals and solvents. Therefore, selecting materials that can withstand these conditions is essential.
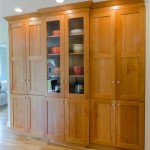
Plywood is a popular choice for garage cabinets due to its strength, stability, and affordability. Consider using exterior-grade plywood, which is treated to resist moisture and decay. Plywood is available in various thicknesses; ¾-inch plywood is generally recommended for cabinet construction due to its rigidity and load-bearing capacity.
Medium-density fiberboard (MDF) is another option, particularly for cabinet doors and drawer fronts. MDF provides a smooth surface for painting and is less prone to warping than solid wood. However, MDF is more susceptible to moisture damage than plywood, so it is important to properly seal and protect it.
Solid wood, such as pine or oak, can be used for cabinet frames and doors, offering a more traditional and aesthetically pleasing appearance. Solid wood is durable and can be easily repaired or refinished. However, it is more expensive than plywood or MDF and may be prone to warping or cracking in fluctuating temperatures.
For hardware, select high-quality hinges, drawer slides, and handles that are designed for heavy-duty use. Consider using soft-close hinges and drawer slides to prevent slamming and reduce wear and tear. Steel or aluminum hardware is more durable and resistant to corrosion than plastic hardware.
Finally, choose a durable finish that will protect the cabinets from scratches, stains, and moisture. Epoxy paint is a popular choice for garage cabinets due to its resistance to chemicals and abrasion. Polyurethane varnish is another option, providing a clear, protective coating that enhances the natural beauty of the wood. Ensure that the finish is properly applied to all surfaces, including edges and corners, to prevent moisture penetration.
Construction Techniques
Proper construction techniques are essential for creating a sturdy and long-lasting garage cabinet system. Accurate measurements, precise cuts, and secure joinery are critical for ensuring the stability and functionality of the cabinets.
Begin by cutting the cabinet components according to the dimensions specified in the design plan. Use a circular saw, table saw, or miter saw to ensure accurate and clean cuts. Label each component to avoid confusion during assembly. Consider using a plywood cutting guide to ensure straight and accurate cuts.
Assemble the cabinet frames using screws, nails, or wood glue. Screws provide a strong and durable connection and can be easily adjusted or removed if necessary. Nails are faster to install but may not provide as strong of a connection as screws. Wood glue adds strength to the joints and helps to prevent racking. Use clamps to hold the components together while the glue dries.
Install the cabinet backs using screws or nails. The back panel provides stability to the cabinet and helps to prevent it from warping. Plywood or hardboard can be used for cabinet backs. Ensure that the back panel is securely attached to all four sides of the cabinet frame.
Install shelves and drawers according to the design plan. Adjustable shelves provide flexibility and can be easily repositioned to accommodate different storage needs. Use shelf pins or shelf supports to hold the shelves in place. Drawer slides should be installed accurately to ensure smooth and reliable operation. Consider using full-extension drawer slides, which allow the drawer to be fully extended for easy access to items stored in the back.
Mount the cabinets to the wall using appropriate hardware. Wall-mounted cabinets should be securely attached to wall studs to ensure stability. Use a stud finder to locate the wall studs and mark their positions. Use lag screws or heavy-duty screws to attach the cabinets to the studs. For added security, consider using metal brackets or braces to reinforce the connection. Ensure that the cabinets are level and plumb before tightening the screws.
Install cabinet doors and hardware according to the manufacturer's instructions. Use a jig or template to ensure accurate placement of hinges and handles. Adjust the hinges to ensure that the doors open and close smoothly and that they are aligned properly. Install door pulls or knobs to make it easier to open and close the doors.
Customization and Additions
Once the basic cabinet system is constructed, consider adding custom features and accessories to enhance its functionality and organization. These additions can tailor the system to specific storage needs and improve the overall usability of the garage.
Install pegboards on the inside of cabinet doors or on the walls near the cabinets to provide additional storage for tools and small items. Pegboards can be customized with various hooks and attachments to accommodate different types of items. Consider using metal pegboards for added durability.
Add task lighting to the cabinet system to improve visibility. Under-cabinet lighting can illuminate the work surface and make it easier to find items stored in the cabinets. LED lights are energy-efficient and provide bright, even illumination. Consider using dimmable lights to adjust the brightness as needed.
Incorporate power outlets into the cabinet system to provide convenient access to electricity. Install outlets inside cabinets to charge power tools or other electronic devices. Consider using surge protectors to protect against electrical surges. Ensure that the electrical wiring is installed by a qualified electrician.
Add specialized storage solutions for specific items. This may include tool racks, hose reels, or bike racks. These specialized solutions can help to organize these items and prevent them from cluttering the garage. Consider using modular storage systems that can be easily reconfigured as storage needs change.
Label the cabinets and drawers to make it easier to find items. Use a label maker or write labels by hand. Consider using color-coded labels to categorize items. Regularly declutter the cabinets and drawers to remove items that are no longer needed. This will help to keep the garage organized and prevent it from becoming cluttered.

Diy Garage Cabinets And Miter Saw Station Jenna Sue Design

Garage Cabinets Diy Wooden Storage Install Guide

Diy Garage Shelves Modern Builds

How To Build A Giant Diy Garage Cabinet Family Handyman

Diy Garage Shelves Modern Builds

Diy Garage Cabinets And Miter Saw Station Jenna Sue Design
:max_bytes(150000):strip_icc()/Garage-storage-units-705e1388ed354599addde39f024c00a6.jpg?strip=all "52 Diy Garage Storage Ideas To Stay On Top Of The Clutter")
52 Diy Garage Storage Ideas To Stay On Top Of The Clutter

Diy Garage Cabinets And Miter Saw Station Jenna Sue Design

How To Build Oversized Garage Storage Cabinets

Garage Cabinets Diy Wooden Storage Install Guide
Related Posts