Stripping Paint From Old Kitchen Cabinets To New Builds
Transforming old kitchen cabinets into new, refreshed pieces can be a rewarding and cost-effective way to enhance the look of your kitchen. However, it often involves removing layers of old paint, varnish, or stain. Stripping paint from kitchen cabinets requires patience, proper tools, and careful attention to safety. This article will guide you through the process of stripping paint from old kitchen cabinets, ensuring a successful transformation.
1. Preparing for the Stripping Process
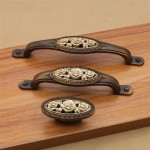
The first step is to thoroughly prepare the cabinets for stripping. This involves removing any hardware, such as handles, knobs, and hinges. Take note of the placement and order of these hardware items for easy reinstallation later. Next, cover the surrounding area with drop cloths or plastic sheeting to protect it from paint stripper spills and residue.
Ventilation is crucial when working with paint stripper. Open windows and doors to allow fresh air circulation. Wear protective gear, including gloves, a respirator mask, and eye protection. These precautions safeguard your health and prevent exposure to harmful chemicals.
2. Choosing and Applying the Paint Stripper
There are various types of paint strippers available, each suited for specific applications. Chemical strippers are powerful solutions that effectively remove multiple layers of paint. However, they can be harsh on the cabinet's surface and require careful handling.
For delicate cabinets, consider using a more gentle option like citrus-based stripper. This type of stripper utilizes natural ingredients, making it less harsh on the wood. Regardless of your choice, always read the product's instructions carefully. This will inform you about the recommended application method and safety precautions.
Apply the stripper evenly to the cabinet surfaces using a paintbrush or scraper. Allow the product to dwell for the recommended time, as specified on the container, to ensure it penetrates the paint layers.
3. Removing the Stripped Paint
Once the paint stripper has done its job, you can remove the softened paint. This process is often messy, so be prepared. Use a scraper (plastic or metal) to gently pry off the loosened paint. Work in sections, avoiding excessive pressure.
For stubborn areas, consider using a heat gun to soften the paint further. However, exercise caution and avoid overheating the wood. Use a damp cloth or sponge to wipe away any remaining stripper residue. Be thorough in this step to ensure a clean surface for painting or staining.
4. Neutralizing and Sanding the Cabinets
After stripping the paint, it's essential to neutralize the paint stripper. This step prevents future problems and ensures a smooth finish for subsequent coatings. Depending on the type of stripper used, apply a neutralizing solution (usually water or baking soda solution) to the cabinet surfaces.
Once the stripping process is complete, sand the cabinets thoroughly. This removes any remaining paint residue and creates a smooth surface for painting or staining. Use coarse sandpaper to remove large paint particles, followed by finer grits to achieve a smooth finish.
After sanding, wipe the cabinet surfaces with a damp cloth to remove dust and debris. Allow the cabinets to dry completely before proceeding with the next step.
5. Preparing for Painting or Staining
With the stripping process complete, the cabinets are ready for painting or staining. First, inspect the wood for any imperfections or damage. Repair any scratches or dents with wood filler and allow it to dry completely. Prime the cabinets with a suitable primer to provide a smooth and even surface for the final finish.
After the primer has dried, choose your desired paint or stain. Apply multiple thin coats, allowing each coat to dry thoroughly before applying the next. This ensures a durable and long-lasting finish.
Once the paint or stain is dry, reattach the hardware, ensuring that it is properly aligned. This final step completes the transformation of the cabinets, giving your kitchen a fresh and updated look.

Kitchen Cabinet Refinishing Guide How We Got A Durable Chip Free Finish

21 Diy Affordable Ways To Redo Kitchen Cabinets Extra Space Storage

How To Paint Kitchen Cabinets A Step By Guide Confessions Of Serial Do It Yourselfer

Painted White Cabinets Before And After Reveal Photos Renovated Faith

A Step By Guide To Painting Kitchen Cabinets With Kilz Primer Blog

How To Update Your Kitchen Cabinets Without Replacing Them Real Estate U S News

Diy Painting Your Kitchen Cabinets The Right Way

How To Strip Paint From Cabinets Angi

How To Paint Old Kitchen Cabinets Save Yourself 1 000s Builds By Maz

Budget Kitchen Renovation With Diy Shaker Painted Cabinets I
Related Posts


