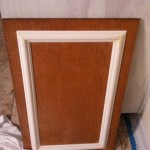
Router Bits To Make Shaker Cabinet Doors
Shaker cabinet doors are a mainstay in both contemporary and traditional cabinetry due to their clean lines, versatility, and ease of construction. The defining feature of a Shaker door is its simple, framed construction, typically consisting of a flat center panel surrounded by four rails and stiles. Achieving this classic look requires specific router bits, each designed to perform a particular function in creating the necessary profiles and joinery.
Selecting the correct router bits is crucial for achieving a professional and aesthetically pleasing result. The choice depends largely on the desired style variations within the Shaker design, as well as the preferred joinery methods for connecting the rails, stiles, and center panel. This article will outline the key router bits needed for crafting Shaker cabinet doors, describing their purpose and considerations for selecting the appropriate tools.
Essential Router Bits for Rail and Stile Cuts
The most important router bits for Shaker doors are those used to create the profile on the rails and stiles, as well as the joinery that connects them. These bits typically come in matched sets, designed to create interlocking profiles along the edges of the rails and stiles.
Rail and stile router bit sets are the foundation for creating the door frame. These sets typically consist of two distinct bits: a rail bit and a stile bit. The rail bit creates a horizontal profile that usually features a tenon or a tongue, while the stile bit creates a vertical profile that typically includes a matching groove or mortise. When the rail and stile are joined, this interlock creates a strong and visually appealing connection.
There are various profiles available in rail and stile bit sets. Some common profiles include a simple square edge, a rounded edge, or a more decorative ogee or cove. The choice of profile is a matter of personal preference and should complement the overall design aesthetic of the kitchen or room in which the cabinets will be installed. More elaborate profiles will require more intricate bits and may be more challenging to execute perfectly.
When selecting a rail and stile bit set, it is important to consider the shank size of the bit and the capacity of the router. Most router bits are available with either a 1/4-inch or 1/2-inch shank. A 1/2-inch shank is generally preferred for larger bits, as it provides greater stability and reduces vibration, resulting in a cleaner cut. However, not all routers can accept a 1/2-inch shank, so it's crucial to check the router's specifications before purchasing a bit set.
Another key factor is the material used to construct the router bits. Carbide-tipped bits are highly recommended for their durability and ability to maintain a sharp cutting edge over time. Carbide is a harder and more wear-resistant material than high-speed steel, making it ideal for routing hardwoods and engineered wood products commonly used in cabinet making. While carbide bits are more expensive, their longevity and performance justify the initial investment.
Always prioritize safety when using router bits. Ensure that the bits are properly installed and securely tightened in the router collet. Use appropriate safety gear, including safety glasses and hearing protection. Make multiple passes with the router, removing a small amount of material with each pass, to prevent overheating and ensure a clean, accurate cut. Use featherboards and other safety devices to keep the workpiece firmly against the fence and prevent kickback.
Router Bits for Panel Grooves
In addition to the rail and stile profiles, Shaker doors require a groove to accept the center panel. This groove is typically cut along the inside edge of the assembled rail and stile frame.
A standard straight router bit can be used to create the panel groove, but specialized groove cutting bits are also available. These bits often feature a bearing that rides along the edge of the frame, ensuring a consistent depth and width of the groove. The size of the straight bit or groove cutting bit will depend on the thickness of the panel being used. A 1/4-inch groove is common for plywood or MDF panels, while a wider groove may be needed for thicker solid wood panels.
Another option is to use a slot cutter router bit. These bits are designed specifically for cutting grooves or slots in wood. They are available in various widths and depths, and some feature adjustable bearings for fine-tuning the groove size. Slot cutters can be particularly useful when working with different panel thicknesses or when creating a slightly wider groove to accommodate expansion and contraction of a solid wood panel.
When cutting the panel groove, it is important to ensure that the frame is securely clamped together. This will prevent movement during the routing process and ensure a consistent groove along the entire perimeter. A router table can be helpful for this task, as it provides a stable platform for the workpiece and allows for greater control over the cut.
If using solid wood panels, it is essential to allow for expansion and contraction within the frame. This can be achieved by making the panel slightly smaller than the groove and using space balls or rubber bumpers to center the panel within the frame. These flexible spacers will allow the panel to move slightly without putting stress on the frame joints. The panel should not be glued into the frame; it should be allowed to "float" within the groove.
Additional Considerations and Router Bit Options
While rail and stile sets and groove-cutting bits are the foundation, other router bits can be incorporated to enhance the design and construction of Shaker cabinet doors.
Raised panel router bits, although not strictly necessary for traditional Shaker doors with flat panels, can be used to create a modified Shaker style with a subtle raised or beveled panel. These bits are designed to create a decorative edge on the panel, adding visual interest and dimension. There are different profiles to consider, such as ogee, cove, or traditional raised panel profiles. Using a raised panel will slightly deviate from the pure Shaker style, but it can be a pleasing variation.
Edge-forming router bits can be used to soften the edges of the rails and stiles or to add a decorative detail. Roundover bits, chamfer bits, and cove bits are all common choices for rounding or beveling the edges of the door frame. These bits can create a more comfortable feel and a more refined appearance. Be careful not to overdo it; the beauty of the Shaker style lies in its simplicity, so any edge-forming should be subtle and understated.
For added strength and durability, consider using a lock miter router bit to join the rails and stiles. This bit creates an interlocking joint that is significantly stronger than a traditional butt joint or even a mortise and tenon joint. The lock miter joint also aligns the pieces perfectly, simplifying the assembly process. However, lock miter joints require precise setup and execution, so it's important to practice on scrap wood before routing the actual door components.
When working with MDF (Medium-Density Fiberboard), specialized MDF router bits can provide cleaner cuts and reduce tear-out. MDF is a common material for cabinet doors due to its stability and smooth surface, but it can be prone to chipping or splintering when routed. MDF router bits often feature a higher shear angle and a sharper cutting edge, resulting in a cleaner cut and a smoother finish. If a user decides to use MDF, consider using these specialized bits to make sure the results are professional.
Finally, consider investing in a good-quality router bit maintenance kit. This kit should include cleaning solution, a sharpening stone, and a magnifying glass. Regular cleaning and sharpening will keep your router bits in top condition, ensuring clean cuts and extending their lifespan. A magnifying glass can be helpful for inspecting the cutting edges for damage or wear.
Ultimately, the selection of router bits depends on the specific design, the desired level of detail, and the preferred construction methods. Careful planning and attention to detail are essential for creating high-quality Shaker cabinet doors that will last for years to come.

Shaker 3 Bit Raised Panel Cabinet Door Router Set With Back Cutter Raiser 1 2 Shank Yonico 12350

Make Mission Or Shaker Style Doors With Tongue Groove Router Bit Set Infinity Cutting Tools

Mlcs Shaker Cabinet Maker Router Bits Set With Back Cutter 8391

Mlcs Raised Panel Router Bits Shaker Bevel Profile

Yonico Rail And Stile Shaker 1 2 In Shank Carbide Tipped Router Bit Set Piece 12249

Tongue And Groove Rail Stile Router Bits Shaker Style Doors Making

Adjustable Shaker Router Bit Sets 8 900 624 Cmt Orange Tools Usa

Round Over 3 Bit Raised Panel Cabinet Door Router Set With Back Cutter Raiser 1 2 Shank Yonico 12343

Shaker Cabinet Door Router Bits With Back Cutter Mlcs

Shaker Door Made Using A Tongue Grove Bit Set
Related Posts

