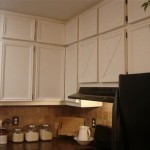
White cabinets are a classic choice for any kitchen or bathroom renovation. They offer a timeless, elegant look that instantly brightens up any room. Painting cabinets white is a relatively simple DIY project that can be accomplished in a few easy steps.
Before beginning, it’s important to thoroughly clean the cabinets and remove any residue, dirt, or dust. Make sure to wear gloves, a face mask, and safety glasses to protect yourself from any potential hazards. Once the cabinets are clean, sand down any rough edges or uneven surfaces.
Next, choose a good quality primer that is designed for use on cabinets. Apply the primer using a brush or roller and allow it to dry completely before moving on to the next step. Once the primer is dry, use a high-quality paint to cover the cabinets. A semi-gloss or satin finish works best for cabinet surfaces.
Using a paint brush, apply the paint in even strokes, starting from the top of the cabinet and working your way down. Be sure to get in all the nooks and crannies. Allow the paint to dry completely before adding a second coat. Once the second coat is dry, add a layer of polyurethane for extra protection.
For best results, use a paintbrush specifically designed for cabinets. These brushes have a special shape that makes it easier to get into corners and crevices. It’s also important to use the highest quality paint you can afford. Low-quality paints can easily chip and peel, so it’s best to invest in a good quality product.
Finally, it’s time to add the hardware. Clean the hardware with a damp cloth to remove any dirt or dust. Then, attach the hardware to the cabinets using the appropriate screws. Make sure to line up the holes correctly, as this will ensure a secure fit.
Painting your cabinets white is a great way to instantly upgrade the look of any room. It’s an affordable and easy project that can be completed in a few simple steps. With the right preparation and a little bit of patience, you’ll have beautiful white cabinets in no time.


Related Posts


