Make My Own Cabinet Doors: A Comprehensive Guide
Cabinet doors are integral components of any kitchen, bathroom, or storage system. They contribute significantly to the overall aesthetic while also serving a functional purpose by concealing contents and protecting them from dust and damage. While commercially manufactured cabinet doors provide convenience, constructing them independently offers customization, cost savings, and the satisfaction of a do-it-yourself project. This article offers a detailed guide to making cabinet doors, covering various aspects from material selection to construction techniques.
Choosing the Right Materials
The selection of materials is a crucial initial step determining the durability, aesthetics, and overall cost of the cabinet doors. The most common materials include solid wood, wood veneer, medium-density fiberboard (MDF), and plywood. Each material possesses distinct characteristics that should be carefully considered based on the intended application and desired outcome.
Solid wood offers unparalleled aesthetic appeal and structural integrity. Hardwoods, such as maple, oak, cherry, and walnut, exhibit beautiful grain patterns and exceptional durability, making them suitable for high-end cabinetry. Softwoods, like pine and cedar, are more affordable but less resistant to dents and scratches. When working with solid wood, account for its natural expansion and contraction due to humidity changes. This can be mitigated by using appropriate joinery techniques and finishing practices.
Wood veneer consists of a thin layer of real wood adhered to a substrate, typically plywood or MDF. This option allows for achieving the look of solid wood at a lower cost, particularly when using expensive hardwoods. Veneered panels are also more stable than solid wood, reducing the risk of warping or cracking. However, veneer can be susceptible to chipping or peeling if not properly applied and finished. Edge banding is essential to conceal the substrate and protect the edges of the veneer.
Medium-density fiberboard (MDF) is an engineered wood product made from wood fibers bonded together with resin under high pressure and temperature. MDF is known for its smooth, uniform surface, dimensional stability, and affordability. It is an excellent choice for painted cabinet doors because it does not have a visible grain pattern and readily accepts paint. However, MDF is relatively heavy and can be susceptible to water damage if not properly sealed. It also does not hold screws as well as solid wood, so consider using specialized hardware when attaching hinges and other components.
Plywood is another engineered wood product consisting of multiple layers of wood veneer glued together with the grain of adjacent layers running at right angles. This cross-graining construction provides exceptional strength and stability. Plywood is less prone to warping or splitting compared to solid wood, making it a good choice for larger cabinet doors. While plywood can be stained, the exposed edges often require concealing with edge banding to achieve a more refined appearance. The grade and quality of the plywood are important factors to consider, particularly if the doors will be painted.
Construction Methods and Joinery Techniques
The method used to construct cabinet doors significantly affects their strength, durability, and aesthetic appeal. Several common construction methods exist, each with its advantages and disadvantages. The most prevalent methods include frame and panel, slab, and mitered doors.
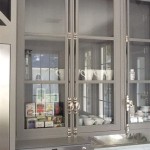
Frame and panel doors consist of a solid wood or MDF frame surrounding a thinner panel, which can be made of solid wood, plywood, or MDF. This construction method allows for creating visually appealing designs with recessed or raised panels. The frame provides structural support, while the panel can be customized with decorative details or textures. The frame is typically joined using mortise and tenon, cope and stick, or dowel joinery. The panel is then held in place within the frame using grooves or rabbets. This construction method is well-suited for both traditional and contemporary cabinet styles.
Slab doors are constructed from a single piece of material, typically solid wood, MDF, or plywood. These doors are characterized by their simple, minimalist design. Slab doors are relatively easy to construct, requiring only accurate cutting and edge finishing. They are commonly used in modern and contemporary kitchens. Edge banding is essential for plywood and MDF slab doors to conceal the core material and provide a finished edge. Solid wood slab doors require careful consideration of wood movement and may benefit from reinforcement to prevent warping.
Mitered doors feature a frame constructed from pieces joined at a 45-degree angle. This construction method creates a seamless, elegant appearance with no visible end grain. Mitered doors can be used with or without a panel. Accurate cutting and precise joinery are crucial for achieving tight, seamless miters. Reinforcement with biscuits, splines, or specialized miter clamps is recommended to ensure the longevity of the joints. Mitered doors are often used in high-end cabinetry due to their sophisticated aesthetic.
The selection of appropriate joinery techniques is vital for ensuring the structural integrity of cabinet doors. Mortise and tenon joints are widely regarded as one of the strongest and most durable joinery methods for frame construction. Cope and stick joints offer a simpler alternative for creating frame and panel doors, using specialized router bits to create interlocking profiles. Dowel joints are a versatile and easy-to-implement option for joining frame components. Biscuit joints are commonly used to reinforce miter joints and provide additional surface area for gluing. The choice of joinery technique should be based on the skill level of the builder, the tools available, and the desired level of strength and durability.
Essential Tools and Equipment
Successfully constructing cabinet doors requires a range of tools and equipment, from basic hand tools to more advanced power tools. Having the right tools on hand will significantly improve the accuracy, efficiency, and quality of the finished product.
A table saw is essential for accurately cutting large panels and creating consistent rabbets or grooves for panel installation. A miter saw is invaluable for making precise crosscuts and miter cuts for frame construction. A router, equipped with a variety of bits, is used for shaping edges, creating decorative profiles, and cutting grooves for panel installation and cope and stick joinery. A drill and driver are necessary for pre-drilling holes and driving screws for assembling the cabinet doors.
Hand tools, such as a measuring tape, combination square, marking knife, hand plane, and sandpaper, are equally important for achieving accurate measurements, fine-tuning joinery, and smoothing surfaces. Clamps are essential for holding pieces together during gluing and assembly. A variety of clamps, including bar clamps, pipe clamps, and corner clamps, will be needed to accommodate different cabinet door sizes and shapes.
Safety equipment, including safety glasses, ear protection, and a dust mask, is crucial for protecting yourself from potential hazards during woodworking. A well-ventilated workspace is also essential for minimizing exposure to dust and fumes. Consider using a dust collection system to keep the workspace clean and improve air quality.
Specialized jigs and fixtures can greatly improve the accuracy and efficiency of certain tasks. A mortising jig can simplify the process of cutting mortises for mortise and tenon joinery. A cope and stick jig can help ensure consistent results when using cope and stick router bits. A panel-raising jig can be used to create raised panels for frame and panel doors.
The selection of tools and equipment should be based on the complexity of the project, the skill level of the builder, and the budget available. Investing in high-quality tools will result in better results and a more enjoyable woodworking experience.
By understanding the characteristics of different materials, mastering various construction techniques, and utilizing the appropriate tools and equipment, any individual can successfully make their own cabinet doors, achieving custom cabinetry that reflects their personal style and meets their specific needs.

How To Make Your Own Cabinet Doors Beneath My Heart Kitchen Cabinets Decor Mdf Diy Makeover

How To Make Your Own Cabinet Doors Beneath My Heart

How To Make Your Own Cabinet Doors Beneath My Heart

Diy Cabinet Doors How To Build And Install

How To Build Diy Inset Cabinet Doors Christine Nickerson Design

How To Make Your Own Cabinet Doors Beneath My Heart

Build Shaker Cabinet Doors With Table Saw New To Woodworking

How To Make Your Own Cabinet Doors Beneath My Heart

Diy Cabinet Doors How To Build And Install

How To Build Your Own Vintage Style Cabinets Daniel Kanter
Related Posts