Crafting a Wooden Bathroom Sink Cabinet: A Comprehensive Guide
A bathroom sink cabinet serves dual purposes: it provides essential storage and enhances the aesthetic appeal of the bathroom. Constructing one from woodwork allows for customization in terms of size, style, and finish, leading to a unique and well-integrated element within the bathroom space. This article presents a detailed guide on building a bathroom sink cabinet from wood, covering the essential steps from planning to installation.
Planning and Design Considerations
The initial stage involves careful planning and design. Before any cutting or assembling occurs, a clear understanding of the desired dimensions, style, and functionality is crucial. This process includes considering the existing bathroom layout, the size and shape of the sink, and the specific storage needs.
Bathroom size and layout are paramount. The cabinet's dimensions must be proportionate to the room, avoiding overcrowding. Measure the available space meticulously, including the area around the plumbing. Account for door swing, walking space, and the proximity of other fixtures. The height of the cabinet should also be considered, typically ranging between 30 and 36 inches, but should be adjusted to accommodate user preferences and accessibility requirements.
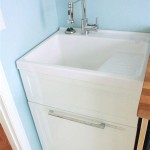
Sink selection is integral to the cabinet’s design. The type of sink – whether it’s an undermount, vessel, or drop-in – dictates the cabinet’s construction. An undermount sink requires a completely enclosed cabinet to support its weight, while a vessel sink necessitates a flat surface with a hole for the drain. Drop-in sinks need precise cutouts in the countertop. Obtain the sink’s specifications, including precise dimensions and installation requirements, before commencing cabinet construction.
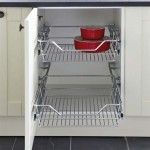
Storage requirements influence the interior design of the cabinet. Consider what items will be stored within – towels, toiletries, cleaning supplies – and design accordingly. Options include shelves, drawers, adjustable dividers, and door-mounted racks. Plan the placement of plumbing to avoid interfering with these storage solutions.
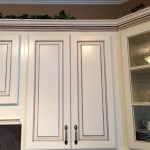
The style of the cabinet should complement the overall bathroom aesthetic. Options range from traditional to modern, rustic to minimalist. Research different styles and choose one that aligns with the existing décor. Consider the type of wood, finish, and hardware to be used. Drawings or sketches, including detailed measurements, are highly recommended to visualize the final product and ensure accurate construction.
Material Selection and Preparation
Choosing the right wood is essential for both the structural integrity and the visual appeal of the cabinet. Different types of wood offer varying degrees of durability, moisture resistance, and aesthetic qualities. Preparation of the chosen wood is also critical for achieving a smooth and lasting finish.
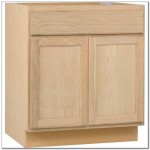
Hardwoods, such as maple, oak, and cherry, are known for their durability and resistance to dents and scratches. They are suitable for high-traffic areas and provide an elegant appearance. Softwoods, like pine and cedar, are generally more affordable and easier to work with, but they are more prone to damage. Cedar is naturally moisture-resistant, making it a good choice for humid bathroom environments. Plywood, especially marine-grade plywood, is highly resistant to moisture and warping, making it a structurally sound option for cabinet construction. MDF (Medium Density Fiberboard) is another option, offering a smooth surface for painting, but it is less resistant to moisture than solid wood or plywood.
Wood preparation involves several key steps. First, the wood must be properly dried and acclimated to the bathroom environment to minimize warping or cracking. Allow the wood to sit in the bathroom for several days before beginning construction. Second, the wood must be carefully inspected for any defects, such as knots, cracks, or blemishes. These defects should be addressed before proceeding. Third, the wood must be cut to the precise dimensions specified in the design plans. Utilize accurate measuring tools and saws to ensure clean and straight cuts.
Sanding is crucial for achieving a smooth and even surface. Start with a coarse grit sandpaper (e.g., 80-grit) to remove any imperfections, then gradually move to finer grits (e.g., 120-grit, 220-grit) to create a polished finish. Sand with the grain of the wood to avoid scratching. After sanding, remove all dust and debris with a tack cloth.
Construction and Assembly Techniques
The assembly process requires precision and attention to detail. Secure joinery techniques are essential for creating a strong and durable cabinet. The method of assembly will depend on the design and the tools available.
Common joinery techniques include butt joints, rabbet joints, dado joints, and mortise and tenon joints. Butt joints are the simplest, involving simply joining two pieces of wood edge-to-edge, typically reinforced with screws, nails, or dowels. Rabbet joints involve cutting a recess along the edge of one piece of wood to receive the edge of another, providing greater strength than butt joints. Dado joints are similar to rabbet joints, but the recess is cut into the middle of a piece of wood, rather than along the edge. Mortise and tenon joints are more complex, involving cutting a projection (tenon) on one piece of wood that fits into a corresponding hole (mortise) in another, offering exceptional strength and stability.
Before assembling the cabinet, dry-fit all the pieces together to ensure a proper fit. Make any necessary adjustments before applying glue. Use wood glue sparingly, applying it evenly to all joining surfaces. Clamp the pieces together securely until the glue has dried completely, typically 24 hours. Screws and nails can be used in conjunction with glue for additional reinforcement. Countersink the screws to create a flush surface.
The cabinet frame is typically constructed first, followed by the installation of shelves, drawers, and doors. Ensure that all components are square and level during assembly. Use a level and a square to check for accuracy. Drawer construction involves building a box with sides, front, and back, and then attaching a drawer bottom. Drawer slides should be installed accurately to ensure smooth operation. Door construction involves creating a frame and filling it with a panel of wood, glass, or other material. Hinges should be installed precisely to ensure proper door alignment and swing.
Finishing and Installation
The finishing stage protects the wood and enhances its aesthetic appeal. Proper finishing techniques are crucial for a long-lasting and attractive cabinet. Installation involves securing the cabinet to the wall and connecting the plumbing.
Finishing options include painting, staining, and varnishing. Painting provides a durable and opaque finish, available in a wide range of colors. Staining enhances the natural grain of the wood, while providing a protective layer. Varnishing provides a clear, protective coat that resists moisture and wear. Choose a finish that is appropriate for the bathroom environment and complements the overall design. Apply multiple coats of finish, sanding lightly between each coat to create a smooth surface.
Before installation, shut off the water supply to the sink. Disconnect the existing plumbing, including the water supply lines and the drainpipe. Carefully position the new cabinet in place, ensuring that it is level and plumb. Use shims if necessary to correct any unevenness in the floor. Secure the cabinet to the wall studs using screws. Ensure that the screws are long enough to penetrate the studs securely. Reconnect the plumbing, ensuring that all connections are tight and leak-free. Use plumber’s tape or pipe dope to seal the threads of the pipes. Turn on the water supply and check for leaks. Caulk around the edges of the cabinet where it meets the wall and the floor to prevent moisture intrusion.

How To Build A Diy Bathroom Vanity Angela Marie Made

How To Build A Bathroom Vanity Single Sink Cabinet

How To Build A Diy Bathroom Vanity Angela Marie Made

How To Diy A Bathroom Vanity Unit Wood Create

How To Build A Bathroom Vanity With Off Center Sink And Fluted Detail

Craftsman Style Sink Stand Woodworking Project Woodsmith Plans

Diy Vanity For Wall Mount Sink Jaime Costiglio

Small Bathroom Vanity My Love 2 Create

Diy Rustic Bathroom Vanity Build A

Diy Wood Vanity In The Master Bathroom Space Between
Related Posts