Installing upper cabinets is a great way to add extra storage space and improve the look of any kitchen. The process of installing upper cabinets can be intimidating, but with a few simple steps, you can get your cabinets up and looking great in no time. Before you begin installing upper cabinets, make sure to measure the space and purchase the right size cabinet for the area. Additionally, check to ensure that all the necessary hardware is included with the cabinet and that you have the necessary tools for the job.
The first step in installing upper cabinets is to determine the desired height of the cabinets. The best way to do this is to measure from the floor to the top of the countertop. This will give you the height that the cabinets should hang from. Once you have determined the desired height, mark the spot using a level and a pencil. Then, you can begin installing the upper cabinets.
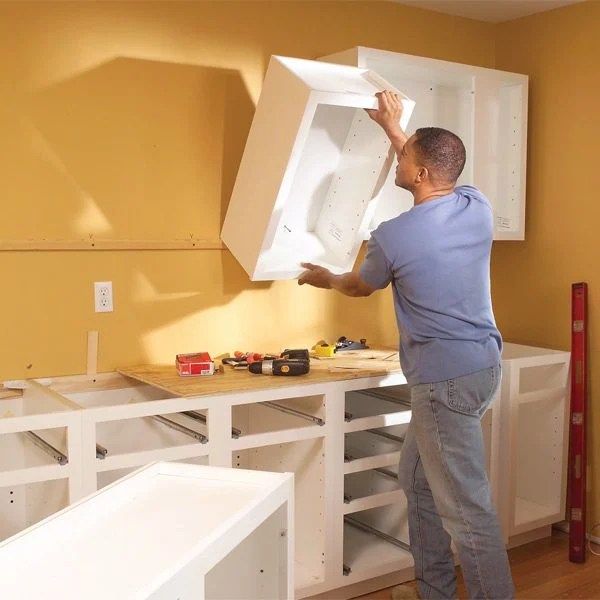
The next step in installing upper cabinets is to attach the mounting rail to the wall. The mounting rail is the piece of wood that the cabinets will hang from. To attach the mounting rail, you will need to use screws or nails. Be sure to use screws or nails that are strong enough to hold the weight of the cabinets. After the mounting rail is securely in place, it’s time to hang the cabinets.
Before you hang the cabinets, it’s important to make sure that they are level. To do this, place a level on the top of the cabinet and adjust the bottom of the cabinet until it is level. Once the cabinets are level, you can attach them to the mounting rail. Most cabinets come with their own screws and hardware, so make sure to use the hardware that came with the cabinets for the best results.
Once the cabinets are securely in place, it’s time to add the doors and drawers. Be sure to follow the instructions that came with the cabinets for the best results. When installing the drawers and doors, it’s important to make sure that they fit correctly. If they don’t fit correctly, the drawers and doors may not open and close properly.
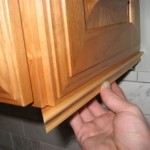
The last step in installing upper cabinets is to add trim to the bottom of the cabinets. This will give the cabinets a finished look and will also help to hide any gaps between the cabinets and the wall. You can use moulding or another type of trim to finish the edges of the cabinets. Once the trim is securely in place, you’re done!
Installing upper cabinets is a great way to add extra storage space and improve the look of any kitchen. With a few simple steps, you can get your cabinets up and looking great in no time. Just make sure to measure the space and purchase the right size cabinets, attach the mounting rail, hang the cabinets, add the drawers and doors, and finish with trim. With a little patience and effort, you can have beautiful upper cabinets in your kitchen in no time.


Related Posts