How to Turn a Cabinet into File Drawer Organizers
A well-organized filing system is essential for maintaining order and efficiency in any office or workspace. However, traditional file cabinets can take up valuable floor space and often lack the flexibility to accommodate diverse filing needs. One innovative solution is to repurpose existing cabinets into functional file drawer organizers. This approach maximizes existing storage space, promotes better organization, and allows for easy access to important documents. This article will guide you through the process of turning a cabinet into a customized file drawer organizer, maximizing its potential and enhancing your work environment.
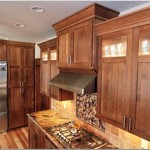
1. Assess the Cabinet and Define Your Needs
Before diving into the transformation process, assess the existing cabinet to determine its suitability for your filing needs. Consider the following factors:
- Size and Dimensions: Measure the cabinet's dimensions and ensure it provides enough space for the type and volume of files you need to store.
- Number of Shelves: Determine the number of shelves you require and whether the cabinet's current design allows for modifications to accommodate file drawers.
- Material: Ensure the cabinet's material is sturdy enough to support the weight of the file drawers. Wood or metal cabinets typically offer greater stability.
- Existing Hardware: Evaluate the existing hardware like hinges, doors, and handles. Some hardware may need to be removed or modified to accommodate the new drawer configuration.
- Desired File Drawer Size: Determine the ideal size of your file drawers to accommodate the range of file sizes you utilize. Standard letter-sized drawers are suitable for most office documents.
Once you have assessed the cabinet and identified its strengths and limitations, you can move on to planning the organization system. This involves defining the types of files you will store in each drawer and the specific categories you want to create. This process helps you visualize the organization scheme and ensure that every drawer serves a specific purpose.
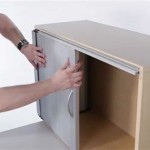
2. Design and Construct File Drawer Frames
With a clear understanding of your needs, the next step is to design and create the file drawer frames. This involves determining the number of drawers you require, their dimensions, and material choices. Here are some key considerations:
- Drawer Material: Wood, metal, or plastic are common options for drawer frames. Select a material that is durable, easy to work with, and aligns with your aesthetic preferences.
- Drawer Dimensions: Base the dimensions of your drawers on the size of your files and the available space within the cabinet. Standard letter-sized file drawers typically measure 12 inches wide, 15 inches deep, and 10 inches high.
- Drawer Construction: You can construct drawer frames using various methods such as cutting and assembling wood panels or using pre-made drawer kits. Choose a construction method that suits your skill level and available tools.
- Drawer Slides: Select appropriate drawer slides that ensure smooth operation and can support the weight of the files. Full-extension slides provide easy access to all contents, while side-mounted slides offer a more compact installation.
Once the drawer frames are built, ensure they fit snugly within the cabinet. You may need to adjust the drawer size slightly to accommodate any irregularities in the cabinet's interior. You can also add decorative details to the drawer fronts, such as handles or labels, to enhance both functionality and aesthetics.
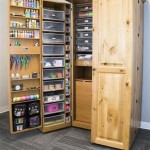
3. Install File Drawers and Organize
With the drawer frames complete, you can now install them within the cabinet. This involves attaching the drawer slides to the cabinet's sides and then carefully inserting the drawers onto the slides. Ensure that the drawers move smoothly and do not bind or stick. The installation process may vary depending on the type of cabinet and drawer slides used.
Once the drawers are installed, you can start organizing your files. This involves labeling each drawer with a clear identifier that corresponds to the type of files it contains. You can use labels, file folders, or even create a simple inventory spreadsheet to maintain track of your file organization. Consider using color-coded folders to further categorize your files for quick retrieval.
This comprehensive approach to transforming a cabinet into a file drawer organizer allows for a customized solution that caters to individual filing needs and preferences. By maximizing existing storage space and promoting a well-organized system, it contributes to a more efficient and productive work environment.

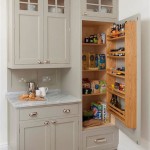
Diy Hanging File Drawer In Kitchen Cabinet Frills And Drills

70 Turn Drawer Into File Cabinet Kitchen Inserts Ideas Check More At Http Www Planetgreenspot Com Chalkboard For

Diy File Cabinet Woodworking Plans To Build A Wooden Filing

Step By Diy How To Upcycle A Rusty Old Metal Filing Cabinet My Thrifty Life Cassie Fairy Inspiration For Living Lovely On Budget

Did You Know Cube Shelving Is The Perfect Size For Storing Hanging Files Under 10 I Transformed This Storage Bin Into A File Cabinet Swipe Over To See

File Cabinet Revamp Snazzy Sister State Storage

Horizontal BestÅ Filing Cabinet Ers

Thinking Of Organizing That File Drawer Dnq Solutions

Turn A Filing Cabinet Into Garden Storage

Turn A Dresser Into Mock Filing Cabinet
Related Posts