How To Transform Your Kitchen Cabinets With Chalk Paint
Chalk paint offers a versatile and cost-effective way to revitalize kitchen cabinets, providing a unique matte finish and the ability to create various decorative effects. This article outlines the process of transforming kitchen cabinets using chalk paint, from preparation to finishing touches.
1. Gather Necessary Materials and Tools
Before starting the project, assembling the required materials and tools is crucial. This includes chalk paint in the desired color, primer (if needed), wax or sealant for protection, paintbrushes specifically designed for chalk paint, sandpaper (varying grits for different stages), a screwdriver, drop cloths or protective covering for surfaces, painter's tape, and cleaning supplies such as a degreaser and tack cloth.
2. Prepare the Cabinets for Painting
Proper preparation is essential for achieving a smooth and durable finish. Start by removing cabinet hardware, including knobs, handles, and hinges. Thoroughly clean the cabinet surfaces using a degreaser to remove grease, grime, and any built-up residue. Rinse with clean water and allow the cabinets to dry completely. Lightly sand the surfaces with medium-grit sandpaper to create a slightly rough texture for better paint adhesion. For cabinets with a glossy finish, a primer designed for slick surfaces might be necessary before applying chalk paint. Fill any holes or imperfections with wood filler and allow it to dry completely before sanding smooth.
3. Apply the Chalk Paint
Chalk paint typically doesn't require extensive preparation like traditional oil-based paints. However, stirring the paint thoroughly before application is essential to ensure a consistent color and texture. Applying thin, even coats is key to preventing drips and ensuring a smooth finish. A high-quality chalk paint brush, often with natural bristles, is recommended for minimizing brushstrokes. Allow each coat to dry completely before applying the next. Depending on the desired opacity, two to three coats are usually sufficient.
4. Achieving Decorative Effects (Optional)
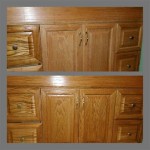
Chalk paint lends itself well to creating a range of decorative effects. Distressing techniques, such as sanding down edges and corners after the paint has dried, can create a vintage or antique look. Layering different colors of chalk paint and then sanding through the top layer can reveal the underlying color, adding depth and dimension. Stenciling, using decorative stencils and contrasting paint colors, can also personalize the cabinets.
5. Protect the Finish With Wax or Sealant
Once the paint is completely dry, protecting the finish with either wax or a sealant is crucial for durability and longevity. Wax provides a classic, slightly sheen finish and enhances the depth of color. Apply the wax with a soft cloth, working in small sections, and buff to a desired sheen. Sealants offer a more hard-wearing finish, particularly important for high-traffic areas like kitchens. Sealants come in various finishes, from matte to glossy, and are applied with a brush or sprayer following the manufacturer's instructions.
6. Reinstall Hardware and Final Touches
After the wax or sealant has cured according to the manufacturer's recommendations, reinstall the cabinet hardware. Consider replacing old hardware with new pieces for an updated look. Clean up any paint spills or drips, and remove any protective coverings from surrounding areas. Perform a final inspection of the cabinets, addressing any minor imperfections or touch-ups as needed.
7. Maintaining Chalk Painted Cabinets
Maintaining chalk-painted cabinets is relatively simple. Regular dusting with a soft cloth is generally sufficient. For more thorough cleaning, use a damp cloth and a gentle cleaning solution, avoiding abrasive cleaners that could damage the painted finish. Waxed finishes may require occasional reapplication to maintain their sheen and protection. By following these steps and maintaining the finish, transformed kitchen cabinets can be enjoyed for years to come.

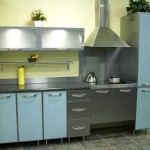
How To Paint Your Kitchen Cabinets With Chalk Dwell Beautiful

Step By Kitchen Cabinet Painting With Annie Sloan Chalk Paint Jeanne Oliver

Chalk Painted Kitchen Cabinets 2 Years Later Our Storied Home

Painting Kitchen Cabinets With Chalk Paint Simply Today Life

How To Paint A Kitchen With Chalk Maison De Pax

Chalk Painted Kitchen Cabinets 2 Years Later Our Storied Home

How To Paint Your Kitchen Cabinets With Chalk Dwell Beautiful

Painting Kitchen Cabinets With Chalk Paint Simply Today Life

Kitchen Cabinet Makeover Annie Sloan Chalk Paint Artsy Rule

Paint Your Kitchen Cabinets With Chalkboard Jessica Rayome
Related Posts