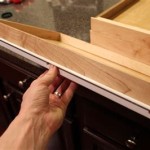
If you’re looking to give a bolder, darker look to your kitchen cabinets, staining them is a great way to do it. Staining kitchen cabinets is a relatively straightforward and cost-effective way to give your existing kitchen cabinets a new look.
Staining kitchen cabinets generally involves sanding the cabinets down, applying a stain, and then sealing the cabinets with a top coat or sealer. Depending on the specific type of wood, the process may vary slightly.
Before you get started, make sure to thoroughly clean the cabinets, as any dirt or grime may affect the end result. It’s also important to check the condition of the cabinets. If they are in good condition, you can proceed with staining, but if they are in poor condition, it might be best to just replace them.
Once you’re ready to begin staining, you’ll need to sand the cabinets down. You’ll likely need to use a fine-grained sandpaper to ensure a smooth finish. Make sure to sand in the direction of the wood grain, and be sure to vacuum up the dust after you’re finished.
Once the cabinets are sanded, it’s time to apply the stain. Make sure to use a stain that is meant for your specific type of wood. Apply the stain with a brush, wiping off any excess with a cloth.
When the stain is applied, it’s time to seal the cabinets. You’ll want to use a top coat or sealer to protect the cabinets and maintain their color. Make sure to apply the sealer in light, even coats, and allow the sealer to dry thoroughly between coats.
Once the cabinets are sealed, you can admire the results! Staining your kitchen cabinets is a great way to give them a bold and beautiful look. With the right supplies and a bit of patience, you can easily make your kitchen cabinets look like new.


Related Posts


