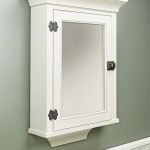
How To Replace a Bathroom Medicine Cabinet
Replacing a bathroom medicine cabinet is a common home improvement project that can enhance both the functionality and aesthetics of a bathroom. While seemingly straightforward, careful planning and execution are crucial for a successful outcome. This guide will outline the necessary steps and considerations involved in replacing a medicine cabinet.
Assessment and Planning: Before starting the project, assess the existing medicine cabinet and the surrounding area. Measure the current cabinet's dimensions: height, width, and depth. Note the location of any electrical wiring or plumbing fixtures within the wall cavity. This information is essential for selecting a replacement cabinet that fits properly and avoids potential conflicts.
Choosing a Replacement: Medicine cabinets are available in a variety of styles, sizes, and materials. Consider the overall bathroom design when selecting a replacement. Options include recessed or surface-mounted cabinets, framed or frameless mirrors, and various materials such as wood, metal, or plastic. Ensure the chosen cabinet's dimensions are compatible with the existing opening and surrounding wall space. Purchasing a cabinet slightly smaller than the existing opening allows for adjustments during installation.
Gathering Necessary Tools and Materials: Assemble the required tools and materials before beginning the removal process. Commonly needed tools include a screwdriver, stud finder, level, safety glasses, gloves, utility knife, pry bar, measuring tape, and pencil. Necessary materials typically include a new medicine cabinet, shims, drywall screws, caulk, and potentially patching compound and sandpaper.
Turning Off the Power: If the medicine cabinet incorporates lighting or electrical outlets, turn off the power to the circuit at the main electrical panel. This is a critical safety step to prevent electrical shock. Verify the power is off by testing the affected outlets or light fixtures with a non-contact voltage tester.
Removing the Old Medicine Cabinet: Begin by carefully removing the contents of the existing cabinet. Depending on the installation method, the removal process will vary. For surface-mounted cabinets, locate and remove the screws securing the cabinet to the wall. For recessed cabinets, use a pry bar to gently loosen the cabinet from the wall, being mindful of any adhesive used during the original installation. Once loosened, carefully disconnect any wiring connected to the cabinet lighting or outlets. Some cabinets may require removal of the mirror doors before accessing the mounting screws within the cabinet frame.
Preparing the Opening: Once the old cabinet is removed, inspect the wall opening. If there is any damage to the drywall or surrounding area, repair it using patching compound and sandpaper. Ensure the opening is clean and free of debris. If the new cabinet is smaller than the existing opening, prepare to add wood blocking to create a secure mounting surface.
Installing the New Medicine Cabinet: The installation process varies depending on the type of cabinet. For surface-mounted cabinets, hold the cabinet against the wall in the desired position and use a level to ensure it is plumb and level. Mark the mounting screw locations and pre-drill pilot holes. Secure the cabinet to the wall using appropriate drywall screws. For recessed cabinets, carefully insert the cabinet into the opening, ensuring it is flush with the wall surface. Use shims as needed to create a snug and level fit. Secure the cabinet to the framing members using screws. Connect any wiring for lighting or electrical outlets, ensuring the correct connections and wire nuts are used. Finally, reinstall the mirror doors or any other components according to the manufacturer's instructions.
Finishing Touches: Apply a bead of caulk around the perimeter of the cabinet where it meets the wall. This seals the gap and prevents moisture from entering the wall cavity. Smooth the caulk with a wet finger for a clean finish. Clean any excess caulk or debris from the cabinet and surrounding area.
Important Considerations: Building codes often dictate specific requirements for electrical wiring and plumbing fixtures in bathrooms. It is essential to comply with these codes during the installation process. If unsure about any aspect of the installation, consulting a qualified electrician or plumber is recommended. When working with electrical wiring, always ensure the power is off at the main electrical panel and use appropriate safety precautions. Disposing of the old medicine cabinet properly depends on local regulations. Check with local waste management authorities for appropriate disposal methods.

Diy Niche Shelf Old Bathroom Medicine Cabinet Makeover A Piece Of Rainbow

Diy Niche Shelf Old Bathroom Medicine Cabinet Makeover A Piece Of Rainbow

How To Install A Medicine Cabinet The Home Depot

How To Install A Medicine Cabinet The Home Depot

How To Install A Medicine Cabinet The Home Depot

Medicine Cabinets Ideas 7 Diy Updates Bob Vila

How To Remove A Medicine Cabinet Kay S Place

How To Remove A Medicine Cabinet Kay S Place

Diy Niche Shelf Old Bathroom Medicine Cabinet Makeover A Piece Of Rainbow

How To Install A Medicine Cabinet The Home Depot
Related Posts


