How to Remove a Sink Cabinet from the Wall
Removing a sink cabinet from the wall may seem like a daunting task, but it is a relatively straightforward process that can be completed in a few hours with the right tools and materials. Whether you're remodeling your kitchen or bathroom or simply replacing an old cabinet, this guide will provide you with step-by-step instructions on how to safely and effectively remove a sink cabinet from the wall.
Materials Required:
* Screwdriver or drill * Adjustable wrench * Hammer * Pry bar * Utility knife * Sponge or rag * Caulk gun * New caulkSafety Considerations:
* Before starting any work, ensure the water supply to the sink is turned off and the drain is capped to prevent water damage. * Wear gloves and safety glasses to protect your hands and eyes from potential hazards. * Clear the area around the cabinet to provide ample workspace.Steps to Remove a Sink Cabinet from the Wall:
Step 1: Disconnect Water Supply Lines
* Locate the shut-off valves under the sink and turn them off. * Disconnect the water supply lines from the faucet and any other appliances connected to the cabinet. * Cap the water supply lines to prevent leakage.Step 2: Remove Cabinet Doors and Drawers
* Remove the screws that secure the cabinet doors and drawer fronts. * Carefully lift the doors and drawers out of the cabinet.Step 3: Detach Countertop
* If the countertop is attached to the cabinet, support it with a few blocks or bricks. * Use a utility knife to cut any caulk between the countertop and the cabinet. * Gently pry the countertop loose from the cabinet using a pry bar.Step 4: Disconnect Plumbing Drain
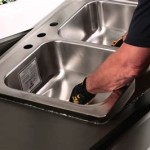
* Loosen the nuts connecting the sink drain to the drain pipe using an adjustable wrench. * Carefully remove the drain pipe from the sink.Step 5: Remove Cabinet Mounting Screws
* Locate the screws or bolts that secure the cabinet to the wall. * Use a screwdriver or drill to remove these screws.Step 6: Pull Cabinet Away from the Wall
* Once all screws are removed, grasp the cabinet firmly and carefully pull it away from the wall. * Be cautious not to damage the wall or the cabinet during this process.Step 7: Remove Old Caulk and Clean the Area
* Use a utility knife or caulk removal tool to remove any old caulk around the edge of the cabinet opening. * Wipe down the area with a damp sponge or rag to clean any remaining debris.Step 8: Apply New Caulk (Optional)
* If desired, apply a bead of fresh caulk around the edge of the cabinet opening to ensure a watertight seal when the new cabinet is installed. Congratulations! You have successfully removed the sink cabinet from the wall. You can now proceed with installing the new cabinet or making any necessary repairs or renovations.:max_bytes(150000):strip_icc()/8_remove-sink-base-cabinet-56a4a26d3df78cf772835b30.jpg?strip=all)
How To Remove A Bathroom Vanity Cabinet

How To Remove A Bathroom Vanity Remodel
:max_bytes(150000):strip_icc()/7_remove-vanity-top-56a4a26d3df78cf772835b2d.jpg?strip=all)
How To Remove A Bathroom Vanity Cabinet

How To Remove And Install Bathroom Vanity Diy

How To Remove Replace A Vanity Top Easy Bathroom Sink Remodel

How To Take Down Kitchen Cabinets Rehang One Young House Love

How To Remove A Bathroom Vanity And Top

How To Remove Kitchen Wall Cabinets And The Cabinet Bracket Works

How To Take Down Kitchen Cabinets Rehang One Young House Love

How To Remove And Install A Wall Mounted Sink In 2 Steps 1 Tom Plumber
Related Posts


