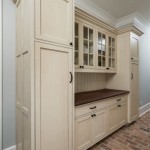
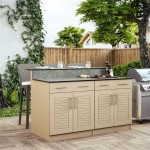
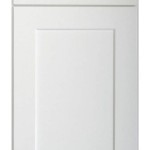
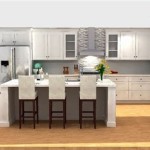
How to Paint Your Oak Kitchen Cabinets White
Transforming your oak kitchen cabinets from warm wood tones to a crisp, clean white can dramatically refresh the entire space. While it may seem daunting, painting kitchen cabinets is a DIY project well within the reach of most homeowners. With careful preparation and the right techniques, you can achieve a professional-looking finish that will last for years.
Preparation is Key:
The success of your paint job hinges on thorough preparation. This step is not to be rushed. Prior to painting, you will need to adequately prepare your cabinets by cleaning, sanding, and priming.
Start by removing all hardware, including cabinet doors, drawer fronts, knobs, and hinges. This allows for easier access to every surface during the cleaning and sanding process. Use a degreaser or trisodium phosphate (TSP) solution to thoroughly clean the cabinets, removing any grease, grime, or wax buildup. Allow the cabinets to dry completely before proceeding.
Next, sand the cabinets using different grit sandpaper. Begin with 120-grit sandpaper to remove any imperfections, then smooth the surface with 220-grit sandpaper. This creates a smooth, even surface for the primer and paint to adhere to. Pay close attention to any edges or corners, as these can have more uneven surfaces.
Once sanding is complete, wipe away all dust with a tack cloth. This ensures no dust particles interfere with the primer and paint adhesion. Finally, use a high-quality primer specifically designed for cabinets. Primer helps the paint adhere better and provides a more consistent finish. Apply two coats of primer, allowing each coat to dry completely before applying the next.
Choosing the Right Paint and Tools:
When choosing paint for your cabinets, opt for a high-quality, durable paint formulated for kitchen cabinets. Consider using a paint specifically designed for cabinets, which often provides a durable, washable finish. Cabinet paints come in various sheens, including semi-gloss, satin, and eggshell.
A semi-gloss finish is durable and easy to clean, making it a popular choice for kitchens. Satin offers a softer sheen while still being easy to wipe clean. Eggshell offers a more matte finish, providing a softer, more traditional look, but it can be prone to showing imperfections.
In addition to paint, you will need several tools for a successful paint job: * Paintbrushes – choose high-quality angled brushes specifically designed for painting cabinets. * Paint roller – use a high-quality roller with a nap specifically designed for cabinets. * Paint tray – use a paint tray with a liner to contain the paint. * Drop cloths – protect your floors and surrounding areas from paint splatters. * Painter's tape – use painter's tape to mask off any areas you do not want to paint. * Sanding block – use a sanding block to smooth the paint between coats. * Tack cloth – use a tack cloth to remove dust before and after painting.
Painting Techniques:
Once you have selected your paint and tools, ensure the room is well-ventilated before you begin painting. Begin by painting the cabinet doors and drawer fronts. Use long, even strokes with your paintbrush to create a smooth, consistent finish. It is best to work in sections and apply thin coats, allowing each coat to dry completely before applying the next.
Use a roller to paint the cabinet boxes. Apply the same technique as with the brush, using long, even strokes with a light hand to avoid streaks or drips. For hard-to-reach areas, like corners and edges, use a brush to ensure complete coverage.
After each coat of paint, allow the paint to dry completely before applying the next coat. This will prevent the paint from becoming cloudy or uneven. Apply two to three coats of paint, depending on the desired coverage. Allow the final coat of paint to dry completely before reinstalling your hardware.

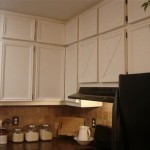
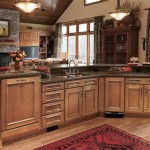
Painting Oak Cabinets White Best Diy Tutorial 2024

How To Paint Oak Cabinets And Hide The Grain Tutorial

How To Paint Oak Cabinets And Hide The Grain Tutorial

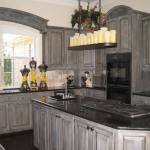
Diy Painted Oak Kitchen Cabinets Makeover

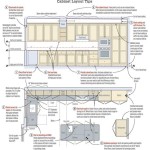
How To Paint Your Cabinets Like The Pros And Get Grain Out Decor

How To Paint Oak Cabinets And Hide The Grain Tutorial

Diy Painted Oak Kitchen Cabinets Makeover

Painting Oak Cabinets White Best Diy Tutorial 2024
:strip_icc()/101671998-27cdf40f639448d0a56ff6c7eab609d7.jpg?strip=all "Expert Tips For Painting Oak Cabinets")
Expert Tips For Painting Oak Cabinets

How To Paint Your Kitchen Cabinets White Colors And Craft
Related Posts


:strip_icc()/101671998-27cdf40f639448d0a56ff6c7eab609d7.jpg?strip=all "Expert Tips For Painting Oak Cabinets")

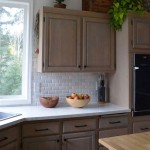


:strip_icc()/101671998-27cdf40f639448d0a56ff6c7eab609d7.jpg?strip=all "Expert Tips For Painting Oak Cabinets")