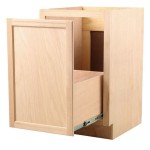
How to Paint Your Cabinets Like a Professional
Transforming your kitchen or bathroom with a fresh coat of paint on your cabinets is a rewarding DIY project. While it may seem daunting, achieving a professional-looking finish is attainable with careful planning and execution. This guide will provide you with expert tips and techniques to achieve a beautiful, durable paint job on your cabinets.
Preparation is Key
The foundation of a successful paint job lies in thorough preparation. This involves removing all hardware, cleaning the cabinet surfaces, and prepping them for paint adhesion.
Begin by removing all cabinet doors, drawers, and hardware. Label each piece for easy reassembly. Thoroughly clean the surfaces using a degreaser and a damp cloth, ensuring all grime, grease, and dust are removed. Lightly sand the cabinets with fine-grit sandpaper (120-grit) to create a smooth, even surface and promote better paint adhesion. If you are painting over existing paint, sanding helps to scuff the surface for better paint bonding. Remove any loose paint or debris using a scraper and a vacuum. Lastly, apply painter's tape to protect any areas you don't want to paint, such as countertops, walls, or appliances.
Choosing the Right Paint and Tools
Selecting the appropriate paint and tools is crucial for a high-quality finish.
For cabinets, a durable, high-quality acrylic latex paint is recommended. These paints are known for their excellent adhesion, durability, and ease of cleaning. Choose a paint specifically designed for cabinets or trim, as these formulas offer superior resistance to scratches and wear. A primer is essential for ensuring smooth, even coverage and providing a solid foundation for the paint. A primer designed for cabinets or trim will help to hide imperfections and prevent the underlying wood from bleeding through the paint. Invest in quality brushes and rollers. For intricate details, a high-quality angled brush will allow precise application. For larger surfaces, use a 4-inch foam roller with a nap length suitable for the smoothness of your cabinets. A paint sprayer offers a smooth, even finish, especially when working with multiple layers of paint. However, ensure proper ventilation and practice with the sprayer before applying it to cabinets.
Painting Techniques for a Professional Finish
The final stage involves painting the cabinets with precision and care.
Begin by applying a thin, even coat of primer to all cabinet surfaces, using long, smooth strokes. Allow the primer to dry completely before applying the paint. When applying paint, use thin, even coats, allowing each coat to dry completely before applying the next. Apply paint in the direction of the wood grain for a natural appearance. For doors and drawer fronts, paint the edges first, followed by the flat surfaces. When painting the inside of cabinets, ensure a smooth, even application, paying close attention to corners and edges. For a seamless finish, use meticulous sanding techniques between coats. Lightly sand each coat with fine-grit sandpaper (220-grit) to smooth out any imperfections and create a smooth, even surface for the next coat. After the final coat of paint, allow it to dry completely before reattaching the hardware. To achieve a professional-looking finish, consider using a paint finish that complements your kitchen or bathroom style, such as a satin or semi-gloss sheen.

Step By How To Paint Kitchen Cabinets Like A Pro And On Budget The American Patriette

How To Paint Kitchen Cabinets The Right Way Diy Home Projects

Step By How To Paint Kitchen Cabinets Like A Pro And On Budget The American Patriette

How To Paint Cabinets Like A Pro Jenna Sue Design

How To Paint Your Cabinets Like A Pro Without Sinking Major

How To Paint Cabinets Like A Pro Shenska

How To Paint Cabinets

A Step By Guide To Painting Kitchen Cabinets With Kilz Primer Blog

A Step By Guide To Painting Kitchen Cabinets Like Pro

How To Paint Kitchen Cabinets Like A Pro Scrappy Geek
Related Posts


