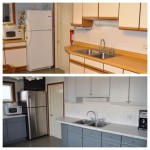
How To Paint Raw Wood Kitchen Cabinets White
Painting raw wood kitchen cabinets white offers a classic, clean look that brightens any kitchen. This comprehensive guide outlines the necessary steps to achieve a professional-quality finish on unfinished cabinets.
Preparation is Key:
The success of any painting project hinges on proper preparation. This is especially true for raw wood, which is porous and requires specific treatment. Begin by cleaning the cabinet surfaces thoroughly. A mixture of warm water and mild dish soap is effective in removing dust, dirt, and any grease residue. Allow the cabinets to dry completely.Sanding for a Smooth Finish:
Sanding creates a smooth surface for the primer and paint to adhere to, preventing peeling and chipping down the line. Start with a medium-grit sandpaper (120-grit) to smooth out any imperfections in the wood. Follow up with a finer-grit sandpaper (220-grit) for a final smoothing. After sanding, wipe down the cabinets with a tack cloth to remove all sanding dust.Priming for Optimal Adhesion:
Applying a primer is crucial, especially for raw wood. Primer seals the wood, preventing it from absorbing the paint unevenly and ensuring a uniform finish. Choose a high-quality, oil-based primer designed for wood. Apply a thin, even coat using a brush or roller, following the wood grain. Allow the primer to dry completely according to the manufacturer’s instructions.Choosing the Right Paint:
Opt for a durable, high-quality paint specifically designed for cabinets. Consider a semi-gloss or satin finish, as these are easier to clean and resist moisture better than flat or matte finishes. Water-based acrylic-alkyd hybrid paints offer the durability of oil-based paints with the easier cleanup of water-based paints.Painting Techniques for a Professional Finish:
Before starting, lightly sand the primed surface with fine-grit sandpaper (220-grit) to create a slightly rough texture for better paint adhesion. Remove any sanding dust with a tack cloth. For a smooth, even finish, use a high-quality paintbrush or a foam roller. Apply thin, even coats, allowing each coat to dry completely before applying the next. Multiple thin coats result in a more durable and professional-looking finish than one thick coat.Brush Selection and Technique:
When using a brush, choose a high-quality angled brush specifically designed for trim work. This allows for precise application and helps prevent brushstrokes. Dip the brush about a third of the way into the paint, tapping off excess paint on the side of the can. Apply the paint in long, smooth strokes, following the wood grain.Roller Application for Larger Surfaces:
For larger, flat surfaces, a foam roller can provide a smooth, even finish. Use a high-density foam roller to minimize stippling. Pour paint into a paint tray and lightly roll the roller through the paint, ensuring it's evenly coated but not saturated. Apply the paint in long, overlapping strokes, maintaining a wet edge to prevent lap marks.Drying Time and Curing:
Allow ample drying time between coats and before reassembling or using the cabinets. Refer to the paint manufacturer's instructions for specific drying and curing times. Curing, which is the process of the paint fully hardening, can take several days or even weeks, depending on the type of paint used. Avoid heavy use of the cabinets during this period to prevent damage to the finish.Protecting the Finish:
Once the paint has fully cured, consider applying a protective topcoat. A clear polyurethane topcoat can add an extra layer of protection against scratches, scuffs, and moisture. Follow the manufacturer’s instructions for application and drying times.Hardware Considerations:
If replacing existing hardware, fill any old screw holes with wood filler before priming and painting. After the final coat of paint has cured, drill new pilot holes for the new hardware. Install the new hardware carefully to avoid damaging the freshly painted surface.Ventilation and Safety:
Work in a well-ventilated area to avoid inhaling paint fumes. Wear appropriate safety gear, including a respirator mask, safety glasses, and gloves. Protect surrounding surfaces with drop cloths or plastic sheeting.Clean-Up:
Clean brushes and rollers thoroughly immediately after use, following the paint manufacturer’s instructions. Dispose of used paint and other materials responsibly according to local regulations.
How To Paint Oak Cabinets And Hide The Grain Tutorial

How To Paint Pressed Wood Kitchen Cabinets Choice Cabinet

How To Paint Unfinished Cabinets Houseful Of Handmade

How To Paint Oak Cabinets And Hide The Grain Tutorial

How To Paint Unfinished Cabinets Houseful Of Handmade

The Best Way To Paint Kitchen Cabinets No Sanding Palette Muse

How To Paint Your Upper Cabinets White Young House Love

How To Paint Unfinished Cabinets Houseful Of Handmade

The Best Way To Paint Kitchen Cabinets No Sanding Palette Muse

How To Paint Kitchen Cabinets In 7 Simple Steps
Related Posts

