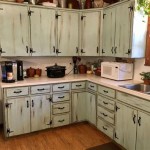
How To Paint Raw Wood Cabinets
Painting raw wood cabinets offers an excellent opportunity to customize a kitchen or bathroom’s aesthetic. This detailed guide outlines the necessary steps and materials for achieving a professional-looking finish on unfinished wood cabinetry.
Preparing the Cabinets
Proper preparation is crucial for a smooth, durable finish. This stage ensures the paint adheres correctly and minimizes imperfections in the final product.
- Remove Hardware: Detach all knobs, pulls, hinges, and other hardware from the cabinet doors and drawers. This prevents them from being coated with paint and allows for a cleaner application.
- Clean the Surfaces: Thoroughly clean all surfaces with a degreasing cleaner to remove any dirt, dust, grease, or oils. These contaminants can interfere with paint adhesion. After cleaning, rinse with a damp cloth and allow the wood to dry completely.
- Sand the Wood: Sanding creates a slightly rough surface, promoting better paint adhesion. Use medium-grit sandpaper (150-180 grit) initially, followed by a finer grit (220 grit) for a smoother finish. Sand in the direction of the wood grain to avoid scratches.
- Fill Imperfections: Use wood filler to address any cracks, dents, or holes in the wood. Apply the filler with a putty knife, allowing it to dry completely according to the manufacturer’s instructions. Sand the filled areas smooth after drying.
- Vacuum and Tack Cloth: Remove all sanding dust using a vacuum cleaner with a brush attachment. Follow up with a tack cloth to capture any remaining fine dust particles.
Priming the Cabinets
Primer creates a uniform base for the paint, sealing the wood and improving paint coverage and durability. Choosing the correct primer is essential for optimal results.
- Choose the Right Primer: An oil-based primer is generally recommended for raw wood, particularly if there are knots or resinous areas. It provides excellent adhesion and stain-blocking properties. Alternatively, a high-quality, stain-blocking latex primer can be used if preferred.
- Apply the Primer Evenly: Use a brush, roller, or sprayer to apply a thin, even coat of primer to all surfaces of the cabinets. Avoid applying the primer too thickly, as this can lead to drips and uneven drying.
- Allow Proper Drying Time: Allow the primer to dry completely according to the manufacturer's instructions before applying the topcoat. This typically takes several hours.
- Lightly Sand (Optional): If necessary, lightly sand the primed surfaces with fine-grit sandpaper (220 grit or higher) to remove any imperfections or raised wood grain. Wipe clean with a tack cloth after sanding.
Painting the Cabinets
Applying the paint requires patience and attention to detail to achieve a professional finish. Selecting the right paint and application techniques are vital.
- Choose the Right Paint: Select a high-quality paint specifically designed for cabinets. Typically, a semi-gloss or satin finish is preferred for its durability and ease of cleaning. Options include acrylic latex, alkyd, or enamel paints.
- Apply Thin Coats: Apply the paint in thin, even coats, avoiding heavy applications that can cause drips and runs. Two to three coats are usually sufficient for full coverage and a smooth finish.
- Maintain Consistent Brush Strokes: When using a brush, maintain consistent brush strokes in the direction of the wood grain. This helps create a uniform appearance and minimizes brush marks.
- Allow Proper Drying Time Between Coats: Allow each coat of paint to dry completely according to the manufacturer's instructions before applying the next coat. This ensures proper adhesion and prevents the paint from becoming tacky.
- Sand Lightly Between Coats (Optional): Lightly sanding between coats with fine-grit sandpaper can further enhance the smoothness of the final finish. Remove any sanding dust with a tack cloth.
Reinstalling the Hardware and Final Touches
Once the paint has dried completely, reattach the hardware and ensure the cabinets are thoroughly dry before returning items to the cabinets.
- Reinstall Hardware: Carefully reattach all hardware, including knobs, pulls, hinges, and any other removed components.
- Final Inspection: Conduct a thorough inspection of the finished cabinets, looking for any imperfections or areas that may require touch-ups.
- Curing Time: Allow the paint to cure completely before subjecting the cabinets to regular use. Curing time can vary depending on the type of paint used, but it generally takes several days or even weeks for the paint to reach its maximum hardness.

How To Paint Unfinished Cabinets Houseful Of Handmade

How To Paint Unfinished Cabinets

How To Paint Kitchen Cabinets Without Sanding Or Priming

Unlock The Secrets Of Painting Unfinished Cabinets A Comprehensive Guide

How To Paint Bare Wood House One

Kitchen Remodel How To Paint Unfinished Stock Cabinets

Easiest Raw Wood Finish With Paint No Stripping Needed

How To Paint Unfinished Cabinets Houseful Of Handmade

How To Paint Unfinished Cabinets Houseful Of Handmade

How To Stain Unfinished Cabinets Painting By The Penny
Related Posts


