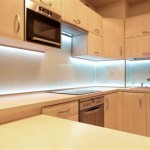
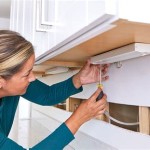
Painting your cabinets can be a great way to update the look of your kitchen or bathroom. Whether you’re looking to give your cabinets a fresh coat of paint, or you’re starting from scratch, it’s important to keep a few things in mind before getting started. This step-by-step guide will walk you through the process of painting your cabinets.
First, you’ll need to decide whether you’re going to paint your cabinets yourself or hire a professional. Although it may be tempting to try and do it yourself, it’s important to remember that painting cabinets requires a certain level of skill and knowledge. If you’re not confident in your painting skills, it’s best to hire a professional to get the job done right.
Once you’ve decided to go the DIY route, you’ll need to gather the necessary supplies. You’ll need a good quality brush, a roller, sandpaper, primer, paint, and a few other tools. If you don’t have any of these supplies, you can find them at your local hardware store.
The next step is to prepare the surface of the cabinets. This involves removing any existing paint or stain, sanding the surface, and cleaning the cabinets. Make sure to use a vacuum or a damp cloth to remove any dust or debris. Once the cabinets are clean, you can apply the primer. This will help the paint stick better and will also help to protect the cabinets from moisture.
Once the primer is dry, you can start painting. Start by painting the back of the cabinets first and then move onto the front. If you’re using a roller, make sure to use even strokes and apply the paint in thin layers. Once the paint is dry, you can apply a second coat.
Once the second coat of paint is dry, you can move onto the finishing touches. This involves adding any hardware, such as new handles or knobs, and sealing the paint with a top coat. This will help to protect the cabinets from moisture and dust.
Painting your cabinets can be a fun and rewarding project. Just remember to be patient and take your time. With a little bit of effort, you can give your cabinets a brand new look. Good luck!


Related Posts

