How to Paint Bare Wood Kitchen Cabinets
Painting bare wood kitchen cabinets can be a rewarding project, transforming the look of your kitchen with a fresh, updated aesthetic. This process involves several steps, from preparation to application, each crucial for achieving a professional-looking finish. This article will guide you through the steps, providing detailed instructions and helpful tips for successfully painting your cabinets.
1. Preparing the Cabinets
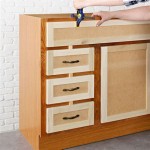
Proper preparation is paramount for a successful paint job. Begin by emptying the cabinets of their contents, ensuring you have ample space to work. Remove all hardware, including hinges, knobs, and pulls, to prevent damage and allow for a smooth paint application. Use a screwdriver or a power drill to detach these items, storing them safely for later reinstallation.
Next, thoroughly clean the cabinets to remove grease, grime, and any residue that may interfere with the paint's adhesion. Use a mild detergent and warm water, applying it with a soft cloth or sponge. Rinse the cabinets well with clean water, ensuring no soap residue remains. Allow the wood to dry completely before proceeding.
Sanding the cabinets is crucial to create a smooth surface for the paint to adhere to. Start with a medium-grit sandpaper (120-grit) to remove any imperfections or rough spots. Sand with the grain of the wood, applying gentle pressure. If needed, follow with a fine-grit sandpaper (220-grit) to further smooth the surface.
Finally, use a tack cloth to wipe away any dust or debris left behind after sanding. This will prevent these particles from contaminating the paint and resulting in a bumpy finish. A clean and dust-free surface is essential for a professional-looking paint job.
2. Priming the Cabinets
Priming acts as a barrier between the wood and the paint, providing a uniform surface for the paint to adhere to. It also helps to seal the wood, prevent stains from bleeding through, and improve the paint's durability. Choose a primer specifically designed for bare wood, ensuring it is compatible with the paint you intend to use.
Apply the primer evenly using a paintbrush or a roller. Avoid applying it too thickly, as it can take longer to dry and may cause the paint to chip. Let the primer dry completely according to the manufacturer's instructions before moving on to the next step.
3. Painting the Cabinets
Once the primer has dried, it's time to apply the paint. Choosing the right paint is essential for achieving the desired finish and durability. For kitchen cabinets, consider using a high-quality acrylic latex paint, known for its durability, ease of cleaning, and resistance to moisture and stains.
Apply the paint in thin, even coats, using a high-quality paintbrush or roller. Start with the top and work your way down. Allow ample time for each coat to dry before applying the next. If needed, apply additional coats until you achieve the desired coverage and opacity.
For a smooth and even finish, use a light touch and avoid overworking the paint. Let each coat dry completely before applying the next. When painting corners and edges, use a small angled brush for precise application.
4. Finishing Touches
Once the paint has completely dried, reinstall the hardware. Clean any excess paint from the hardware and around the screw holes before attaching the knobs, pulls, and hinges. Ensure they are securely installed to avoid any loose or wobbly components.
To protect the painted surface and enhance its durability, consider applying a clear sealant. This will help to prevent scratches, stains, and water damage. Use a sealant specifically designed for painted surfaces and follow the manufacturer's instructions for application.
The final step is to admire your newly painted kitchen cabinets. With proper preparation, careful application, and attention to detail, you can achieve a professional-looking finish that will transform your kitchen and create a welcoming and stylish space for years to come.

How To Paint Unfinished Cabinets Houseful Of Handmade

How To Paint Kitchen Cabinets Without Sanding Or Priming

Exactly How To Paint Oak Cabinets Written By A Pro Painted Kayla Payne

How To Paint Oak Cabinets And Hide The Grain Tutorial

How To Paint Kitchen Cabinets In 7 Simple Steps

How To Paint Oak Cabinets And Hide The Grain Tutorial

How To Paint Unfinished Cabinets

How To Paint Kitchen Cabinets A Step By Guide Confessions Of Serial Do It Yourselfer

How To Paint Unfinished Cabinets Houseful Of Handmade

How To Stain Unfinished Cabinets Painting By The Penny
Related Posts

