How To Make Your Own Shaker Cabinet Doors for Kitchen
Shaker cabinet doors are a classic and timeless choice for kitchens, offering a simple yet elegant design that complements various styles. Their clean lines and recessed panels create a visually appealing aesthetic that enhances the overall look of any kitchen. While shaker doors are readily available, crafting them yourself can be a fulfilling and cost-effective project. This article will guide you through the process of making your own shaker cabinet doors for your kitchen, providing step-by-step instructions and valuable tips.
1. Gathering Materials and Tools
Before embarking on the project, gather the necessary materials and tools. The following list will help ensure a smooth construction process:
- Wood: Select high-quality plywood or solid wood for the door panels and frames. Maple, cherry, oak, and birch are popular choices for shaker doors.
- Wood glue: Choose a high-quality wood glue specifically designed for woodworking projects.
- Screws: Use wood screws that are appropriate for your chosen wood type.
- Clamps: A variety of clamps, including bar clamps, spring clamps, and corner clamps, will be essential for holding the pieces together during assembly.
- Measuring tape: Ensure you have a precise measuring tape to accurately measure and cut the wood pieces.
- Pencil: A sharp, well-defined pencil is crucial for marking the wood pieces.
- Saw: Choose a saw that can accurately cut the wood pieces according to your measurements. A table saw, circular saw, or jigsaw will be suitable.
- Router: A router will be used for creating the recessed panel profile.
- Router bits: Select appropriate router bits for the desired panel profile and edge details.
- Sandpaper: Sandpaper in various grits will be necessary for smoothing the wood surfaces and achieving a polished finish.
- Finishing supplies: Depending on your desired finish, gather paint, stain, or clear coat.
2. Planning and Designing the Door
Before cutting any wood, carefully plan and design the shaker door. Consider the following factors:
- Door size: Determine the exact dimensions of the cabinet opening to ensure the door fits properly.
- Panel size: Choose the size of the recessed panel within the door frame. The panel should be slightly smaller than the frame to create a visible recess.
- Frame style: Select the desired frame style for the door. Shaker doors typically feature a simple, rectangular frame with a recessed panel.
- Edge details: Decide on the edge details for the door frame. Consider options like a simple bevel, a roundover, or a bullnose profile.
Once you have a clear design in mind, create a detailed drawing with precise measurements. This will serve as a blueprint for cutting and assembling the door.
3. Cutting and Assembling the Door Frame
Using your blueprint, cut the wood pieces for the door frame according to the designated dimensions. Remember to account for the panel size and thickness when calculating the frame pieces. Once cut, use a router to create the desired edge details on the frame pieces.
Next, assemble the door frame. Apply wood glue to the mating surfaces of the frame pieces and clamp them together securely. Drill pilot holes and attach the frame pieces using screws. Ensure the corners are tight and square. Allow the glue to dry completely before proceeding.
4. Creating the Recessed Panel
Cut the panel piece to the specified size, ensuring it is slightly smaller than the door frame. Use a router equipped with a panel-raising bit to create the recessed profile on the panel.
Start by marking the panel area on the door frame. Then, carefully guide the router along the marked area while maintaining a consistent depth and speed. Once the recess is created, sand the panel surface smooth and remove any excess material.
5. Attaching the Panel to the Frame
After creating the panel recess, attach the panel to the door frame. Apply wood glue to the edges of the panel and carefully position it within the recess. Use clamps to hold the panel securely in place while the glue dries. Once the glue is set, remove the clamps and use brad nails or screws to secure the panel to the frame, ensuring they are countersunk and concealed.
6. Finishing the Door
Once the cabinet door is fully assembled, sand it thoroughly to ensure a smooth surface. Remove any glue residue and use sandpaper in progressively finer grits to achieve a flawless finish.
After sanding, apply the desired finish to the door. Whether you choose paint, stain, or a clear coat, ensure you apply it evenly and according to the manufacturer's instructions. Allow the finish to dry completely before installing the doors on the cabinets.
By carefully following these steps, you can create beautiful and functional shaker cabinet doors for your kitchen. With a little patience and attention to detail, you can enhance your kitchen's aesthetic while enjoying the satisfaction of crafting these DIY wonders.

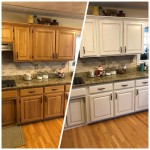
Diy Shaker Cabinet Doors How To Make Your Own For Less Farmhouseish

Kitchen Diy Shaker Style Cabinets Cherished Bliss

Diy Shaker Cabinet Doors

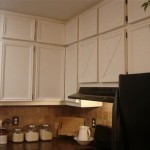
Diy Shaker Cabinet Doors The Easy Way Mimzy Company

How To Make Diy Cabinet Doors Without Fancy Router Bits

Diy Shaker Cabinet Doors The Easy Way Mimzy Company

Diy Shaker Cabinet Doors How To Make Your Own For Less Farmhouseish

You Can Diy Cabinet Doors W New Easy Bathroom Makeover Pt 1

Diy Shaker Cabinet Door Tutorial Step By Guide

Diy Shaker Cabinet Doors How To Make Your Own For Less Farmhouseish
Related Posts


