How To Make Shaker Cabinet Doors With a Router Jig
Shaker cabinet doors are a classic and versatile design element commonly found in kitchens and throughout homes. Their clean lines and simple construction make them adaptable to a wide range of interior styles, from traditional to contemporary. While various methods exist for crafting these doors, utilizing a router jig offers a precise and efficient means of achieving consistent, professional-looking results. This article outlines the process of creating Shaker cabinet doors using a router jig, detailing the necessary materials, tools, and techniques involved.
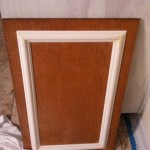
The Shaker style, characterized by its emphasis on functionality and minimalism, translates directly into the design of the cabinet doors. A typical Shaker door comprises a flat center panel surrounded by a frame consisting of four pieces: two stiles (vertical pieces) and two rails (horizontal pieces). The frame members are joined using a mortise-and-tenon joint, a robust and time-tested method of woodworking. A router jig, in this context, simplifies the creation of both the mortises and tenons required for this joint, as well as the groove that accepts the center panel.
Key Point 1: Understanding the Router Jig and Its Benefits
A router jig, specifically designed for Shaker cabinet door construction, serves as a template and guide for routing precise cuts. It typically consists of a base plate, adjustable fences, and clamping mechanisms to securely hold the workpiece in place. The use of a router jig offers several significant advantages over freehand routing or other methods.
Firstly, it ensures accuracy and repeatability. The jig's fixed parameters guarantee that each cut is identical, resulting in uniform mortises, tenons, and panel grooves across all the door components. This consistency is crucial for achieving a professional finish and ensuring that the doors fit together seamlessly.
Secondly, a router jig enhances safety. By securely clamping the workpiece and guiding the router along a predefined path, the jig minimizes the risk of slippage or accidental cuts. This is particularly important when working with powerful routers and sharp cutting bits.
Thirdly, it increases efficiency. The jig streamlines the routing process, allowing for faster and more consistent results compared to manual methods. This is especially beneficial when producing multiple doors or large quantities of components.
Different types of router jigs are available for Shaker cabinet door construction. Some jigs are designed for creating both the mortise and tenon, while others specialize in routing the panel groove. A comprehensive jig system will generally offer greater versatility and efficiency. Before beginning any project, it's important to thoroughly understand the specific features and capabilities of the chosen jig.
Materials and Tools Required
Successful Shaker cabinet door construction necessitates the right materials and tools. The selection of wood is paramount, influencing both the aesthetic appeal and structural integrity of the finished product. Hardwoods such as maple, cherry, oak, and poplar are popular choices due to their durability and ability to accept finishes well. The specific wood species should be chosen based on the desired look and the overall design of the cabinetry.
In addition to wood, the following materials and tools are essential:
- Router: A powerful router with variable speed control is crucial for precise and efficient routing. A plunge router is recommended for creating mortises and grooves.
- Router Bits: A variety of router bits are required, including straight bits for mortises and tenons, rabbeting bits for panel grooves, and potentially a profile bit for adding decorative edges. The shanks of the bits should match the collet size of the router.
- Router Jig: A dedicated Shaker cabinet door router jig is necessary for accurate and repeatable cuts.
- Clamps: A variety of clamps, including bar clamps and pipe clamps, are needed to securely hold the workpiece and assemble the doorframe.
- Measuring Tools: A precision ruler, combination square, and calipers are essential for accurate measurements and layout.
- Safety Equipment: Safety glasses, hearing protection, and a dust mask are indispensable for protecting against debris and noise.
- Wood Glue: High-quality wood glue is necessary for creating strong and durable joints.
- Sandpaper: Various grits of sandpaper are needed for smoothing the wood surfaces and preparing them for finishing.
- Finishing Supplies: Stain, paint, varnish, or other desired finishes, along with applicators such as brushes or spray equipment, are required to complete the project.
Proper preparation of the wood is also crucial. The lumber should be properly dried and acclimated to the workshop environment to minimize warping or movement after assembly. Surfacing the lumber with a jointer and planer ensures that the pieces are flat, square, and of consistent thickness, which is essential for accurate mortise-and-tenon joinery.
Key Point 2: Step-by-Step Construction Process
The construction of Shaker cabinet doors involves several distinct steps, each requiring careful attention to detail. The following outlines a general process, but it is important to always refer to the specific instructions provided with the chosen router jig.
1. Cutting the Frame Components: Begin by cutting the stiles and rails to the required dimensions. The length of the rails will determine the overall width of the door, while the length of the stiles will determine the height. Accuracy in cutting these components is critical for ensuring that the door frame is square and that the center panel fits properly.
2. Routing the Mortises: Using the router jig, create the mortises in the stiles. The jig will guide the router to create consistent mortises at the correct depth and width. It is important to securely clamp the stile in the jig and follow the jig's instructions carefully. Multiple passes may be required to achieve the desired mortise depth.
3. Routing the Tenons: Using either the same jig or a dedicated tenoning jig, create the tenons on the ends of the rails. The tenons should be precisely sized to fit snugly into the mortises. Test the fit of the tenons into the mortises frequently during the routing process to ensure a proper fit.
4. Routing the Panel Groove: Use a rabbeting bit and the router jig to create a groove along the inside edge of each stile and rail. This groove will house the center panel. The width and depth of the groove should be sufficient to accommodate the panel, allowing for seasonal expansion and contraction of the wood. The groove must be consistent in depth and width throughout the entire frame.
5. Preparing the Center Panel: Cut the center panel to the appropriate size, ensuring that it is slightly smaller than the opening created by the panel groove. This allows for expansion and contraction of the panel without putting stress on the frame joints. The panel can be made from solid wood or plywood, depending on the desired aesthetic and budget.
6. Assembling the Door Frame: Dry-fit the frame components without glue to ensure that the mortise-and-tenon joints fit properly and that the frame is square. If necessary, make adjustments to the tenons or mortises to achieve a perfect fit. Once satisfied with the fit, apply wood glue to the mortise-and-tenon joints and clamp the frame together. Ensure the frame remains square during clamping. Allow the glue to dry completely according to the manufacturer's instructions.
7. Inserting the Center Panel: Slide the center panel into the groove before the glue dries completely, ensuring that it is centered within the frame. Remember that the panel should "float" within the groove to allow for wood movement, meaning it should not be glued in place. Some builders use space balls to center the panel within the groove.
8. Sanding and Finishing: Once the glue has dried, remove the clamps and sand the door frame smooth, paying particular attention to any glue squeeze-out. Use progressively finer grits of sandpaper to achieve a smooth, even surface. Prepare the door for finishing by cleaning it thoroughly. Apply the desired finish, such as stain, paint, or varnish, according to the manufacturer's instructions. Allow the finish to dry completely before installing the door.
Key Point 3: Troubleshooting Common Problems
Even with careful planning and execution, certain problems may arise during the construction of Shaker cabinet doors. Understanding these potential issues and knowing how to address them can save time and frustration.
1. Loose or Tight Joints: If the mortise-and-tenon joints are too loose, the door frame will be weak and unstable. To remedy this, consider using shims to tighten the joints or re-cutting the tenons to a larger size. If the joints are too tight, they may be difficult to assemble and could potentially damage the wood. In this case, carefully sand or plane the tenons until they fit properly.
2. Warped or Twisted Frames: Warping or twisting of the door frame can occur if the wood is not properly dried or if the clamps are not applied evenly during assembly. To correct this, try clamping the frame to a flat surface and applying heat or moisture to encourage the wood to straighten. In severe cases, it may be necessary to disassemble the frame and re-surface the components.
3. Uneven Panel Groove: An uneven panel groove can cause the center panel to bind or rattle within the frame. To fix this, carefully re-route the groove with the router and jig, ensuring that the depth and width are consistent throughout. Alternatively, the panel can be trimmed or shimmed to fit the existing groove.
4. Finish Imperfections: Finish imperfections such as runs, drips, or brush marks can detract from the overall appearance of the door. To remove these imperfections, sand the affected areas and reapply the finish. Preventative measures include using high-quality finishing products, applying thin coats, and using proper application techniques.
5. Jig Inaccuracy: If the router jig is not properly calibrated or if it is damaged, it can lead to inaccurate cuts and inconsistent results. Before beginning any project, carefully inspect the jig for any signs of damage or wear. Calibrate the jig according to the manufacturer's instructions and ensure that all components are securely fastened. Making test cuts on scrap material can help identify and correct any problems before working on the final pieces.
By understanding the principles of Shaker cabinet door construction, utilizing a router jig effectively, and addressing potential problems proactively, it's possible to create high-quality, professional-looking cabinet doors that will enhance the beauty and functionality of any cabinetry project.

How To Make A Diy Cabinet Door With The Router Tutorial Free

Make Cabinet Doors With A Router Free Project Plan

Make Mission Or Shaker Style Doors With Tongue Groove Router Bit Set Infinity Cutting Tools

Learn The Steps To Easy Diy Shaker Cabinet Doors

Giving Plain Flat Doors A Diffe Look With Simple Jig

I Don T Understand Why People Make This So Hard

Make Cabinet Doors With A Router Free Project Plan

Making Drawer Fronts On A Router Table Kreg Tool

3 Diy Cabinet Door Construction Techniques Easy To Advanced Angela Marie Made

Never Using A Table Saw For This Again Shaker Style Cabinet Doors With Router
Related Posts