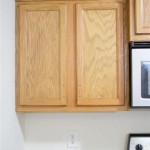
How To Install Self-Closing Hinges on Kitchen Cabinets
Upgrading your kitchen cabinets with self-closing hinges is a simple yet impactful improvement. These hinges ensure that your cabinet doors close smoothly and silently, adding a touch of modern convenience to your kitchen. Installing self-closing hinges is a relatively easy DIY project, requiring basic tools and a little patience. Here's a step-by-step guide to help you install these hinges successfully.
1. Gather Your Tools and Materials
Before you begin, gather the necessary tools and materials:
- Self-closing hinges
- Screwdriver
- Drill
- Pencil
- Tape measure
- Level
- Phillips head screwdriver bit
- Wood screws
- Optional: A hinge jig (for precise placement)
Choose the appropriate type of self-closing hinges for your cabinets. These are available in various sizes and finishes to match your existing hinges.
2. Remove the Old Hinges
To begin the installation process, carefully remove the existing hinges from your cabinet doors. If you're dealing with old or stubborn hinges, a small pry bar can be helpful. Be mindful not to damage the cabinet door or the cabinet frame.
3. Align the New Hinges
The next step involves aligning the new self-closing hinges on the cabinet door. This step is crucial for ensuring proper door function and a consistent look.
- Use a hinge jig: A hinge jig is a tool that accurately aligns hinges, making it an excellent option for beginners or those seeking precise placements.
- Measure and mark: If you're not using a hinge jig, measure the distance between the existing hinge holes and mark the new hinge positions with a pencil. Ensure that the new hinges are aligned with the old ones for a seamless look.
4. Drilling Pilot Holes
To prevent splitting the wood, drill pilot holes for the self-closing hinge screws.
- Use a drill bit slightly smaller than the diameter of the screws provided with the hinges.
- Drill pilot holes in the locations you marked in the previous step.
- Ensure the depth of the pilot holes is slightly shallower than the length of the screws.
5. Secure the Hinges to the Cabinet Door
With the pilot holes in place, it's time to secure the hinges to the cabinet door.
- Align the hinges with the marked positions.
- Start with a few screws to hold the hinges securely.
- Finish securing the hinges by tightening all screws.
6. Attach the Hinges to the Cabinet Frame
After securing the hinges to the cabinet door, you'll need to attach them to the frame.
- Install the hinges to the cabinet frame directly opposite the hinges attached to the door.
- Align the hinges carefully to ensure that the door opens and closes smoothly.
- Secure the hinges using the provided screws.
7. Adjust the Hinges
Once the hinges are attached, adjust them to ensure proper door closure.
- Check the door opening and closing for any binding or uneven movements.
- Use a screwdriver to adjust the hinge screws if necessary.
- Adjust the hinges until the door closes smoothly and sits flush with the cabinet frame.
8. Test the Self-Closing Feature
The final step involves testing the self-closing feature of the new hinges.
- Open and close the cabinet door a few times.
- Ensure the door closes automatically, and the closure is smooth and silent.
- Adjust the hinge tension further if necessary to achieve the desired closing speed.
Following these steps will help you install self-closing hinges on your kitchen cabinets effectively. Remember to take your time, be patient, and enjoy the added convenience and style your kitchen will gain with these modern features.

Replacing Cabinet Hinges With Overlay Self Closing The Palette Muse

How To Add Soft Close Any Cabinet Porch Daydreamer

How To Adjust Self Closing Kitchen Cabinet Hinges Maintenance

How To Install Soft Close Hinges In Cabinets

Benefits Of Soft Close Self Closing Hinges For Your Kitchen

Soft Close Hinge Stopped Working Here S How To Fix It Doorsome

110 Degree 35 Mm Full Overlay Soft Close Face Frame Cabinet Hinges With Installation S 1 Pair 2259 Ff The Home Depot
Titus Soft Close 165 Wide Angle Cabinet Hinge Pair Of 2 Diy At B Q

110 Degree 35 Mm Half Overlay Soft Close Frameless Cabinet Hinges With Installation S 1 Pair 2258 The Home Depot

Cabinet Door Hinges Self Closing Soft Close Rejs Ltd
Related Posts