How to Install Concealed European Style Cabinet Hinges
Concealed European style cabinet hinges are a popular choice for kitchen and bathroom cabinets due to their sleek, modern look and reliable performance. They offer a smooth, quiet closing experience and can be easily adjusted to ensure perfect door alignment. Installing these hinges requires careful attention to detail and some basic woodworking skills. This article will guide you through the process step-by-step, ensuring you have the knowledge and confidence to install concealed European style cabinet hinges successfully.
1. Gather Your Tools and Materials
Before you begin, gather the necessary tools and materials to ensure a smooth installation process. These include:
- Concealed European style cabinet hinges
- Cabinet doors
- Cabinet boxes
- Screwdriver (for cabinet doors)
- Drill with a 5/64" or 1.5mm drill bit (for pilot holes)
- Pencil
- Measuring tape
- Level
- Wood screws (included with the hinges)
- Countersinking drill bit (optional)
- Wood filler (optional)
- Sandpaper (optional)
2. Determine Hinge Placement and Mark Cabinet Door
The first step is to determine the hinge placement on the cabinet door. The standard hinge placement is 3.5 inches from the top and bottom edges of the door. However, you can adjust this distance according to your specific cabinet design. Once you've decided on the hinge placement, use a pencil to mark the location on the door's inside surface. Ensure that the markings are accurate and level for a professional finish.
For most hinges, the hinge cup should be placed 1/2 inch from the edge of the door, centered at the marked position. Some hinges may have specific installation instructions, so consult the manufacturer's guidelines for the most accurate placement.
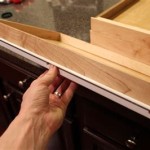
3. Drill Pilot Holes and Install Hinge Cup
Before drilling pilot holes, ensure the cabinet door is securely clamped or held in place to prevent movement during drilling. Using a 5/64" or 1.5mm drill bit, create a pilot hole at each marked location on the door's inside surface. Make sure the pilot holes are deep enough to accommodate the screws that will secure the hinge cup.
Once the pilot holes are drilled, align the hinge cup on the door's inside surface, ensuring it's flush with the door's edge. Using the provided screws, attach the hinge cup to the door. If you find the screws are too long, use a countersinking drill bit to create a recess to accommodate the screw heads. This will prevent the screw heads from protruding and damaging the door's surface.
4. Mark and Attach Hinge Plate to Cabinet Box
With the hinge cup attached to the door, it's time to attach the hinge plate to the cabinet box. To pinpoint the hinge plate's location, close the door against the cabinet box while paying attention to the hinge cup's position. Use a pencil to mark the hinge plate position on the cabinet box's surface. Ensure the marked position is level. Align the hinge plate with the markings and secure it to the cabinet box using the provided screws.
For optimal performance, ensure the hinge plate is flush with the cabinet box's surface. If the plate is slightly above or below the surface, adjust it before securing it with screws. This step is crucial for a smooth and seamless door opening and closing experience.
5. Adjust Hinge for Optimal Door Alignment
Once the hinge plate is securely attached, close the door and check for proper alignment. If the door is misaligned, you can adjust the hinge using the screws on the hinge plate. These screws allow you to move the door up, down, in, or out. Refer to the hinge manufacturer's instructions for detailed adjustment guidelines. Carefully adjust the hinge plate until the door aligns perfectly with the cabinet box.
Adjusting the hinges is a crucial step in achieving optimal door alignment and a seamless cabinet closing experience. It allows you to fine-tune the door's position, ensuring it opens and closes smoothly and effortlessly.
6. Repeat for Additional Hinges
If your cabinet door requires more than one hinge, repeat steps 2-5 for each additional hinge. Ensure that the hinges are positioned equidistantly along the door for a balanced and symmetrical look.
Using multiple hinges is essential for larger and heavier doors, providing adequate support and preventing sagging. They also contribute to a smooth and even door movement throughout its entire opening range.
Installing concealed European style cabinet hinges may seem daunting at first but with careful planning and attention to detail, you can achieve a professional-looking finish. Following these steps will guide you through the process effectively, ensuring the hinges are installed correctly and your cabinets have a smooth, stylish, and functional look. Remember to always consult the manufacturer's instructions for specific guidance on your chosen hinge type and model.

Installing European Hinges Woodworking Blog S Plans How To

How To Install Cabinet Hinges Pine And Poplar

How To Install Concealed Hinges With Or Without Jigs Kitchen Euro Style

How To Install Concealed Hinges Wood

How To Measure Install Concealed Hinges On Cabinet Doors

How To Install Concealed Hinges Painting By The Penny

Concealed Hinges Made Easy And Ilrated Guide Ana White

How To Install Concealed Hinges The Complete Guide

Simply Easy Diy How To Install Concealed European Hinges On Cabinets

Easily Install Concealed Hinges Comprehensive Guide Euro Hinge Cabinet Vid 135
Related Posts