How To Install A Kohler Recessed Medicine Cabinet
Installing a recessed medicine cabinet, such as a Kohler model, can significantly enhance bathroom functionality and aesthetics. A recessed cabinet provides valuable storage without protruding into the room, contributing to a cleaner and more spacious feel. This article provides a comprehensive guide on how to install a Kohler recessed medicine cabinet, covering preparation, cabinet placement, securing the cabinet, and finishing touches. Following these steps will ensure a successful and professional-looking installation.
Preparing for the Installation
Proper preparation is crucial for a smooth and successful installation. This phase involves gathering the necessary tools and materials, identifying the optimal location for the cabinet, and carefully assessing the structural elements within the wall.
Gather Tools and Materials: A complete set of tools is essential before beginning the installation process. The required tools typically include:
- Measuring tape: For accurate measurements of the wall opening and cabinet dimensions.
- Level: To ensure the cabinet is installed perfectly straight.
- Stud finder: To locate wall studs behind the drywall.
- Pencil: For marking measurements and cut lines.
- Safety glasses: To protect eyes from dust and debris.
- Gloves: To protect hands.
- Utility knife: For scoring drywall.
- Drywall saw or keyhole saw: For cutting the drywall opening.
- Drill with various drill bits: For pilot holes and securing the cabinet.
- Screwdrivers (Phillips and flathead): To tighten screws.
- Shims: To level the cabinet within the opening.
- Construction adhesive: For additional support.
- Caulk: To seal the edges of the cabinet.
- Putty knife: For applying caulk smoothly.
In addition to these tools, ensure you have the necessary hardware that came with your Kohler medicine cabinet, including mounting screws and any provided templates. If the hardware is missing, contact Kohler customer service or purchase replacement hardware from a local hardware store.
Locate the Ideal Position: Determining the best location for the medicine cabinet is an important step. Consider the following factors:
- Height: The cabinet should be positioned at a comfortable height for all users. A common guideline is to place the bottom of the cabinet approximately 36 to 40 inches from the floor. This can be adjusted based on the height of the primary users.
- Proximity to Sink and Mirror: The cabinet should be conveniently located near the sink and mirror for easy access to toiletries.
- Obstruction: Avoid placing the cabinet where it might obstruct light fixtures, electrical outlets, or other bathroom fixtures.
- Personal Preference: Ultimately, the location should align with personal preferences and aesthetic considerations.
Once a suitable location is identified, use a measuring tape and pencil to mark the outline of the cabinet on the wall. This will serve as a visual guide during the cutting process.
Assess Wall Structure: Before cutting into the wall, it is crucial to understand the wall's structure and identify any potential obstacles. Employing a stud finder to locate wall studs is essential. If a stud is positioned precisely where the cabinet is intended to be placed, it may be necessary to shift the cabinet’s location slightly to avoid cutting into the stud. Cutting into load-bearing studs should be avoided unless you consult with a structural engineer or qualified contractor. Also, if electrical wiring or plumbing pipes are present within the wall cavity, it may be necessary to relocate them or choose an alternate location for the cabinet.
To confirm the absence of obstructions, carefully drill a small pilot hole within the marked outline. If resistance is encountered, indicating a stud, pipe, or wire, reposition the cabinet accordingly. If obstacles prove difficult to avoid, consulting a professional plumber or electrician is advisable to ensure a safe and compliant installation.
Cutting the Wall Opening
Creating the wall opening requires precision and care to avoid damaging the surrounding drywall. The opening should be slightly larger than the cabinet's dimensions to allow for minor adjustments during installation.
Mark the Cut Lines: Using the measurements obtained earlier, carefully mark the cut lines on the wall. Ensure the lines are straight and accurate, as this will directly affect the appearance of the finished installation. Double-check the alignment of the lines with a level to prevent any slant in the cabinet.
Score the Drywall: Before cutting, score the drywall along the marked lines using a utility knife. This will help prevent the drywall from chipping or tearing during the cutting process. Apply firm, consistent pressure while scoring to create a clean, defined line.
Cut the Drywall: Employ a drywall saw or keyhole saw to carefully cut along the scored lines. Maintain a slow and steady pace to avoid damaging the surrounding drywall. If working with a thicker wall material, such as plaster, use a saw designed for that specific material.
As the cutting progresses, periodically check the size and shape of the opening against the cabinet dimensions. Make minor adjustments as necessary to ensure a proper fit. The opening should be approximately 1/4 to 1/2 inch larger than the cabinet on all sides for ease of installation.
Clean the Opening: Once the drywall is cut, remove the cut-out piece from the wall. Carefully clean the opening, removing any loose drywall or debris. This will provide a clean surface for the cabinet to sit against.
Installing and Securing the Cabinet
With the opening prepared, the next step involves carefully installing and securing the medicine cabinet within the wall. This requires attention to leveling, alignment, and secure fastening to the wall studs.
Test Fit the Cabinet: Before securing the cabinet, test fit it within the opening to ensure a proper fit. The cabinet should slide in smoothly without excessive force. If the fit is too tight, carefully trim the edges of the drywall opening as needed. It is better to have a slightly larger opening than one that is too small.
Level the Cabinet: Using shims, level the cabinet within the opening. Insert shims along the sides and top of the cabinet until it is perfectly level. Check the level both horizontally and vertically to ensure accurate alignment. Once the cabinet is level, carefully mark the location of the shims so they can be re-positioned when the cabinet is fully installed.
Secure the Cabinet to Wall Studs: Locate the wall studs within the opening and use a drill to create pilot holes through the cabinet frame and into the studs. This will provide a secure anchor for the mounting screws. Ensure that the pilot holes are slightly smaller than the diameter of the mounting screws to provide a tight grip.
Using appropriate mounting screws, securely fasten the cabinet to the wall studs. Tighten the screws until the cabinet is firmly in place. Avoid over-tightening, as this can damage the cabinet frame or strip the screw threads.
If the cabinet does not line up perfectly with the wall studs, consider using construction adhesive to provide additional support. Apply a bead of construction adhesive to the back of the cabinet frame where it will contact the wall. This will help to bond the cabinet to the wall surface and provide added stability.
Re-Check Level and Alignment: After securing the cabinet, re-check the level and alignment to ensure that it has not shifted during the fastening process. Make any necessary adjustments by tightening or loosening the mounting screws or adding additional shims.
Finishing Touches
The final step involves adding finishing touches to complete the installation. This includes concealing gaps, sealing the edges, and cleaning up the work area.
Conceal Gaps: Once the cabinet is securely installed and level, inspect the edges of the cabinet where it meets the wall. If any gaps are visible, use caulk to seal them. Apply a thin, even bead of caulk along the edges of the cabinet using a caulk gun.
Use a putty knife to smooth the caulk and create a seamless transition between the cabinet and the wall. Remove any excess caulk with a damp cloth. Allow the caulk to dry completely according to the manufacturer's instructions. Paintable caulk can be used if you wish to paint it to match the wall color.
Clean Up: Remove any remaining shims and dispose of them properly. Clean up any dust, debris, or leftover materials from the work area. Inspect the finished installation to ensure it is clean, secure, and visually appealing. Dispose of all waste materials responsibly.
Inspect and Adjust: As a final step, inspect the cabinet doors and shelves to ensure they are properly aligned and functioning correctly. Adjust the hinges or shelf supports as needed to achieve smooth and seamless operation.
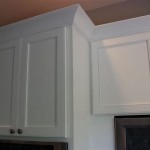
Consider adding decorative trim around the cabinet to further enhance its appearance and blend it seamlessly with the surrounding wall. Choose trim that complements the style of your bathroom and install it using finish nails or adhesive.
By following these comprehensive steps, a professional-looking Kohler recessed medicine cabinet installation can be achieved, adding both functionality and aesthetic value to the bathroom space.

Installation Recessed Mount Aluminum Frame Medicine Cabinets

Recessed Medicine Cabinet Installation Plan Learn Build

Kohler 99010 Verdera 40 X 30 Three Door Medicine Cabinet

Complete Install Kohler Mirror Medicine Cabinet R32067 Na How To Diy

Have A Question About Kohler Maxstow 20 In W X 24 H Rectangular Surface Mount Medicine Cabinet With Mirror And Enhanced Storage Pg 3 The Home Depot

How To Install A Kohler Mirrored Medicine Cabinet

Recessed Medicine Cabinet Install

Have A Question About Kohler Verdera 24 In W X 30 H Recessed Medicine Cabinet Pg 4 The Home Depot

Have A Question About Kohler 16 In W X 20 H Single Door Recessed Medicine Cabinet With Mirror Interior Pg 4 The Home Depot

Bathroom Recessed Mirror Cabinet Never Easy
Related Posts