How To Gel Stain Cabinets Without Sanding
Gel staining cabinets without sanding is a great way to update the look of your kitchen or bathroom without the hassle of sanding. Gel stains are thicker than traditional stains, so they don't require as much prep work. Plus, they're less likely to drip or run, making them a good choice for beginners.
Here's a step-by-step guide on how to gel stain cabinets without sanding:
1. Clean the cabinets
The first step is to clean the cabinets thoroughly. This will remove any dirt or grease that could prevent the stain from adhering properly. Use a mild cleaner and a soft cloth, and be sure to rinse the cabinets well with water afterwards.
2. Remove the hardware
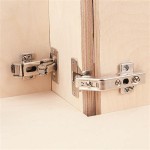
Once the cabinets are clean, remove all of the hardware, including knobs, pulls, and hinges. This will make it easier to apply the stain and will prevent the hardware from getting stained.
3. Apply the gel stain
Apply the gel stain to the cabinets using a brush or a rag. Be sure to apply it evenly and in the direction of the wood grain. Allow the stain to sit for the amount of time specified on the can, then wipe off any excess stain with a clean rag.
4. Apply a topcoat
Once the stain is dry, apply a topcoat to protect it. You can use a polyurethane or a lacquer, depending on the desired finish. Apply the topcoat according to the manufacturer's instructions.
5. Reinstall the hardware
Once the topcoat is dry, you can reinstall the hardware. Be sure to align the hardware carefully so that it doesn't damage the finish.
Tips for applying gel stain
Here are a few tips for applying gel stain:
- Wear gloves to protect your hands from the stain.
- Use a brush or a rag to apply the stain. A brush will give you a more even finish, but a rag is easier to use for larger areas.
- Apply the stain in the direction of the wood grain.
- Allow the stain to sit for the amount of time specified on the can.
- Wipe off any excess stain with a clean rag.
- Apply a topcoat to protect the stain.
Troubleshooting
If you have any problems with your gel stain finish, here are a few tips:
- If the stain is too dark, you can try diluting it with water.
- If the stain is too light, you can try applying another coat.
- If the stain is not adhering properly, you may need to sand the cabinets before applying the stain.
Gel staining cabinets without sanding is a great way to update the look of your kitchen or bathroom without the hassle of sanding. By following these steps, you can achieve a beautiful, professional-looking finish.

Gel Stain Kitchen Cabinets Without Sanding Fast Easy Diy

Diy Gel Stain Cabinets No Heavy Sanding Or Stripping Maison De Pax

How To Use Gel Stain Update Cabinets Without Sanding Anika S Diy Life

How To Use Gel Stain Update Cabinets Without Sanding Anika S Diy Life

Staining Your Wood Cabinets Darker Young House Love

Darken Cabinets Without Stripping The Existing Finish Pneumatic Addict

Diy Gel Stain Cabinets No Heavy Sanding Or Stripping Maison De Pax

How To Stain With Gel Over An Existing Finish Without Stripping The Weathered Door

How To Use Gel Stain Update Cabinets Without Sanding Anika S Diy Life Painting Furniture

How To Glaze Cabinets With Gel Stain Adventures Of A Diy Mom
Related Posts

