How To Finish Wood Kitchen Cabinets
Finishing wood kitchen cabinets is a multi-step process that significantly impacts their appearance, durability, and longevity. Choosing the right finish and applying it correctly can transform unfinished cabinets into beautiful, functional elements of a kitchen. This process involves meticulous preparation, careful application, and sufficient drying time for optimal results.
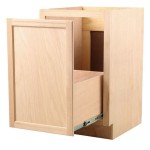
1. Preparing the Cabinets: The first step is to prepare the cabinets for finishing. This involves removing any existing hardware like hinges, knobs, and pulls. If working with assembled cabinets, removing doors and drawers facilitates easier and more thorough finishing. This allows each surface to be accessed without obstruction.
2. Cleaning the Surfaces: Thorough cleaning is crucial to ensure optimal adhesion of the finish. Use a suitable cleaning solution, such as a mixture of warm water and a mild detergent, or a specialized cabinet cleaner. Grease, dirt, and dust must be completely removed. After cleaning, rinse the surfaces with clean water and allow them to dry completely.
3. Sanding the Wood: Sanding creates a smooth surface for the finish to adhere to and promotes even absorption. Start with a coarser grit sandpaper (around 120-grit) to remove imperfections and level any raised grain. Progress through progressively finer grits (150-grit, 180-grit, and finally 220-grit) to achieve a uniformly smooth surface. Between each grit, wipe down the cabinets with a tack cloth to remove sanding dust.
4. Filling Imperfections (Optional): If any imperfections, dents, or scratches remain after sanding, wood filler can be used. Apply the filler according to the manufacturer's instructions, allow it to dry completely, and then sand the filled areas smooth with fine-grit sandpaper.
5. Applying the Primer: A primer coat is essential, especially for paint finishes. Primer seals the wood, preventing the topcoat from being absorbed unevenly, which can lead to an inconsistent finish. It also provides a better bonding surface for the paint. Apply the primer evenly using a brush, roller, or sprayer. Allow the primer to dry completely according to the manufacturer's instructions.
6. Sanding the Primer: Lightly sanding the dried primer with fine-grit sandpaper (around 220-grit) creates a smooth surface for the topcoat. This removes any raised fibers or imperfections in the primer coat, promoting a more even and professional-looking final finish.
7. Applying the Finish (Stain or Paint): The chosen finish should be applied in thin, even coats. For stains, follow the manufacturer's instructions regarding application and drying times. For paint, multiple thin coats are usually preferred over one thick coat to prevent drips and ensure even coverage. Allow each coat to dry thoroughly before applying the next.
8. Applying a Topcoat (Optional): A topcoat provides additional protection and durability, particularly for painted surfaces. Choose a topcoat compatible with the chosen finish. Apply the topcoat in thin, even coats, allowing each coat to dry completely before applying the next.
9. Drying and Curing: Allow the finish to dry and cure completely before reassembling the cabinets and reinstalling hardware. The curing time can vary depending on the type of finish, temperature, and humidity. Refer to the manufacturer's instructions for specific drying and curing times.
Choosing the Right Finish: Several finishing options exist, each with advantages and disadvantages. Paint offers a wide range of colors and sheens, providing flexibility in design. Stain enhances the natural beauty of the wood grain and comes in various shades. Clear coats, such as varnish or polyurethane, protect the wood while allowing the natural grain to show through. Consider factors such as desired aesthetics, durability requirements, and the existing kitchen décor when selecting a finish.
Application Techniques: Different application techniques can be used depending on the chosen finish and the desired result. Brushes offer excellent control for intricate details, while rollers provide efficient coverage for larger, flat surfaces. Sprayers offer the smoothest finish, but require practice and proper ventilation. Select the application technique that best suits the specific project and skill level.
Safety Precautions: When working with wood finishes, proper safety precautions are essential. Always work in a well-ventilated area to avoid inhaling fumes. Wear appropriate personal protective equipment, such as gloves and a respirator, especially when using solvent-based products. Dispose of used rags and other materials properly to prevent spontaneous combustion.
Environmental Considerations: Consider using low-VOC (volatile organic compound) finishes to minimize environmental impact. These finishes release fewer harmful chemicals into the air. Properly dispose of leftover finishes and cleaning solutions according to local regulations.

How To Stain Wood Cabinets True Value

How To Stain Oak Cabinetry Tutorial The Kim Six Fix

Cabinet Refinishing Guide

Staining Your Wood Cabinets Darker Young House Love

Refinishing Kitchen Cabinets Modern Refacing Made Easy Wisewood

8 Tips For A Professional Looking Finish On Your Cabinets Cabinetdoors Com

How To Finish Wood Cabinets Cabinet Doors N More

How To Refinish Kitchen Cabinets N Hance
:strip_icc()/101903247-58c480d08b8a4aa68c85f81f783911b6.jpg?strip=all "Wood Cabinet Ideas To Consider For Your Kitchen Remodel")
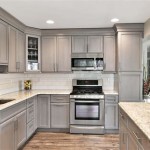
Wood Cabinet Ideas To Consider For Your Kitchen Remodel

Refinishing Kitchen Cabinets Modern Refacing Made Easy Wisewood
Related Posts