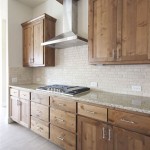
How to Degrease the Top of Kitchen Cabinets
The top surfaces of kitchen cabinets, often overlooked during regular cleaning routines, are notorious for accumulating a thick layer of grease, dust, and grime. This accumulation is due to rising cooking vapors, which contain airborne oil and fat particles. Over time, these particles settle on the cabinet tops, trapping dust and debris, creating a sticky, unsightly mess. Regular degreasing is essential not only for aesthetic purposes but also for maintaining a clean and hygienic kitchen environment. Neglecting this task can lead to a buildup that becomes increasingly difficult to remove, potentially damaging the cabinet finish and attracting pests. The following article will detail effective methods for degreasing the tops of kitchen cabinets, ensuring a cleaner and healthier home.
Preparing for the Cleaning Process
Before embarking on the degreasing process, adequate preparation is crucial. This involves gathering the necessary cleaning supplies, protecting the surrounding areas, and taking initial steps to loosen the accumulated grime. The choice of cleaning solutions will depend on the type of cabinet finish and the severity of the grease buildup.
The first step is to assemble the required cleaning supplies. These typically include:
Cleaning Solution:
A degreasing agent is essential. Options include commercial degreasers, dish soap mixed with warm water, a solution of baking soda and water, or a mixture of vinegar and water (for specific cabinet finishes).Spray Bottle:
Useful for applying the cleaning solution evenly.Microfiber Cloths or Sponges:
For wiping down the surfaces. Microfiber cloths are preferred as they are gentle and effective at lifting dirt and grease.Scrub Brush:
A soft-bristled scrub brush can be helpful for loosening stubborn grease buildup. Avoid using abrasive brushes that can scratch the cabinet finish.Ladder or Step Stool:
To safely reach the tops of the cabinets.Drop Cloth or Old Newspaper:
To protect the countertop and floor from drips and spills.Gloves:
To protect hands from harsh cleaning chemicals and grime.Dust Mask:
To avoid inhaling dust and cleaning fumes.
Once the supplies are gathered, protect the surrounding areas. Lay down a drop cloth or old newspaper on the countertop and floor beneath the cabinets to catch any drips. Clear the countertop of any items that might obstruct the cleaning process.
The next step is to loosen the accumulated grime. Use a dry brush or vacuum cleaner with a brush attachment to remove loose dust and debris from the cabinet tops. This will prevent the dust from mixing with the cleaning solution and creating a muddy mess. For heavily soiled areas, a dry scrub with a baking soda paste can help to break down the grease before applying the wet cleaning solution.
Applying Cleaning Solutions and Degreasing Techniques
After preparing the area and gathering necessary tools, the next step involves applying the chosen cleaning solution and implementing specific degreasing techniques. The appropriate method will largely depend on the type of cabinet material and the severity of the grease accumulation.
The selection of the cleaning solution is paramount. Commercial degreasers are specifically formulated to break down grease and grime effectively. These products often contain solvents and surfactants that dissolve oily residues. However, it is crucial to read the product label carefully and test the degreaser on an inconspicuous area of the cabinet before applying it to the entire surface. This ensures that the degreaser does not damage or discolor the cabinet finish.
For a more natural approach, a mixture of dish soap and warm water can be a viable alternative. The dish soap acts as a surfactant, helping to lift the grease and grime from the surface. Mix a few drops of dish soap into a bucket of warm water and stir well. This solution is generally safe for most cabinet finishes, but testing a small area beforehand is still recommended.
Baking soda is another effective degreasing agent. Its mild abrasive properties help to scrub away stubborn grease without scratching the surface. Create a paste by mixing baking soda with a small amount of water. Apply the paste to the greasy areas and let it sit for a few minutes before scrubbing gently with a sponge or cloth.
Vinegar, a natural acid, can also be used to dissolve grease. Mix equal parts of white vinegar and water in a spray bottle. Spray the solution onto the greasy areas and let it sit for a few minutes. Vinegar is generally safe for most surfaces, but it should be used with caution on natural stone or waxed finishes, as it can damage them.
Once the cleaning solution is chosen, the application process begins. Spray the solution evenly onto the greasy areas of the cabinet tops. Allow the solution to dwell for a few minutes to loosen the grease. For stubborn buildup, leave the solution on for a longer period, but be careful not to let it dry completely. After the solution has had time to work, use a microfiber cloth or sponge to wipe away the grease. Scrub gently in a circular motion to remove any remaining residue. For particularly difficult areas, use a soft-bristled scrub brush to agitate the grease.
Rinse the cleaned areas with a clean, damp cloth to remove any traces of the cleaning solution. Ensure that all soap or residue is removed, as this can attract dust and grime in the future. Finally, dry the cabinet tops with a clean, dry microfiber cloth. This will prevent water spots and ensure a streak-free finish.
Maintaining Clean Cabinets: Preventive Measures and Regular Cleaning
After successfully degreasing the tops of the kitchen cabinets, implementing preventive measures and establishing a regular cleaning schedule is essential for maintaining their cleanliness and preventing future grease buildup. These steps help to reduce the frequency and intensity of deep cleaning sessions.
One of the most effective preventive measures is to improve ventilation in the kitchen. Using the exhaust fan or range hood while cooking helps to capture airborne oil and fat particles, preventing them from settling on surfaces, including the tops of cabinets. Regularly clean the exhaust fan filters to ensure they are functioning optimally. A clogged filter reduces the efficiency of the fan, allowing more grease to escape into the kitchen. Ideally, exhaust fan filters should be cleaned or replaced every one to three months, depending on cooking frequency.
Another preventive step is to wipe down the cabinet tops regularly, even if they do not appear visibly dirty. A quick wipe with a damp cloth or a microfiber duster can remove dust and light grease before it has a chance to accumulate and harden. This simple habit can significantly reduce the need for more intensive cleaning sessions.
Consider using shelf liners or wax paper on top of the cabinets. These liners act as a barrier, catching dust and grease and making cleanup much easier. When the liner becomes soiled, simply remove and replace it. This eliminates the need to scrub the actual cabinet surface. Choose liners that are heat-resistant and easy to clean. Avoid using materials that could potentially damage the cabinet finish or trap moisture.
Establishing a regular cleaning schedule is crucial for long-term maintenance. Ideally, the tops of kitchen cabinets should be thoroughly degreased at least every three to six months, depending on cooking habits. This schedule can be adjusted based on the amount of grease accumulation observed. Mark the cleaning schedule on a calendar or create a reminder to ensure the task is not neglected.
When cleaning, be mindful of the cleaning products used. Harsh chemicals can damage the cabinet finish. Opt for gentle, non-abrasive cleaning solutions that are specifically designed for the cabinet material. Always test the cleaning solution on an inconspicuous area before applying it to the entire surface. Proper maintenance and careful selection of cleaning products will help to preserve the beauty and longevity of kitchen cabinets.
Addressing splatters and spills immediately is another crucial step in preventing grease buildup. Wipe up any spills or splatters as soon as they occur. This prevents the grease from drying and hardening, making it much easier to remove. Keep a supply of clean cloths readily available for quick cleanup tasks. By promptly addressing spills, the accumulation of grease on cabinet tops, and throughout the kitchen, can be significantly reduced.

Cleaning The Tops Of Cabinets

Cleaning Wood Top Cabinets In Kitchen Spring Is A Must

Cleaning The Tops Of Cabinets

How To Keep Kitchen Cabinet Tops Clean

How To Clean The Tops Of Greasy Kitchen Cabinets Secret Tip My Pinterventures

How To Clean The Top Of Kitchen Cupboards 4 Simple Steps Everyday Old House

How To Clean Kitchen Cabinets So The Entire Room Shines

8 Refinished Kitchen Cabinet Cleaning Tips To Keep Them Like New

How To Clean The Tops Of Greasy Kitchen Cabinets Secret Tip My Pinterventures

Degrease Kitchen Cabinets With An All Natural Homemade Cleaner De House Cleaning Tips S
Related Posts