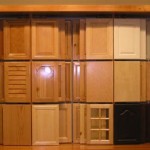
How To Build Your Own Kitchen Cabinet Doors
Replacing or upgrading kitchen cabinet doors can significantly alter the aesthetic of a kitchen without the expense of a full kitchen remodel. Building cabinet doors is a manageable DIY project for individuals with basic woodworking skills and tools. This article outlines the process of constructing kitchen cabinet doors, covering design considerations, material selection, construction techniques, and finishing touches.
Understanding Cabinet Door Designs
Before commencing construction, it is imperative to determine the desired style of the cabinet doors. Several common designs are prevalent in kitchen cabinetry, each with distinct characteristics and construction methods. The primary types include:
Flat Panel Doors: These doors feature a single, flat piece of material, typically plywood or MDF (Medium-Density Fiberboard), as the door face. Their simplicity lends itself to modern and minimalist kitchen designs. Construction is straightforward, requiring only cutting the panel to size and applying edge banding or a frame for a more refined look.
Raised Panel Doors: Characterized by a central panel that is raised above the surrounding frame, these doors are often associated with traditional or formal kitchen styles. Constructing raised panel doors involves creating a frame from stiles and rails (vertical and horizontal pieces, respectively) and then shaping the central panel using woodworking machinery like a router or shaper. The raised panel can be solid wood or a veneered product.
Shaker Style Doors: Shaker doors are a subset of panel doors, distinguished by their simple, clean lines and recessed flat panel. The frame consists of four pieces—two stiles and two rails—joined together to create a rectangular opening. A flat panel is then inserted into this opening, creating the signature Shaker look. Their versatility allows them to complement a wide range of kitchen styles, from traditional to contemporary.
Slab Doors: Similar to flat panel doors, slab doors are a solid piece of material, but generally thicker and without any frame. Often made of plywood, MDF, or even solid wood, slab doors offer a minimalist aesthetic and are commonly used in modern and contemporary kitchens. Edge treatments, such as edge banding or painting, are crucial for a finished appearance.
The choice of door style will influence the materials required, the tools needed, and the complexity of the construction process. Consider the existing kitchen décor and the desired aesthetic when making this decision.
Essential Tools and Materials
Successful cabinet door construction requires a selection of appropriate tools and materials. The specific requirements will vary depending on the chosen door style, but the following list provides a general overview:
Tools: A table saw is essential for accurate and consistent cuts of wood components. A miter saw is useful for creating precise angles, particularly for cope-and-stick joinery in frame-and-panel doors. A router, along with various router bits, is necessary for shaping edges, creating grooves for panel insertion, and crafting raised panels. A drill or impact driver is required for assembling the door components with screws or dowels. Clamps are crucial for holding pieces together during glue-up and assembly. Measuring tools, such as a tape measure, square, and marking gauge, are essential for accurate measurements and layout. Safety equipment, including safety glasses, hearing protection, and a dust mask, is paramount for protecting the user during woodworking activities.
Materials: The choice of wood species will influence the appearance and durability of the cabinet doors. Popular choices include maple, oak, cherry, and poplar. Plywood or MDF are often used for flat panels and as a substrate for veneered panels. Wood glue is necessary for bonding the frame components together. Screws or dowels can be used to reinforce the joints. Sandpaper, in various grits, is required for smoothing surfaces and preparing them for finishing. Paint, stain, and sealant are essential for protecting the wood and achieving the desired aesthetic.
Accurate measurements are critical to ensure that the new cabinet doors fit correctly. Before purchasing materials, measure the existing door openings or cabinet frames precisely. Subtract a small amount (typically 1/8 to 1/4 inch) from each dimension to allow for clearance.
Step-by-Step Construction Process: Shaker Style Door
As an example, the following details the construction process for a Shaker-style cabinet door. This design provides a balance of simplicity and elegance, making it a good starting point for beginner woodworkers.
1. Prepare the Stiles and Rails: Cut the stiles and rails to the required length and width. The width of the stiles and rails is typically between 2 and 3 inches. Use a table saw for accurate cuts and ensure that all pieces are square.
2. Create the Groove: Using a router with a groove cutting bit or dado blade on the table saw, create a groove along the inside edge of each stile and rail. This groove will house the flat panel. The width of the groove should match the thickness of the panel material (typically ¼ inch for plywood or MDF). The depth of the groove should be sufficient to hold the panel securely.
3. Assemble the Frame: Apply wood glue to the ends of the rails and the corresponding areas on the stiles. Clamp the frame together, ensuring that it is square. Reinforce the joints with screws or dowels for added strength. Allow the glue to dry completely according to the manufacturer's instructions.
4. Prepare the Panel: Cut the flat panel to the required size. The panel should be slightly smaller than the opening in the frame to allow for expansion and contraction. Lightly sand the panel to smooth any rough edges.
5. Insert the Panel: Slide the flat panel into the grooves in the frame, ensuring that it is centered. The panel should fit snugly but not be forced into the grooves.
6. Finishing and Installation: Sand the entire door to smooth any imperfections and prepare it for finishing. Apply the desired finish, such as paint, stain, or a clear coat. Once the finish is dry, install the hinges and any desired hardware.
Advanced Techniques: Cope-and-Stick Joinery
For a more professional and durable frame-and-panel door, consider using cope-and-stick joinery. This technique involves shaping the edges of the stiles and rails with specialized router bits to create a tight, interlocking joint. Cope-and-stick joinery provides a stronger and more visually appealing connection than simple butt joints.
1. Cope Cut: The cope cut is made on the ends of the rails. A router with a cope bit is used to create a profile that matches the stick cut on the stiles. The cope cut essentially removes the material from the end of the rail, leaving a shaped edge that fits into the groove on the stile.
2. Stick Cut: The stick cut is made on the inside edges of the stiles and rails. A router with a stick bit is used to create a profile that includes a groove for the panel and a decorative edge. The stick cut shapes the edge of the wood and creates the recess for the panel.
3. Assembling the Frame: After creating the cope and stick cuts, the frame is assembled using glue and clamps. The interlocking joints provide a strong and precise connection, ensuring a durable and visually appealing door frame.
Cope-and-stick joinery requires more advanced woodworking skills and specialized router bits, but the resulting doors are significantly stronger and more professional-looking. This is a good technique to learn for those looking to elevate the quality of their cabinet door construction.
Finishing and Hardware Installation
The finishing process is crucial for protecting the wood and achieving the desired aesthetic. Proper preparation and application techniques are essential for a durable and attractive finish. Before applying any finish, thoroughly sand the door to remove any imperfections and create a smooth surface. Start with a coarser grit sandpaper (e.g., 120-grit) and gradually progress to finer grits (e.g., 220-grit) for a smooth finish.
If painting, apply a primer coat to seal the wood and provide a uniform surface for the paint. Choose a high-quality primer that is compatible with the chosen paint. Apply the paint in thin, even coats, allowing each coat to dry completely before applying the next. Two or three coats of paint are typically required for full coverage. Lightly sand between coats with fine-grit sandpaper to remove any imperfections and ensure a smooth finish.
If staining, apply the stain evenly with a brush, cloth, or sponge. Allow the stain to penetrate the wood for the recommended time, then wipe off any excess stain. Apply a sealant to protect the stained wood and enhance its durability. Polyurethane is a popular choice for sealants, as it provides a durable and water-resistant finish.
Once the finish is dry, install the hinges and any desired hardware, such as knobs or pulls. Choose hinges that are appropriate for the weight and size of the door. Use a hinge jig to ensure accurate and consistent hinge placement. Install the knobs or pulls according to the manufacturer's instructions, taking care to avoid damaging the finish.
Building your own kitchen cabinet doors can be a rewarding DIY project. By carefully planning the design, selecting appropriate materials, and following the construction steps outlined in this article, individuals can create custom cabinet doors that enhance the aesthetic and functionality of their kitchen. The process requires attention to detail and a commitment to quality craftsmanship, but the results are well worth the effort.

Diy Rustic Industrial Cabinet Doors Tutorial Cherished Bliss

How To Build Cabinet Doors Update Your Cabinets Or Built Ins

Diy Shaker Cabinet Doors How To Make Your Own For Less Farmhouseish

How To Build Cabinets The Complete Guide Houseful Of Handmade

Convert Stock Cabinets To Custom With Inset Doors Sincerely Marie Designs

How To Make Your Own Cabinet Doors Beneath My Heart

How To Make Diy Cabinet Doors Without Fancy Router Bits Handles Cabinets

Diy Inset Cabinet Doors A Beginner S Way Remodelando La Casa

How To Diy Cabinet Doors W New Easy Bathroom Makeover Pt 1

How To Make Kitchen Cabinet Doors The Happy Housewife Home Management
Related Posts

