How To Build A Kitchen Sink Cabinet
Constructing a kitchen sink cabinet represents a manageable, yet rewarding, project for homeowners seeking to personalize their kitchen space or replace an existing worn-out structure. This guide provides a comprehensive overview of the process, detailing the necessary materials, tools, and step-by-step instructions for building a functional and aesthetically pleasing sink cabinet. The project requires careful planning and precise execution to ensure a long-lasting and watertight installation.
Before commencing the build, meticulous planning is crucial. Begin by carefully measuring the available space under the sink, taking into account the dimensions of the sink itself, the plumbing connections, and any existing appliances or obstructions. A well-defined plan serves as a roadmap, preventing costly errors and ensuring a seamless installation.
Accurate measurements are paramount. Measure the width, depth, and height of the space designated for the cabinet. Consider the overhang of the countertop and the placement of the sink. The height of the cabinet should accommodate the sink bowl and any required plumbing. Allow for a small clearance space at the top for ease of installation and future maintenance. Document all measurements in a detailed sketch or diagram.
Selecting the appropriate materials is essential for the cabinet's durability and longevity. Plywood forms the primary structural component of the cabinet due to its strength and stability. Consider using moisture-resistant plywood, especially for the cabinet floor and areas prone to water exposure. Hardwood such as maple or oak can be used for the face frame and door components, offering both aesthetic appeal and structural integrity. Choose hardware such as hinges, drawer slides, and pulls that are durable and corrosion-resistant.
A comprehensive list of required tools is essential for efficient and accurate construction. These typically include a circular saw or table saw for cutting plywood sheets, a drill with various drill bits for creating pilot holes and driving screws, a measuring tape and square for accurate measurements and alignment, a level to ensure the cabinet is plumb and level, a jigsaw for cutting curved shapes or notches, a sander for smoothing rough edges, a wood glue for bonding joints, clamps for securing pieces during glue-up, and a countersinking bit for creating clean screw holes. Safety glasses and ear protection are also essential for personal safety.
Key Point 1: Cabinet Frame Construction
The cabinet frame forms the skeletal structure of the sink cabinet. It comprises the side panels, base, back, and top supports. These components are typically constructed from ¾-inch plywood. Begin by cutting the plywood sheets to the required dimensions, adhering to the measurements taken during the planning phase. Precision in cutting is crucial for ensuring a square and stable frame.
The side panels provide vertical support for the cabinet. Their height determines the overall height of the cabinet. Cut two identical side panels according to the planned dimensions. Ensure the edges are smooth and square to facilitate accurate assembly. Mark the locations for the shelf supports or drawer slides on the interior surfaces of the side panels.
The base of the cabinet provides a stable platform for the sink and its contents. It typically consists of a bottom panel and two side supports known as stretchers. Cut the bottom panel to the required width and depth. The stretchers are attached to the inside edges of the side panels and the bottom panel, providing additional support and rigidity. Attach the stretchers using wood glue and screws, ensuring they are flush with the bottom edge of the side panels.
The back panel adds further stability to the cabinet frame. It can be a full panel covering the entire back of the cabinet or a series of horizontal rails. A full panel provides maximum stability and prevents racking. Cut the back panel to the required dimensions and attach it to the side panels and base using wood glue and screws. Ensure the back panel is square and flush with the edges of the frame.
Top supports provide a surface for attaching the countertop. These supports typically consist of horizontal rails attached to the front and back edges of the side panels. The top supports should be positioned to provide adequate support for the countertop and allow for the installation of the sink. Attach the top supports using wood glue and screws, ensuring they are level and flush with the top edge of the side panels.
Once all the frame components are cut and assembled, secure them using wood glue and screws. Use clamps to hold the pieces together while the glue dries. Ensure the frame is square and level before the glue sets. Allow the glue to dry completely before proceeding to the next step.
Key Point 2: Face Frame Assembly and Door Installation
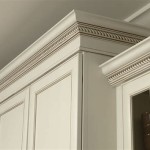
The face frame adds aesthetic appeal and structural reinforcement to the front of the cabinet. It typically consists of vertical stiles and horizontal rails, constructed from hardwood. The face frame is attached to the front edges of the cabinet frame, providing a finished look and covering the exposed edges of the plywood.
The stiles are the vertical components of the face frame. Cut two stiles to the required height, matching the height of the cabinet frame. The rails are the horizontal components of the face frame. Cut two rails to the required width, fitting between the stiles. The top rail typically sits flush with the top edge of the stiles, while the bottom rail sits flush with the bottom edge of the stiles.
Assemble the face frame using wood glue and screws or a pocket hole jig. Apply wood glue to the joining surfaces and clamp the pieces together. Secure the joints with screws or pocket hole screws. Ensure the face frame is square and flush before the glue sets. Allow the glue to dry completely before attaching the face frame to the cabinet frame.
Attach the assembled face frame to the front edges of the cabinet frame using wood glue and screws. Clamp the face frame to the cabinet frame while the glue dries. Ensure the face frame is aligned properly and flush with the edges of the cabinet frame. Fill any gaps or imperfections with wood filler and sand smooth.
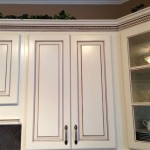
The door provides access to the cabinet's interior and enhances its overall aesthetic. The door can be constructed from solid wood or a combination of wood and glass. The dimensions of the door should be slightly smaller than the opening in the face frame, allowing for clearance and proper operation.
Construct the door frame using mortise and tenon joints or dowel joints for strength and stability. Alternatively, a simpler frame can be constructed using butt joints reinforced with screws or pocket hole screws. Insert a panel made of wood or glass into the door frame and secure it with retaining strips. Sand the door smooth and apply a finish to match the cabinet.
Install hinges on the door and the face frame, aligning them properly. Use screws to secure the hinges to both the door and the face frame. Adjust the hinges to ensure the door swings smoothly and closes properly. Install a handle or knob on the door for easy opening and closing.
Key Point 3: Plumbing Considerations and Finishing Touches
Accommodating the plumbing is a critical aspect of sink cabinet construction. Cutouts or notches must be made in the cabinet frame to allow for the passage of water supply lines and drainpipes. These cutouts should be strategically placed to avoid interfering with the structural integrity of the cabinet.
Locate the water supply lines and drainpipe connections. Measure the diameter of the pipes and the distance from the back wall. Use a hole saw or jigsaw to cut appropriately sized holes in the cabinet back and side panels to accommodate the pipes. Seal the edges of the cutouts with silicone caulk to prevent moisture damage.
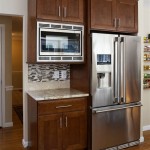
Consider the placement of the garbage disposal, if applicable. The garbage disposal requires adequate space beneath the sink. Ensure the cabinet design accommodates the size and configuration of the garbage disposal. Provide access to the electrical outlet for the garbage disposal. Reinforce the cabinet floor to support the weight of the garbage disposal.
After the cabinet is assembled and the plumbing considerations are addressed, apply a finish to protect the wood and enhance its appearance. Sand the entire cabinet smooth using progressively finer grits of sandpaper. Remove all dust and debris before applying the finish. Apply a primer to seal the wood and provide a uniform surface for the finish coat.
Choose a finish that is durable, water-resistant, and easy to clean. Polyurethane varnish is a popular choice for kitchen cabinets due to its durability and resistance to moisture. Apply multiple coats of varnish, allowing each coat to dry completely before applying the next. Lightly sand between coats to achieve a smooth finish.
Install the countertop according to the manufacturer's instructions. Apply a bead of silicone caulk to the top edges of the cabinet frame to create a watertight seal. Position the countertop on the cabinet frame and secure it with screws or adhesive. Install the sink according to the manufacturer's instructions. Connect the water supply lines and drainpipe to the sink. Test the plumbing for leaks and make any necessary adjustments.
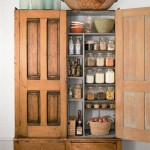
Finally, add any finishing touches such as shelf liners, drawer organizers, or decorative hardware. These additions enhance the functionality and aesthetics of the sink cabinet. Ensure all surfaces are clean and free of dust and debris. With careful planning and execution, a well-built kitchen sink cabinet can provide years of reliable service and enhance the beauty of the kitchen.

Build Cabinets The Easy Way How To A Sink Base

Easy To Build Open Kitchen Cabinet The Ponds Farmhouse

How To Build A Farmhouse Sink Base Cabinet Houseful Of Handmade

How To Build A Farmhouse Sink Base Cabinet Houseful Of Handmade

How To Build Your Own Kitchen Sink Base Do It Yourself

Free Woodworking Plans To Build An Under Sink Base Cabinet The Design Confidential

Everything And The Kitchen Sink

How To Build A Farmhouse Sink Base Cabinet Houseful Of Handmade

Kitchen Cabinet Storage Solutions Diy Pull Out Shelves

How To Build Your Own Kitchen Sink Base Do It Yourself
Related Posts