How To Build A Corner Built-In Cabinet
Building a corner built-in cabinet can maximize storage space and add a touch of elegance to any room. This article provides a comprehensive guide to constructing a corner built-in cabinet, covering everything from planning and design to installation and finishing.
Planning and Design
Careful planning is crucial for a successful built-in cabinet project. Consider the following points during the planning phase:
- Measure the corner space accurately, noting any obstructions like windows, doors, or vents.
- Determine the desired cabinet depth and height. Ensure the dimensions fit proportionally with the room size.
- Visualize the cabinet’s interior layout. Consider the items to be stored and plan for shelves, drawers, or other specialized storage solutions.
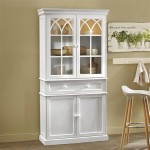
- Choose a cabinet style that complements the existing room décor. Consider traditional, modern, or transitional styles.
- Create detailed sketches or use design software to visualize the cabinet and its dimensions. This will aid in material estimation and construction accuracy.
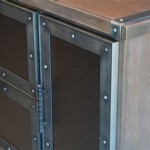
Material Selection
Selecting appropriate materials is essential for cabinet durability and aesthetics. Consider the following materials:
- Plywood: A versatile and cost-effective choice for the cabinet box construction. Choose high-quality plywood with a smooth finish.
- Solid Wood: Offers a premium look for face frames, doors, and shelves. Select a wood species that matches the existing trim or desired aesthetic.
- Medium-Density Fiberboard (MDF): A smooth and stable material suitable for painted finishes. Often used for door panels and drawer fronts.
- Hardware: Select appropriate hinges, handles, drawer slides, and screws for optimal functionality and appearance.
Construction of the Cabinet Box
Building the cabinet box is the foundation of the project. Follow these steps for constructing a robust cabinet box:
- Cut the plywood pieces to the desired dimensions according to the design plan. Use a table saw or circular saw for accurate cuts.
- Assemble the cabinet box using wood glue and screws. Ensure square corners and a level assembly.
- Reinforce the cabinet box with corner braces for added stability, especially for taller cabinets.
- Attach a back panel to the cabinet box using nails or screws. The back panel provides structural support and prevents dust accumulation.
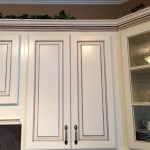
Building Face Frames and Doors
The face frame and doors significantly impact the cabinet’s visual appeal.
- Construct the face frame using solid wood pieces, mitering the corners for a clean joint. Attach the face frame to the cabinet box with glue and screws.
- Build the cabinet doors using solid wood or MDF panels. Consider raised panel doors or flat panel doors depending on the desired style.
- Install hinges on the doors and the cabinet frame, ensuring proper alignment and smooth operation.
Installing Shelves and Drawers
Interior organization is key to a functional cabinet.
- Install adjustable shelves using shelf supports or build fixed shelves directly into the cabinet box.
- Build drawers using dovetail joints or other suitable joinery methods. Install drawer slides for smooth operation.
- Consider adding drawer organizers or dividers for efficient storage of smaller items.
Installation of the Cabinet
Proper installation ensures the cabinet's stability and longevity.
- Position the cabinet in the corner, ensuring it is level and plumb. Use shims as needed to achieve perfect alignment.
- Secure the cabinet to the wall studs using screws. Use long screws for a secure connection.
- Fill any gaps between the cabinet and the walls with caulk for a seamless finish.
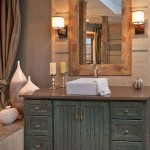
Finishing Touches
The finishing process enhances the cabinet’s appearance and protects the materials.
- Sand all surfaces smooth, paying attention to any rough edges or imperfections.
- Apply primer to prepare the surfaces for paint or stain. Use a primer suitable for the chosen finish.
- Paint or stain the cabinet according to the desired aesthetic. Apply multiple coats for a durable and even finish.
- Install hardware, including handles, knobs, and any other decorative elements.
Trimming and Molding (Optional)
Adding trim and molding can elevate the built-in cabinet’s appearance.
- Install crown molding at the top of the cabinet to create a seamless transition to the ceiling.
- Add baseboard molding at the bottom of the cabinet to conceal any gaps and enhance the visual appeal.
- Consider adding other decorative moldings or trim pieces to complement the cabinet style.

Diy Corner Cabinet For Dining Room Tutorial Thrifty And Chic

How To Build A Blind Corner Cabinet With Built In Drawers

Diy Corner Cabinet With No Wasted Space Sawdust Girl

Diy Corner Cabinet With No Wasted Space Sawdust Girl

Corner Cupboard Ana White

Diy Corner Cabinet With No Wasted Space Sawdust Girl

How To Build A Blind Corner Cabinet With Built In Drawers

Diy Corner Cabinet For Dining Room Tutorial Thrifty And Chic

How To Build A Custom Diy Built In Cabinet Angela Marie Made

Built In Corner Bookshelf With Open Diy Handcrafted By Jason Cooper
Related Posts