How To Bleach Honey Oak Cabinets: A Comprehensive Guide
Honey oak cabinets, a hallmark of rustic charm, can sometimes fall out of vogue leaving homeowners yearning for a more modern aesthetic. Fortunately, you can achieve this transformation without replacing your existing cabinetry by bleaching them. This comprehensive guide will provide you with all the essential steps to bleach honey oak cabinets safely and effectively, leaving you with a refreshed and updated look.
Materials Required:
- Wood bleach specifically formulated for oak
- Gloves
- Safety glasses
- Paintbrush or foam brush
- Clean cloths or rags
- Neutralizing solution (optional)
- Clear polyurethane finish
Safety Precautions:
Wood bleach contains harsh chemicals that can irritate the skin and eyes. Therefore, it is crucial to take the following safety precautions:
- Wear gloves and safety glasses throughout the process.
- Work in a well-ventilated area to prevent inhaling harmful fumes.
- Keep bleach away from children and pets.
Steps:
1. Preparation:
Remove all hardware, hinges, and doors from the cabinets. Clean the cabinets thoroughly with a mild detergent solution to remove any dirt or debris.
2. Apply Bleach:
Apply the wood bleach evenly to the cabinets using a paintbrush or foam brush. Start with a thin coat and gradually add more if necessary. Ensure that the bleach covers the entire surface area.
3. Allow Time:
Let the bleach sit for the amount of time specified in the manufacturer's instructions. The time will vary depending on the desired level of bleaching.
4. Neutralize (Optional):
To stop the bleaching process, neutralize the bleach by applying a neutralizing solution. Follow the manufacturer's guidelines for mixing and applying the solution.
5. Rinse:
Rinse the cabinets thoroughly with clean water to remove any remaining bleach or neutralizing solution. Wipe down with clean cloths to remove excess moisture.
6. Dry:
Allow the cabinets to dry completely before applying any finishes. You can speed up the drying process using a fan or hair dryer.
7. Finish:
To protect the bleached cabinets, apply a clear polyurethane finish. This will enhance the durability and resistance to wear and tear.
Tips:
- Test the bleach on an inconspicuous area first to ensure compatibility with your cabinets.
- Use a light sanding block to remove any imperfections or raised grain after bleaching.
- Apply multiple thin coats of polyurethane finish to build up a protective layer.
- If desired, you can add a stain or paint over the bleached cabinets to achieve a custom look.
Conclusion:
Bleaching honey oak cabinets can effectively transform their appearance, giving them a fresh and modern look. By following these steps and taking the necessary safety precautions, you can achieve professional-looking results without the expense of replacing your cabinets.

How To Bleach Cabinets Decorate With Tip And More

How To Bleach Cabinets Decorate With Tip And More

How To Get A Rustic Bleached Wood Finish House Mix

How To Change Orange Oak Wood Furniture Into Whitewashed In 3 Steps

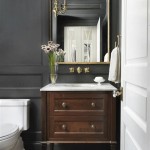
How To Lighten Stained Wood 7 Options That Work Grace In My Space

How To Get A Rustic Bleached Wood Finish House Mix

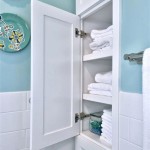
Pin By Magdalena Cazarez On Bathroom Reno Honey Oak Cabinets Home Remodeling Diy

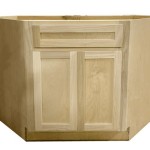
Wood Bleached Cabinet Hometalk

How To Lighten Stained Wood 7 Options That Work Grace In My Space

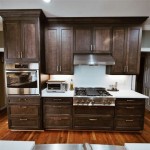
Dated Oak Cabinets Once Again
Related Posts