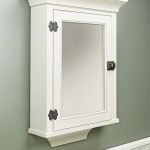
Molding can be used to add a touch of class to any room in the house, and cabinet doors are no exception. Installing molding on cabinet doors can create a more customized look, adding definition and elegance to your kitchen or bathroom. The process of adding molding to cabinet doors is relatively simple, and can be done in a few steps.
First, measure the cabinet doors to determine the length and width of the molding needed. You will also need to decide what type of molding you want to use. There are a variety of options available, from traditional wood moldings to more modern, decorative options. Once you have chosen the molding, cut it to the desired length and width.
Next, use a drill to create pilot holes in the cabinet doors where the molding will be attached. Make sure the holes are slightly larger than the screws you will use to attach the molding. Once the pilot holes are drilled, attach the molding to the cabinet doors using the screws. Make sure the screws are tightened securely.
After the molding is attached, use a bit of wood putty to fill in any gaps between the molding and the cabinet doors. This will create a seamless look, and will also help to keep the molding securely in place. Once the wood putty has dried, you can paint or stain the molding to match the rest of the room. If desired, you can also apply a sealant to protect the molding from wear and tear.
Adding molding to cabinet doors is an easy and affordable way to give any room in the house an elegant and customized look. With the right tools and materials, it can be done in just a few steps. Whether you choose traditional wood molding or something more modern and decorative, the end result will be a beautiful addition to your cabinets.


Related Posts


