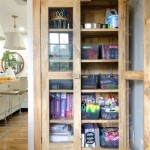
Creating the Ultimate DIY Garage Cabinets with Doors and Shelves
Transform your garage into an organized haven with custom-built DIY garage cabinets. Whether you're a seasoned DIY enthusiast or a novice seeking a practical storage solution, this comprehensive guide will empower you to create functional and aesthetically pleasing cabinets that meet your specific needs.
Materials and Tools You'll Need
- Plywood (3/4-inch to 1-inch thickness)
- Pine or MDF for doors and shelves
- Cabinet hardware (hinges, handles, screws)
- Wood screws and nails
- Circular saw or miter saw
- Drill/driver
- Clamps
- Level
- Tape measure
- Sandpaper or sanding sponge
- Paint or stain (optional)
Step 1: Planning and Design
Determine the desired dimensions and layout of your cabinets. Consider the available space in your garage, the storage needs you have, and the height at which you want the cabinets to be mounted.
Make a detailed sketch or blueprint to visualize the design and ensure accurate measurements. Mark the locations of doors, shelves, and any other features.
Step 2: Cutting the Pieces
Use a circular saw or miter saw to cut the plywood into the required shapes and sizes for the cabinet carcass. Cut the doors and shelves from pine or MDF.
Ensure all cuts are precise and square to achieve a professional-looking finish. Sand any rough edges or splinters.
Step 3: Assembling the Carcass
Start by attaching the sides of the carcass to the back panel using wood screws or nails. Countersink the screws to ensure a flush surface.
Next, attach the top and bottom panels to complete the carcass. Use clamps to hold the pieces securely while driving the screws.
Step 4: Building the Doors
Assemble the door frames using mitered joints. Glue and clamp the corners, then reinforce them with wood screws.
Attach the door panels to the frames using wood screws. Countersink the screws and fill the holes with wood filler.
Step 5: Installing the Doors and Shelves
Mount the hinges on the doors and the door frames. Ensure the doors swing smoothly and without any obstruction.
Install the shelves by placing them on the supports within the cabinet carcass. Adjust the shelves to the desired height and secure them with shelf pins or screws.
Step 6: Finishing Touches
Sand the entire cabinet, including the doors and shelves, to smooth any rough edges or imperfections.
Paint or stain the cabinet to match the decor of your garage. Apply multiple coats, allowing each coat to dry thoroughly before applying the next.
Add handles or knobs to the doors for a convenient and stylish touch. Ensure the hardware is appropriate for the weight and size of the doors.
Conclusion
Congratulations, you have successfully created your own DIY garage cabinets with doors and shelves! Not only will these cabinets provide ample storage space for your tools, equipment, and other garage essentials, but they will also enhance the aesthetic appeal of your workspace.
With proper care and maintenance, these durable and functional cabinets will serve you well for years to come.

5 Garage Cabinets For Ultimate Diy Storage
Diy Garage Shelves Modern Builds

How To Build Oversized Garage Storage Cabinets

How To Build A Giant Diy Garage Cabinet Family Handyman

Diy Garage Cabinets How To Build

Diy Garage Cabinets And Miter Saw Station Jenna Sue Design

Diy Garage Storage Shelf Workbench Solution

Garage Cabinets Diy Wooden Storage Install Guide

5 Diy Garage Cabinets Modular Storage System Fixthisbuildthat
:max_bytes(150000):strip_icc()/Garage-storage-units-705e1388ed354599addde39f024c00a6.jpg?strip=all)
52 Diy Garage Storage Ideas To Stay On Top Of The Clutter
Related Posts

