Creating Storage Space with a Decorative Cabinet in Revit Family
Revit, a powerful Building Information Modeling (BIM) software, empowers architects and designers to create detailed and coordinated building models. Within this software, families are essential building blocks, representing repetitive elements like doors, windows, and furniture. One particularly versatile family type is the decorative cabinet, which provides a unique opportunity to blend storage functionality with aesthetic appeal. This article explores the process of creating a decorative cabinet family in Revit, enhancing both storage solutions and interior design within a project.
Defining the Cabinet's Geometry and Parameters
The foundation of any successful Revit family is a meticulously defined geometry. For a decorative cabinet, this involves establishing the cabinet's overall dimensions, internal compartments, and any decorative elements. Here's a step-by-step breakdown of the process:
- Create a New Family: Begin by opening Revit and navigating to the "New" tab. Select "Family" and choose the "Generic Model" template. This template provides a blank canvas for creating the cabinet.
- Sketch the Cabinet's Outline: Utilize the "Line" tool to sketch the cabinet's outer frame. This outline should accurately reflect the desired dimensions and overall shape. Ensure the sketch is closed and properly aligned using the "Snap" and "Align" tools.
- Define Internal Compartments: Within the cabinet's outline, sketch the internal compartments. These could include shelves, drawers, or any other desired storage elements. Use the "Extrude" tool to give these compartments depth.
- Add Decorative Elements: Revit's modeling tools enable the addition of decorative features like moldings, carvings, or intricate panel designs to enhance the cabinet's visual appeal. These elements can be created separately and then inserted into the cabinet's geometry.
- Create Parameters: Parameters are crucial for controlling the cabinet's dimensions and appearance. In the "Properties" palette, add parameters for width, height, depth, and any other customizable features. These parameters will allow for easy adjustment of the cabinet's size and configuration within the project.
Assigning Materials and Textures
Materials and textures play a vital role in determining the visual impact of the decorative cabinet. Revit offers a wide range of materials and textures to choose from, allowing for realistic representation of different finishes:
- Apply Materials: Select the cabinet's surfaces and access the "Materials" palette. Choose from the available library of materials or create custom materials to achieve the desired finish. This could include wood veneers, painted surfaces, or metallic finishes.
- Assign Textures: Textures add depth and realism to the cabinet's surfaces. Access the "Texture" tab within the "Materials" palette and choose from various texture options. These textures can simulate wood grains, marble patterns, or other surface details.
- Control Material Properties: Materials in Revit can be customized with properties like reflectivity, transparency, and roughness. Adjust these properties to fine-tune the visual appearance of the cabinet and create a visually compelling representation.
Adding Doors and Hardware
Doors and hardware are essential components of the decorative cabinet, enhancing both functionality and aesthetic appeal. Revit provides tools to create doors, assign them to the cabinet, and add realistic hardware:
- Create Door Geometry: Sketch the door's outline and use the "Extrude" tool to create a three-dimensional representation. Ensure the door's dimensions and style align with the cabinet's overall design.
- Assign Door to Cabinet: Link the door to the cabinet by using the "Door" tool within the "Insert" tab. The door will automatically become associated with the cabinet and respond to its movements.
- Add Hardware: Employ the "Generic Model" family category or load specialized hardware families to include handles, hinges, and other hardware components. Place these elements on the doors or cabinet surfaces to complete the design.
By following these steps, Revit users can craft decorative cabinet families that enhance both storage functionality and design aesthetic within their projects. These families can be reused throughout the project, ensuring consistency and simplifying the design process. This meticulous attention to detail and the ability to customize parameters and materials empower designers to create unique and visually appealing storage solutions that seamlessly integrate into the surrounding environment.

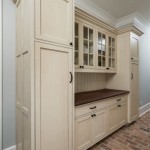
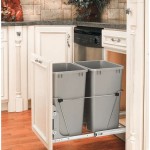
Revit Families Bim Objects Of Cabinets And Storage Free

Cabinet Storage In Revit Free 184 00 Kb Library

Revit Families Bim Objects Of Cabinets And Storage Free

Revit Families Bim Objects Of Cabinets And Storage Free

Entryway Storage Set Parametric Revit Family 3d Model

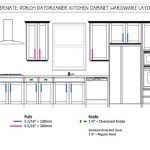
Revit Cabinetry Rccs 26 Pro New Features Adding Lattice
.png?strip=all "Revit Families Bim Objects Of Cabinets And Storage Free")
Revit Families Bim Objects Of Cabinets And Storage Free

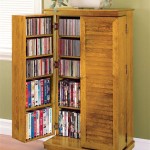
Media Cabinet Revit Family File

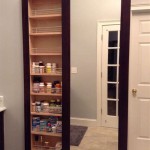
Parametric Entryway Closet And Shoe Rack Revit Family 3d Model

Parametric Entryway Closet And Shoe Rack Revit Family 3d Model
Related Posts