Create A Unique Look With Perforated Cabinet Doors in Revit
Perforated cabinet doors are a versatile architectural design element that introduces visual interest and functionality to any space. Whether used in kitchens, bathrooms, or commercial settings, these doors can elevate the aesthetics while providing practical advantages. Using Revit, the popular BIM software, designers can seamlessly incorporate perforated cabinet doors into their projects, creating compelling and unique designs. This article will guide you through the process of modelling perforated cabinet doors in Revit, highlighting key features and techniques for achieving a seamless integration.
1. Modeling Perforated Cabinet Doors in Revit
Revit provides powerful tools for creating detailed and accurate representations of architectural elements. When modeling perforated cabinet doors, the process begins with the creation of a base cabinet door geometry. Utilize the "Wall" tool in Revit to create the basic outline of the door. The "Sweep" tool can be used to create the desired shape of the door, whether it's a simple rectangle or a more intricate design. Once the basic door frame is established, you can start adding the perforated details.
There are two primary methods for creating perforations: using "Revit Families" or employing "Mass" geometry. Creating custom families allows for more control and flexibility in modifying the perforations, while "Mass" geometry provides a faster and simpler approach.
For creating families, use the "Family Editor" to create a new door family that includes the desired perforation pattern. You can utilize the "Array" tool to create repetitive patterns of holes, or use "Sketch" to draw custom perforation designs. The "Profile" tool can be used to define the shape of the holes, allowing for a wide range of options, from simple circles to intricate shapes. The "Extrude" tool can be used to create the depth of the perforations. This method allows for fine-tuning the size, shape, and spacing of the perforations, ensuring alignment with the overall design aesthetic.
Alternatively, "Mass" geometry can be used to create perforations in a more streamlined process. First, create a "Mass" object, a solid 3D representation, that reflects the shape of the perforations. Use the "Subtract" command to remove the desired shape from the cabinet door. This technique is ideal for creating simple perforation patterns and provides flexibility for quick adjustments.
2. Materials and Finishes
Choosing the right materials and finishes for perforated cabinet doors plays a crucial role in the overall look and feel of the design. There's a variety of materials suitable for perforated cabinet doors, including wood, metal, glass, and acrylic. The choice depends on the desired aesthetics, durability, and functionality. For a modern look, consider using metal with a powder-coated finish for durability and color options, or glass for a sleek and contemporary feel. For a more traditional style, wood with a stain or paint finish delivers warmth and a classic look.
Revit allows you to apply materials and finishes to your model, accurately representing the chosen material's appearance and texture. The "Materials" palette provides a wide range of pre-defined materials, or you can create custom materials to perfectly match your specific selections. This helps visualize the final design and allows you to experiment with different material combinations until you achieve the desired look.
3. Lighting and Rendering
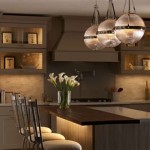
Lighting plays a vital role in highlighting the visual appeal of perforated cabinet doors. Properly illuminating the doors can emphasize the intricate details and create a sense of depth and dimension. As you work in Revit, use the provided "Lighting" tools to create the desired lighting environment. Experiment with various light types, from ambient lighting to spotlights, to emphasize the perforations and create the desired mood and ambiance.
When rendering the model, utilizing high-quality rendering software can enhance the visual impact of the perforated cabinet doors. Revit's rendering capabilities allow you to create photorealistic representations of the final design, showcasing the intricate details and the interaction of light with the perforations. In addition to standard rendering options, tools like "Ray Tracing" can create even more realistic and detailed images. Through careful attention to lighting and rendering, designers can create stunning visuals that truly bring the perforated cabinet doors to life.

How To Make Perforated Metal Steel In Revit Facade Design

How To Make Perforated Metal Steel In Revit Facade Design

Rd073 How To Make Parametric Perforated Plate Or Panel In Revit

How To Make Perforated Metal Steel In Revit Facade Design

Solved Need Some Metallic Perforated Panels Autodesk Community

Multi Colored Perforated Panels In Curtain System Parametric Autodesk Community

Solved Need Some Metallic Perforated Panels Autodesk Community

Solved Perforated Curtain Wall Panels Autodesk Community

Bahn Black Sliding Door Cabinet

Solved Perforated Curtain Wall Panels Autodesk Community
Related Posts

