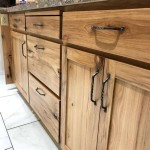
Can You Paint Over Previously Painted Cabinets? A Comprehensive Guide
Painting kitchen, bathroom, or any other cabinets offers a cost-effective way to renovate a space without fully replacing the existing cabinetry. However, embarking on this project raises a common question: can you successfully paint over cabinets that have already been painted? The answer is generally yes, but achieving a durable and aesthetically pleasing finish requires careful preparation, proper techniques, and the right materials.
Skipping essential steps can lead to peeling, chipping, or an uneven finish, ultimately undermining the effort invested. This article provides a detailed guide to successfully painting over previously painted cabinets, covering crucial aspects from assessment to the final coat.
Assessing the Existing Paint and Cabinet Condition
Before even considering paint colors, a thorough assessment of the existing painted surface and the cabinet structure is paramount. This evaluation will dictate the preparation process and the types of materials needed. The first step is to visually inspect each cabinet door and frame. Look for signs of damage such as scratches, dents, chips, water stains, or peeling paint. These issues need to be addressed before any further work is done.
Pay close attention to areas around handles, knobs, and hinges, as these are high-touch areas prone to wear and tear. Water damage is especially critical to identify as it can indicate underlying problems with the cabinet material itself. If the cabinets are made of wood, check for signs of rot or warping. For laminate or thermofoil cabinets, look for delamination, where the surface layer is separating from the core.
Next, consider the type of paint currently on the cabinets. Identifying the existing paint type, either oil-based or latex, is crucial because it affects the type of primer and paint needed for optimal adhesion. A simple test involves rubbing a small area of the painted surface with a cloth soaked in denatured alcohol. If the paint softens or comes off, it is likely latex. If it remains unaffected, it is likely oil-based. This test should be performed in an inconspicuous area, preferably on the inside of a cabinet door.
The condition of the existing paint job will also influence the preparation process. If the paint is in good condition, with minimal imperfections, a light sanding and priming might suffice. However, if the paint is peeling, cracking, or excessively glossy, more extensive preparation, such as complete stripping, may be required to ensure proper adhesion of the new paint.
Preparing the Cabinets for Painting
Preparation is the most critical aspect of painting previously painted cabinets. Rushing this stage can result in a substandard finish that will not last. The goal is to create a clean, smooth, and slightly roughened surface that allows the new paint to bond effectively.
Begin by removing all cabinet doors and drawers. Label each door and drawer with its corresponding cabinet opening. This step will prevent confusion during reassembly. Remove all hardware, including knobs, handles, hinges, and any other decorative elements. Store these items in a safe place to avoid loss or damage.
Next, thoroughly clean the cabinets with a degreasing cleaner. Kitchen cabinets, in particular, tend to accumulate grease and grime over time, which can interfere with paint adhesion. Use a strong cleaner specifically designed for removing grease and follow the manufacturer's instructions. Rinse the cabinets thoroughly with clean water and allow them to dry completely.
Once the cabinets are clean and dry, it is time to sand them. Sanding creates a textured surface that provides a better grip for the primer and paint. For cabinets with a glossy finish, use a medium-grit sandpaper (around 120-grit) to dull the surface. For cabinets with a matte finish, a finer-grit sandpaper (around 220-grit) may be sufficient. Sand evenly, paying attention to edges and corners. After sanding, remove all sanding dust with a tack cloth or a damp cloth. Ensure the surface is completely clean before proceeding to the next step.
For cabinets with significant imperfections such as dents, scratches, or chips, fill these areas with wood filler or spackle. Allow the filler to dry completely according to the manufacturer's instructions, and then sand it smooth to blend it seamlessly with the surrounding surface. Re-clean the area to remove any remaining dust.
Finally, masking is essential to protect surrounding surfaces from paint splatters. Use painter's tape to mask off walls, countertops, floors, and any other areas that you do not want to paint. Cover large areas with drop cloths to prevent paint from dripping onto the floor.
Selecting the Right Primer and Paint
Choosing the right primer and paint is just as important as the preparation process. The primer acts as a bonding agent between the existing surface and the new paint, ensuring proper adhesion and preventing the old paint from bleeding through. The paint provides the final color and finish, and it needs to be durable enough to withstand daily use and cleaning.
For previously painted cabinets, an adhesion-promoting primer is highly recommended. These primers are specifically formulated to bond to difficult surfaces, such as glossy paints and laminates. They provide a strong foundation for the topcoat and prevent peeling or chipping. Oil-based primers are generally considered more effective at blocking stains and providing better adhesion, but they require more cleanup and emit stronger odors. Latex primers are easier to clean up and have lower VOCs, but they may not be as effective at blocking stains on previously painted surfaces.
When selecting paint, consider the type of finish you want to achieve and the level of durability required. Semi-gloss or gloss paints are generally recommended for cabinets because they are easier to clean and more resistant to moisture and stains. However, they also tend to show imperfections more readily than matte or satin paints. Matte or satin paints can provide a more modern look, but they may not be as durable or easy to clean.
There are several types of paint suitable for cabinets, including latex, oil-based, and alkyd paints. Latex paints are water-based and offer good durability, easy cleanup, and low VOCs. Oil-based paints provide a harder, more durable finish but require more cleanup and emit stronger odors. Alkyd paints are a hybrid of oil-based and latex paints, offering some of the benefits of both. They provide good durability and adhesion, and they are easier to clean up than oil-based paints.
Consider using a paint specifically formulated for cabinets and furniture. These paints are designed to withstand the wear and tear of daily use and are often self-leveling, meaning they create a smooth, even finish with minimal brushstrokes. Read the product labels carefully and choose a primer and paint that are compatible with each other and with the existing painted surface.
Regarding color selection, consider the overall aesthetic of the room and the existing décor. Light colors can make a small kitchen feel larger and brighter, while dark colors can add drama and sophistication. Test paint samples in the space before committing to a final color to ensure it complements the lighting and other elements in the room.
Painting Techniques and Finishing Touches
Once the cabinets are properly prepared and the right primer and paint have been selected, it is time to begin painting. Proper painting techniques are essential for achieving a smooth, even, and professional-looking finish. The choice between using a brush, roller, or sprayer depends on personal preference, the size and complexity of the cabinets, and the desired finish.
If using a brush, choose a high-quality brush with synthetic bristles designed for use with latex or oil-based paints. Load the brush with a moderate amount of paint and apply it in smooth, even strokes, following the grain of the wood. Avoid applying too much paint at once, as this can lead to drips and runs. Work in small sections and feather the edges of each section to blend it seamlessly with the next.
If using a roller, choose a roller with a nap that is appropriate for the type of paint and the texture of the surface. A short-nap roller is best for smooth surfaces, while a longer-nap roller is better for textured surfaces. Load the roller with paint and apply it in a W-pattern, then roll over the area to smooth out the paint and eliminate any roller marks. Overlapping each pass slightly to ensure even coverage is important.
A paint sprayer is often the best option for achieving a professional-looking finish on cabinets, especially those with intricate details or large surfaces. A sprayer applies the paint in a fine mist, resulting in a smooth, even finish with minimal brushstrokes or roller marks. However, using a paint sprayer requires more skill and preparation than using a brush or roller. It is essential to practice on a scrap piece of material before painting the cabinets to get a feel for the sprayer and the paint flow.
Apply the primer in thin, even coats, allowing it to dry completely between coats. Follow the manufacturer's instructions for drying time. Once the primer is dry, lightly sand it with fine-grit sandpaper (around 320-grit) to smooth out any imperfections. Remove the sanding dust with a tack cloth.
Apply the paint in thin, even coats, allowing each coat to dry completely before applying the next. Two coats of paint are typically sufficient for achieving full coverage and a durable finish. Lightly sand the paint between coats with fine-grit sandpaper to remove any imperfections and create a smoother surface for the next coat.
After the final coat of paint is dry, remove the painter's tape carefully to avoid peeling the paint. Inspect the cabinets for any imperfections, such as drips, runs, or missed spots. Touch up these areas with a small brush or a cotton swab.
Allow the paint to cure completely before reattaching the hardware and reinstalling the cabinet doors and drawers. Curing time typically takes several days to a week, depending on the type of paint and the humidity. Handle the cabinets with care during this time to avoid scratching or damaging the paint.
Finally, reattach the hardware and reinstall the cabinet doors and drawers. Ensure that all screws are tight and that the doors and drawers align properly. Clean the cabinets with a mild soap and water solution to remove any fingerprints or smudges.

Avoid These Mistakes How To Paint Cabinets That Are Already Painted Grace In My Space

How To Repaint Kitchen Cabinets Painted By Kayla Payne

Do It Yourself Divas Diy How To Paint Over Red Painted Cabinets Walls

How To Paint Kitchen Cabinets A Step By Guide Confessions Of Serial Do It Yourselfer

Painted Kitchen Cabinets One Year Later The Palette Muse

The Right Way To Paint Your Kitchen Cabinets And Save Factory Finish Guaranteed Emily Henderson

How To Paint Your Kitchen Cabinets Without Losing Mind The Kim Six Fix

How To Repaint Kitchen Cabinets Painted By Kayla Payne

Why I Repainted My Chalk Painted Cabinets Sincerely Sara D Home Decor Diy Projects

Tips Tricks To Paint Honey Oak Kitchen Cabinets Cottage Living And Style
Related Posts

