Can You Make Your Own Kitchen Cabinet Doors From Scratch?
Kitchen cabinet doors are a significant visual element of any kitchen. Replacing them can dramatically alter the aesthetic appeal of the space without undertaking a full kitchen renovation. While purchasing new cabinet doors is a common solution, crafting them from scratch presents a viable alternative, offering customization options and potentially cost savings. This article explores the feasibility of creating kitchen cabinet doors from scratch, considering the necessary skills, tools, materials, and techniques involved.
The decision to embark on a DIY kitchen cabinet door project depends largely on several factors. Skill level, available time, access to tools and materials, and the desired quality and aesthetic of the finished product all play crucial roles. Those with prior woodworking experience will find the process more manageable, while novices may encounter a steeper learning curve. The cost-effectiveness of the project also warrants careful consideration, as material expenses and tool purchases can potentially offset the savings compared to purchasing pre-made doors.
Assessing Your Skills and Resources
Before initiating a DIY cabinet door project, it is essential to honestly evaluate your woodworking skills. Experience with measuring accurately, cutting precisely, joining wood securely, and applying finishes evenly is highly beneficial. Familiarity with various woodworking tools, such as table saws, routers, sanders, and drills, is also crucial. If you lack proficiency in these areas, consider taking introductory woodworking classes or practicing on smaller projects before tackling cabinet doors.
Beyond skills, access to the appropriate tools and a suitable workspace is equally important. A well-equipped workshop will significantly streamline the process and improve the quality of the finished product. Essential tools include a table saw for cutting lumber to size, a router for shaping edges and creating profiles, a sander for smoothing surfaces, a drill for installing hardware, and clamps for holding pieces together during assembly. A dedicated workspace provides ample room for maneuvering and allows for efficient workflow organization.
Furthermore, consider the time commitment required for such a project. Creating cabinet doors from scratch is a labor-intensive process that involves multiple steps, each requiring meticulous attention to detail. Depending on the number of doors needed and the complexity of the design, the project could span several days or even weeks. Evaluate your schedule and ensure you have sufficient time to dedicate to the project without compromising other commitments.
Selecting Materials and Planning the Design
The choice of materials will significantly impact the appearance, durability, and cost of the cabinet doors. Solid wood, plywood, and medium-density fiberboard (MDF) are common options, each offering distinct advantages and disadvantages. Solid wood provides a natural aesthetic and can be easily stained or painted, but it is also the most expensive and susceptible to warping or cracking. Plywood offers a more stable and cost-effective alternative, but it may require edge banding to conceal the layered construction. MDF is a smooth, uniform material that is ideal for painting, but it is less durable than solid wood or plywood and requires careful handling to prevent damage.
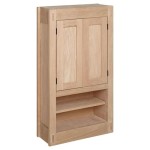
Carefully plan the design of the cabinet doors before commencing the construction process. Consider the overall style of the kitchen and choose a door design that complements the existing aesthetic. Common door styles include flat panel, raised panel, shaker, and slab. Once you have decided on a style, create detailed drawings or use CAD software to generate precise dimensions and cut lists. Accurate measurements are crucial for ensuring that the doors fit properly and function smoothly.
When planning the design, consider the hardware that will be used, such as hinges and knobs or pulls. Select hardware that complements the style of the doors and provides reliable functionality. Ensure that the chosen hardware is compatible with the thickness and material of the doors. For example, heavy solid wood doors may require sturdier hinges than lightweight MDF doors. Account for the dimensions and mounting requirements of the hardware when determining the overall dimensions of the doors.
The Construction Process: Step-by-Step
The construction process typically involves several distinct steps, each requiring careful attention to detail. The steps outlined below provide a general overview of the process, but specific techniques may vary depending on the chosen design and materials.
1. Cutting the Lumber: Use a table saw to cut the lumber to the required dimensions, following the cut list generated during the planning phase. Ensure that all cuts are square and accurate to prevent alignment issues during assembly. If using plywood, use a sharp blade and score the surface before cutting to minimize splintering.
2. Shaping the Edges (Optional): If the design includes shaped edges, use a router with the appropriate bit to create the desired profile. Practice on scrap wood first to ensure that the bit is properly set and the cut is clean. Use a router table for greater control and accuracy.
3. Assembling the Door Frame: Join the frame pieces using wood glue and clamps. Ensure that the frame is square and the joints are tight. You can reinforce the joints with screws or dowels for added strength. Allow the glue to dry completely before proceeding to the next step.
4. Installing the Panel (If Applicable): If the design includes a panel, insert it into the frame. For flat panel doors, the panel may be glued and screwed into the frame. For raised panel doors, the panel is typically held in place by the frame using a tongue-and-groove joint. Ensure that the panel is properly centered and secured within the frame.
5. Sanding and Finishing: Sand all surfaces of the door smooth using progressively finer grits of sandpaper. Remove any dust or debris before applying the finish. Apply a primer to seal the wood and provide a smooth surface for the topcoat. Apply several coats of paint or stain, allowing each coat to dry completely before applying the next. Consider using a clear topcoat to protect the finish and enhance its durability.
6. Installing Hardware: Install the hinges and knobs or pulls according to the manufacturer's instructions. Ensure that the hardware is properly aligned and securely fastened. Test the doors to ensure that they open and close smoothly.
Potential Challenges and Considerations
While creating kitchen cabinet doors from scratch can be a rewarding experience, it is important to be aware of the potential challenges involved. Achieving consistent results requires meticulous attention to detail and a high degree of precision. Minor errors in measurement or cutting can lead to alignment issues, which can be difficult to correct.
Another challenge lies in achieving a professional-quality finish. Applying paint or stain evenly and consistently requires practice and skill. Imperfections in the surface preparation or application technique can result in uneven color, brush strokes, or other blemishes. Investing in high-quality finishing products and practicing on scrap wood can help to minimize these issues.
The cost-effectiveness of the project should also be carefully evaluated. While DIY cabinet doors may seem like a cheaper alternative to purchasing pre-made doors, the cost of materials, tools, and finishing supplies can quickly add up. In some cases, purchasing pre-made doors may be more economical, especially if you lack the necessary tools or experience.
Furthermore, consider the time commitment involved. Creating cabinet doors from scratch is a time-consuming process that can disrupt your kitchen routine. If you have limited time, purchasing pre-made doors may be a more practical solution.
Finally, it is essential to prioritize safety when working with woodworking tools. Always wear appropriate safety gear, such as safety glasses, hearing protection, and a dust mask. Follow the manufacturer's instructions for all tools and equipment. Work in a well-ventilated area to avoid inhaling dust or fumes. If you are unsure about any aspect of the process, seek guidance from experienced woodworkers or professionals.

Diy Shaker Cabinet Doors How To Make Your Own For Less Farmhouseish

Diy Shaker Cabinet Doors

Diy Rustic Industrial Cabinet Doors Tutorial Cherished Bliss

Convert Stock Cabinets To Custom With Inset Doors Sincerely Marie Designs

Refresh The Cabinets In Your Home Without Starting From Scratch Angela Rose

Diy Shaker Cabinet Doors How To Make Your Own For Less Farmhouseish

How To Build Your Own Vintage Style Cabinets Daniel Kanter

How To Make Your Own Cabinet Doors Beneath My Heart

How To Diy Build Your Own White Country Kitchen Cabinets

How To Make Your Own Cabinet Doors Beneath My Heart
Related Posts