Breathing New Life Into Your Cabinets With DIY Painting
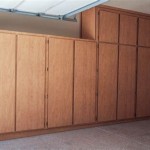
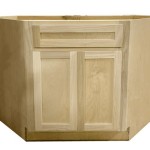
Kitchen and bathroom cabinets, while functional, can often become visually outdated before their structural integrity is compromised. Replacing entire cabinet sets is a substantial investment, making repainting a compelling alternative for homeowners seeking to refresh their living spaces without significant financial burden. DIY cabinet painting offers a cost-effective, aesthetically pleasing, and relatively simple solution to transform the look and feel of existing cabinetry.
The success of a DIY cabinet painting project hinges on thorough preparation, the selection of appropriate materials, and the application of precise painting techniques. Rushing any phase of the process can result in a subpar finish, potentially leading to peeling, chipping, or an uneven appearance. A methodical approach, coupled with attention to detail, is paramount to achieving professional-looking results.
Key Point 1: Meticulous Preparation is the Foundation
Proper preparation is arguably the most crucial element of a successful cabinet painting endeavor. It involves several key steps, each designed to ensure optimal paint adhesion and a flawless final finish. These steps include removing hardware, cleaning the surfaces, sanding, and priming.
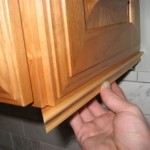
The initial step involves the complete removal of all cabinet hardware, including knobs, pulls, hinges, and any decorative elements. This prevents paint from getting on the hardware, allows for easier sanding, and ensures a clean, professional look. All hardware should be stored in labeled bags to facilitate easy reinstallation later. Consider replacing the existing hardware with new pieces for an even more dramatic transformation.
Once the hardware is removed, the cabinets need to be thoroughly cleaned. Years of accumulated grease, grime, and food splatters can hinder paint adhesion. A degreasing cleaner specifically formulated for kitchen use is ideal. Apply the cleaner according to the manufacturer's instructions, paying particular attention to areas around handles and near stovetops. Rinse the cabinets thoroughly with clean water and allow them to dry completely before proceeding to the next step.
Sanding is essential for creating a receptive surface for the primer and paint. Use a medium-grit sandpaper (around 120-grit) to lightly scuff the existing finish. This process creates microscopic scratches that allow the primer to grip the surface more effectively. For cabinets with a particularly glossy or smooth finish, a coarser grit sandpaper (around 80-grit) may be necessary initially to break down the existing sheen. After the initial sanding, follow up with the medium-grit sandpaper to smooth the surface. Dust thoroughly with a tack cloth after sanding to remove all traces of sanding dust. This ensures a clean and smooth surface for priming.
Priming is a critical step that should not be overlooked. Primer seals the existing surface, provides a uniform base for the paint, and improves paint adhesion. Choose a high-quality primer specifically designed for use on cabinets. Oil-based primers are often recommended for their superior adhesion and stain-blocking properties, especially on wood cabinets. However, they require mineral spirits for cleanup and emit strong odors. Water-based (acrylic) primers are a good alternative, especially for latex paints, offering easier cleanup and lower VOC emissions. Apply the primer evenly using a brush, roller, or sprayer, following the manufacturer's instructions. Allow the primer to dry completely before proceeding to the painting stage. Lightly sand the primed surface with a fine-grit sandpaper (around 220-grit) to remove any imperfections and ensure a smooth finish.
Key Point 2: Selecting the Right Materials for a Durable Finish
The selection of appropriate paint and application tools is fundamental to achieving a durable and aesthetically pleasing finish on cabinets. Choosing the wrong type of paint or using inferior tools can result in a finish that is prone to chipping, peeling, or an uneven appearance. Careful consideration should be given to the type of cabinet material, the desired sheen, and the application method.
For cabinet painting, two primary types of paint are commonly used: latex (water-based) and oil-based. Latex paints are user-friendly, easy to clean up with water, and have lower VOC emissions. They are a good choice for primed surfaces and offer good durability. Oil-based paints provide a harder, more durable finish and are particularly effective at blocking stains and resisting scratches. However, they require mineral spirits for cleanup and emit strong odors. Modern acrylic paints, often labeled as "alkyd-modified acrylics," offer a good compromise, combining the durability of oil-based paints with the ease of use of latex paints. Consider the specific needs of the cabinetry and the desired finish when selecting the paint type. For high-traffic areas, such as kitchen cabinets, a more durable paint, like an alkyd-modified acrylic, is often recommended.
The sheen of the paint also plays a significant role in the overall appearance and durability of the finish. Sheen refers to the amount of light reflected by the painted surface. Higher sheens, such as gloss or semi-gloss, are more durable and easier to clean, making them suitable for kitchen and bathroom cabinets. However, they also tend to highlight imperfections. Lower sheens, such as matte or eggshell, are more forgiving of imperfections but are less durable and harder to clean. A satin or semi-gloss finish is a popular choice for cabinets, offering a good balance of durability, cleanability, and visual appeal. Consider the existing décor and personal preferences when selecting the paint sheen.
The application tools used for cabinet painting can significantly impact the final finish. High-quality brushes and rollers are essential for achieving a smooth and even coat of paint. Use a brush with synthetic bristles for latex paints and a brush with natural bristles for oil-based paints. Choose a brush size appropriate for the size of the cabinet panels. A small, angled brush is ideal for painting corners and edges. Use a low-nap roller for applying paint to larger, flat surfaces. A paint sprayer can also be used to achieve a smooth, professional finish, especially on cabinets with intricate details. However, using a paint sprayer requires practice and proper ventilation.
Key Point 3: Precise Painting Techniques for a Professional Finish
After the cabinets have been properly prepared and the appropriate materials have been selected, the final step is to apply the paint using precise techniques. This involves applying thin, even coats of paint, allowing sufficient drying time between coats, and addressing any imperfections that may arise. Patience and attention to detail are crucial for achieving a professional-looking finish.
Before beginning to paint, protect the surrounding areas with drop cloths and painter's tape. Cover countertops, floors, and appliances to prevent paint splatters. Use painter's tape to mask off any areas that should not be painted, such as walls, backsplashes, or trim. Ensure the tape is firmly adhered to the surface to prevent paint from bleeding underneath.
Apply the paint in thin, even coats. Avoid applying too much paint at once, as this can lead to drips, runs, and an uneven finish. Use a brush to paint corners, edges, and any areas that are difficult to reach with a roller. Use a roller to apply paint to the larger, flat surfaces of the cabinet panels. Roll the paint in smooth, overlapping strokes, maintaining a wet edge to prevent lap marks. If using a paint sprayer, follow the manufacturer's instructions carefully. Apply the paint in thin, even coats, overlapping each pass slightly.
Allow sufficient drying time between coats of paint. Follow the manufacturer's instructions for drying times. Typically, at least 4-6 hours of drying time is required between coats. Applying a second coat of paint before the first coat is completely dry can lead to a soft, sticky finish. Lightly sand the painted surface with a fine-grit sandpaper (around 320-grit) between coats to remove any imperfections and ensure a smooth finish. Dust thoroughly with a tack cloth after sanding.
After the final coat of paint has dried completely, carefully remove the painter's tape. Use a utility knife to score along the edge of the tape before removing it to prevent the paint from peeling off with the tape. Reinstall the cabinet hardware, ensuring that all screws are tightened securely. Inspect the finished cabinets for any imperfections, such as missed spots or drips. Touch up any imperfections with a small brush. Allow the touch-up paint to dry completely before using the cabinets.
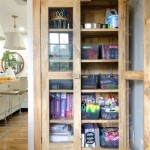
By following these steps and paying attention to detail, homeowners can successfully breathe new life into their cabinets with DIY painting, transforming their living spaces without the expense and disruption of replacing the entire cabinetry. The result is a fresh, updated look that enhances the overall aesthetic appeal of the home.

Refresh The Cabinets In Your Home Without Starting From Scratch Angela Rose

21 Diy Affordable Ways To Redo Kitchen Cabinets Extra Space Storage

How To Make Freshly Painted Cabinets Last Longer

New Bold Beautiful Kitchen Revamp Painted Cabinets Luxe Lighting A Show Stopping Island

Guide To A Cabinet Makeover In Vancouver Kitchen Makeovers

Breathe New Life Into Your 70 S Kitchen Cabinets Without Starting From Scratch Vital Turnaround Furniture Works

Style And Structure A Journey Through Home Organization Baxter Cabinets

21 Diy Affordable Ways To Redo Kitchen Cabinets Extra Space Storage

Kitchen Cabinet Paint Pictures Ideas Tips From

Do I Need A Cabinet Painting Service 10 Questions To Ask
Related Posts