Bleach Honey Oak Cabinets
Honey oak cabinets were a ubiquitous feature in homes built during the late 1980s and 1990s. Their warm, golden hue provided a traditional aesthetic, however, design trends have shifted towards lighter, brighter kitchens. Consequently, many homeowners are looking for ways to update their existing honey oak cabinets without a complete demolition and replacement, a costly and time-consuming endeavor. Bleaching presents one such option.
Key Considerations Before Bleaching Honey Oak Cabinets
Bleaching cabinets is a multi-step process requiring careful planning and execution. Understanding the process and potential challenges is essential for a successful outcome.
1. Wood Type and Finish
The success of bleaching depends heavily on the type of wood and the existing finish. Solid oak tends to bleach more evenly than oak veneer. Furthermore, factory-applied finishes often contain sealants that can hinder the bleaching process. Testing the bleach on an inconspicuous area is crucial to gauge effectiveness and potential color variations.
2. Existing Stains and Damage
Existing stains and damage on the cabinets may not respond uniformly to bleaching. Water stains, in particular, can be exacerbated by the bleaching process, leading to uneven discoloration. Repairing any existing damage before bleaching is recommended.
3. Safety Precautions
Bleaching chemicals are potent and can cause skin irritation and respiratory problems. Adequate ventilation and the use of protective gear, including gloves and eye protection, are imperative. Following manufacturer instructions meticulously is essential for safe and effective use.
The Bleaching Process
The bleaching process involves several steps, each requiring meticulous attention to detail. A methodical approach ensures a professional-looking result.
1. Preparation
Thorough preparation is the cornerstone of successful cabinet bleaching. This involves removing cabinet doors and drawer fronts, as well as all hardware. Cleaning the cabinets with a degreaser removes grease and grime that can interfere with the bleaching process. Lightly sanding the surfaces after cleaning creates a slightly porous surface for better bleach penetration.
2. Applying the Bleach
Two-part wood bleach systems, which typically involve a combination of hydrogen peroxide and sodium hydroxide, are often recommended for oak cabinets. These are more powerful than oxalic acid-based wood bleaches and offer greater lightening potential. Apply the bleach evenly following the manufacturer's instructions, working in the direction of the wood grain.
3. Neutralization
After the bleach has lifted the color to the desired level, a neutralizing solution is applied to stop the bleaching action and restore the wood's pH balance. This step is crucial to prevent further lightening and damage to the wood fibers.
4. Rinsing and Drying
Once neutralized, the cabinets need a thorough rinsing with clean water to remove any residual bleach and neutralizer. Allowing the cabinets to dry completely in a well-ventilated area is essential before applying any new finish.
Post-Bleaching Considerations
After bleaching, the cabinets may require additional steps to achieve the desired final look.
1. Sanding and Refinishing
Light sanding after bleaching smooths the wood fibers and prepares the surface for refinishing. This is the ideal time to address any remaining imperfections. Various finish options exist, including paint, stain, and varnish. Choosing a finish that complements the newly bleached wood is an important design consideration.
2. Dealing with Uneven Bleaching
Despite careful preparation and application, some degree of uneven bleaching can occur, particularly with older cabinets or those with existing damage. Toning, which involves applying a thin layer of pigmented stain, can help blend inconsistencies and create a more uniform appearance. Multiple coats of toner may be required to achieve the desired color.
3. Maintenance
Maintaining bleached cabinets requires attention to cleaning practices. Avoid harsh chemicals and abrasive cleaners, which can damage the finish and discolor the wood. Regular dusting and occasional cleaning with a mild wood cleaner will help preserve the beauty and longevity of the bleached cabinets.
Alternatives to Bleaching
While bleaching offers a transformative option, alternative approaches exist for updating honey oak cabinets.
1. Painting
Painting offers a dramatic change and complete color control. Careful preparation, including sanding and priming, ensures proper paint adhesion.
2. Refacing
Refacing involves applying a thin veneer over the existing cabinet boxes while replacing the cabinet doors and drawer fronts. This provides a fresh look with less disruption than a full remodel.
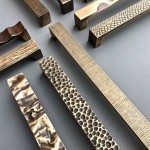
3. Replacing Hardware
Simply changing the hardware can offer a significant update without altering the cabinets themselves. Switching from dated brass knobs to sleek nickel pulls, for instance, can significantly modernize the kitchen's appearance.

How To Bleach Cabinets Decorate With Tip And More

How To Bleach Cabinets Decorate With Tip And More

How To Get A Rustic Bleached Wood Finish House Mix

How To Get A Rustic Bleached Wood Finish House Mix

Image Result For Golden Oak Cabinets Bleaching Высокие кухонные шкафы Декор кухонных шкафов Кухня

Dated Oak Cabinets Once Again

How To Stain Dark Or Yellow Kitchen Cabinets Lighter

How To Lighten Stained Wood 7 Options That Work Grace In My Space

Pin By Magdalena Cazarez On Bathroom Reno Honey Oak Cabinets Home Remodeling Diy

Wood Bleached Cabinet Hometalk
Related Posts