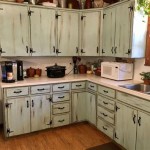
When it comes to giving your kitchen a makeover, one of the simplest, most cost-effective ways is to strip the cabinets. This involves removing the finish so that you can start fresh with a new stain or paint. Stripping cabinets is a labor-intensive job, but it can be done with the right tools and a little patience. In this guide, you will learn how to strip cabinets safely and efficiently, so that you can give your kitchen a new and improved look.
The first step in stripping cabinets is to prepare the area. Make sure the room is well-ventilated by opening windows and turning on fans. Put down drop cloths or newspaper to protect your flooring, and wear protective clothing such as gloves, goggles, and a dust mask. Once the room is ready, you can begin the stripping process.
The best way to strip cabinets is with a chemical stripper. This is available at most hardware stores and is specifically designed to remove finishes from wood. To apply the chemical stripper, use a paintbrush to cover the cabinet doors and frames with an even layer. Let it sit for a few minutes until the finish begins to bubble and lift. Then you can begin scraping the finish off with a plastic putty knife. Work slowly and carefully so that you don’t damage the wood.
When the finish is completely removed, you can use a vacuum cleaner to remove the dust and debris from the cabinets. Then you can use a damp cloth to wipe down the surfaces and remove any remaining stripper. Give the cabinets a few hours to dry before you begin staining or painting. If you plan on repainting, make sure to use a paint that is designed for use on wood.
Stripping cabinets requires some elbow grease, but the results are worth the effort. With a few simple tools and a bit of patience, you can give your kitchen a brand new look. All it takes is a few hours of work and you’ll have cabinets that will last for years to come.


Related Posts

