Painting Over Already Painted Cabinets on Wooden Floors: A Comprehensive Guide
Painting kitchen cabinets represents a significant undertaking that can dramatically alter the aesthetics of a kitchen. The decision to paint over existing paint, particularly when the kitchen features wooden floors, requires careful consideration and meticulous execution to achieve a professional and lasting finish. This article provides a detailed guide to the process, outlining the necessary steps, potential challenges, and crucial considerations for success.
The appeal of repainting cabinets often stems from a desire to update the kitchen's appearance without the expense and disruption of a full remodel. Existing painted cabinets may show signs of wear and tear, exhibit an outdated color, or simply fail to complement a changing design aesthetic. Wooden floors, while durable and attractive, can present a specific challenge when painting cabinets, as protecting the floors from paint splatters and damage becomes a primary concern.
Assessing the Existing Cabinet Condition
Before embarking on the painting project, a thorough assessment of the existing cabinets is essential. This assessment helps determine the necessary preparation steps and identifies any potential issues that need to be addressed. The following aspects should be carefully evaluated:
Paint Condition: Examine the existing paint for signs of cracking, peeling, chipping, or bubbling. Severely damaged paint will require more extensive preparation, possibly including stripping or sanding to create a smooth, even surface. Areas affected by moisture damage also warrant attention. Failure to address these issues can result in the new paint failing prematurely.
Cabinet Material: Identifying the cabinet material is crucial for selecting the appropriate primer and paint. Common cabinet materials include solid wood, wood veneer, MDF (Medium-Density Fiberboard), and laminate. Each material reacts differently to paint and requires specific preparation techniques. For example, laminate cabinets require a specialized bonding primer to ensure proper adhesion.
Hardware Condition: Evaluate the condition of the cabinet hardware, including knobs, pulls, hinges, and drawer slides. Decide whether to reuse the existing hardware, replace it with new hardware, or paint it. Replacing hardware can significantly update the cabinet's appearance, while painting existing hardware offers a cost-effective alternative. It is always recommended to remove the hardware before painting the cabinets.
Structural Integrity: Inspect the cabinets for any structural damage, such as loose joints, warped doors, or damaged drawer boxes. Repair any structural issues before painting to ensure a solid foundation for the new finish. Ignoring structural problems can lead to further deterioration and compromise the overall appearance of the painted cabinets.
Preparation: The Foundation for a Successful Paint Job
Proper preparation is the most critical factor in achieving a professional-looking finish when painting over existing paint. Neglecting this stage can lead to adhesion problems, uneven coverage, and a short-lived paint job. The following steps outline the essential preparation process:
Surface Protection: Begin by protecting the surrounding areas, particularly the wooden floors. Cover the floors with drop cloths made of canvas or heavy-duty plastic. Secure the drop cloths with painter's tape to prevent them from shifting and exposing the floors to paint splatters. Additionally, cover countertops, appliances, and any other nearby surfaces to avoid accidental paint contact.
Cabinet Removal: Remove all cabinet doors, drawers, and hardware. This allows for easier access to all surfaces and ensures a more even paint application. Label each door and drawer with its corresponding location to facilitate reinstallation. Store the hardware in a safe place to prevent loss or damage. If removing doors isn’t feasible, protect the surrounding areas very carefully.
Cleaning: Thoroughly clean the cabinet surfaces to remove any dirt, grease, grime, or wax buildup. Use a degreasing cleaner specifically designed for kitchen cabinets. Rinse the cabinets with clean water and allow them to dry completely. Residue from cleaning products can interfere with paint adhesion, so thorough rinsing is essential.
Sanding: Sanding creates a slightly roughened surface that allows the primer and paint to adhere properly. Use a medium-grit sandpaper (120-180 grit) to lightly sand all surfaces of the cabinets. Focus on smoothing out any imperfections or rough spots. After sanding, wipe down the cabinets with a tack cloth to remove any sanding dust. Dust can compromise the paint finish.
Priming: Applying a primer is crucial for achieving a long-lasting and durable finish. Primer helps to block stains, seal porous surfaces, and improve paint adhesion. Choose a high-quality primer specifically designed for the cabinet material. Apply the primer in thin, even coats, using a brush, roller, or sprayer. Allow the primer to dry completely according to the manufacturer's instructions. Multiple coats of primer may be necessary for heavily stained or porous surfaces.
Caulking (Optional): If desired, caulk any gaps or cracks around the cabinet frames or trim to create a seamless appearance. Use a paintable caulk and apply it evenly. Smooth the caulk with a wet finger or a caulking tool. Allow the caulk to dry completely before painting.
Painting: Achieving a Flawless Finish
With the cabinets properly prepared, the painting process can begin. Selecting the right paint and applying it correctly are essential for achieving a professional and durable finish. The following guidelines will help ensure a successful paint job:
Paint Selection: Choose a high-quality paint specifically designed for kitchen cabinets. Options include acrylic latex paint, oil-based paint, and enamel paint. Acrylic latex paint is a popular choice due to its durability, ease of cleaning, and low VOC (Volatile Organic Compounds) content. Oil-based paint provides a harder, more durable finish but requires longer drying times and more stringent cleanup procedures. Enamel paint offers a smooth, glass-like finish and is highly resistant to scratches and stains.
Application Method: Paint can be applied using a brush, roller, or sprayer. A brush is ideal for cutting in edges and painting intricate details. A roller provides a smooth, even finish on larger surfaces. A sprayer offers the most professional-looking finish but requires more skill and experience to operate. For best results, consider using a combination of methods, such as brushing the edges and rolling the larger surfaces.
Paint Application: Apply the paint in thin, even coats, avoiding drips or runs. Allow each coat to dry completely according to the manufacturer's instructions before applying the next coat. Multiple thin coats are preferable to one thick coat, as they result in a smoother, more durable finish. Lightly sand between coats with fine-grit sandpaper (220-grit or higher) to remove any imperfections and create a better surface for the next coat.
Finishing Touches: Once the final coat of paint has dried completely, carefully inspect the cabinets for any imperfections. Touch up any areas as needed. Allow the paint to cure fully for several days or weeks before reinstalling the hardware and reattaching the doors and drawers. This allows the paint to harden and become more resistant to scratches and dings.
Reassembly: Reattach the hardware and reinstall the doors and drawers. Ensure that the doors and drawers align properly and function smoothly. Make any necessary adjustments to the hinges or drawer slides. Clean up any paint splatters or drips on the surrounding surfaces.
Protecting wooden floors is paramount when painting cabinets. Regular inspection of the floor covering is important. Promptly clean any spills or drips to prevent staining or damage. This careful attention will preserve the beauty of the wooden floors while achieving a refreshed kitchen aesthetic through cabinet painting.

Best Practices For Painting Over Painted Cabinets The Morris Mansion

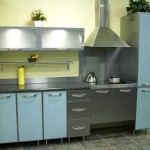
Painted Wood Kitchen Cabinets Before After Photos

Diy Faux Wood Cabinets The Beauty Revival

Painted White Cabinets Before And After Reveal Photos Renovated Faith

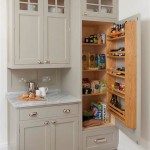
How To Paint Laminate Cabinets Without Sanding The Palette Muse

Questionnaire Is It Better To Paint Or Restain Wood Cabinets

How To Paint Oak Cabinets And Hide The Grain Tutorial

How To Paint Kitchen Cabinets Best Color Ideas Cost

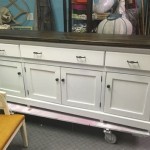
Painted Kitchen Cabinets One Year Later The Palette Muse

Diy Faux Wood Cabinets The Beauty Revival
Related Posts