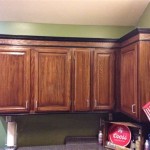
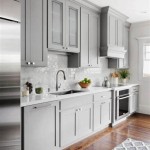
How to Paint Dark Wood Kitchen Cabinets White
Painting dark wood kitchen cabinets white is a transformative project that can dramatically brighten and modernize a kitchen. This undertaking requires careful preparation, diligent execution, and the right materials to achieve a durable and aesthetically pleasing finish. Success hinges on understanding the inherent challenges of covering dark wood with a light color and implementing strategies to overcome them.
The project's scope extends beyond simply applying paint. It encompasses thorough cleaning, meticulous sanding, the application of a high-quality primer, and the selection of a suitable paint formulated for cabinets. Skipping steps or using inferior materials can lead to unsatisfactory results, including peeling, chipping, and the undesirable bleed-through of the dark wood grain.
Key Point 1: Preparation is Paramount
Effective preparation is the cornerstone of a successful cabinet painting project. This phase involves several crucial steps designed to ensure proper adhesion and a smooth, even finish. Neglecting these steps will almost certainly result in premature paint failure and an unprofessional appearance.
Begin by completely removing all cabinet doors and drawers. Label each door and drawer with tape indicating its location. This will greatly simplify the reinstallation process. Remove all hardware, including hinges, knobs, and pulls. Store the hardware in labeled bags to prevent loss and ensure easy identification later.
Thorough cleaning is essential. Use a degreasing cleaner specifically formulated for kitchen surfaces to remove grease, grime, and cooking residue. A mixture of TSP (trisodium phosphate) and water is an effective cleaning solution, but it requires rinsing with clean water to remove any residue. Alternative degreasers are available at most home improvement stores. Ensure the cabinets are completely dry before proceeding to the next step.
Sanding is critical for creating a surface that paint can adhere to. Use a medium-grit sandpaper (120-180 grit) to lightly sand all surfaces that will be painted. The goal is not to remove the existing finish entirely, but to create a slightly roughened surface. Pay particular attention to edges and corners, which are prone to chipping. After sanding, remove all dust with a tack cloth or a vacuum cleaner with a brush attachment. A tack cloth is a sticky cloth specifically designed to pick up fine dust particles.
Addressing imperfections is another important aspect of preparation. Fill any holes, cracks, or dents with wood filler. Allow the wood filler to dry completely according to the manufacturer's instructions. Sand the filled areas smooth with fine-grit sandpaper (220 grit) to blend them seamlessly with the surrounding surface. Remove all dust before proceeding.
Key Point 2: Priming for Success
Priming is an indispensable step when painting dark wood cabinets white. A high-quality primer serves multiple purposes: it blocks stains, prevents bleed-through of the dark wood grain, and provides a uniform surface for the paint to adhere to. Choosing the right primer is as important as choosing the right paint.
An oil-based or shellac-based primer is generally recommended for painting dark wood cabinets. These primers are excellent at blocking stains and preventing tannin bleed-through, a phenomenon where the tannins in the wood migrate through the paint, causing discoloration. Water-based primers are less effective at blocking stains on dark wood.
Apply the primer in thin, even coats using a high-quality paintbrush, roller, or paint sprayer. A paint sprayer can provide a smoother, more uniform finish, but it requires practice and proper ventilation. If using a brush or roller, choose tools designed for use with the type of primer you are using. Allow the primer to dry completely according to the manufacturer's instructions. This is crucial for achieving optimal adhesion and stain blocking.
Sand the primed surfaces lightly with fine-grit sandpaper (220-320 grit) to create an even smoother surface for painting. This step helps to eliminate any imperfections in the primer and ensures a flawless finish. Remove all dust thoroughly before applying the paint.
For particularly dark or heavily grained wood, consider applying two coats of primer. This will provide an extra layer of protection against bleed-through and ensure a more even color coverage. Allow each coat of primer to dry completely before applying the next.
Key Point 3: Painting Techniques and Material Selection
Selecting the right paint and employing proper painting techniques are crucial for achieving a durable and aesthetically pleasing finish. The type of paint, the application method, and the number of coats all contribute to the final outcome.
Choose a high-quality paint specifically formulated for cabinets. Acrylic latex paint is a popular choice due to its durability, ease of application, and low VOC (volatile organic compounds) content. Alkyd paint offers excellent durability and a smooth, hard finish, but it typically has a higher VOC content. Consult with a paint specialist at a local hardware store to determine the best option for your specific needs and preferences.
Apply the paint in thin, even coats using a high-quality paintbrush, roller, or paint sprayer. Multiple thin coats are preferable to one thick coat, as they reduce the risk of drips, runs, and uneven coverage. Allow each coat of paint to dry completely before applying the next. The drying time will vary depending on the type of paint, the humidity, and the temperature.
If using a brush or roller, choose tools designed for use with the type of paint you are using. A high-density foam roller can provide a smooth, even finish with minimal stipple. A high-quality paintbrush with synthetic bristles is ideal for cutting in around edges and corners. Avoid using cheap brushes or rollers, as they can leave behind brush marks or lint.
If using a paint sprayer, thin the paint according to the manufacturer's instructions. Practice spraying on a piece of cardboard or scrap wood to get a feel for the sprayer and adjust the settings as needed. Overlap each pass slightly to ensure even coverage. Wear a respirator to protect yourself from inhaling paint fumes.
Depending on the original color of the cabinets and the desired opacity of the white paint, two or three coats of paint may be necessary to achieve full coverage. Allow each coat to dry completely before applying the next. Sand lightly between coats with fine-grit sandpaper (320-400 grit) to remove any imperfections and create a smooth surface for the next coat.
Once the final coat of paint is dry, consider applying a clear topcoat for added protection and durability. Polyurethane is a popular choice for cabinets due to its resistance to scratches, stains, and moisture. Apply the topcoat in thin, even coats using a brush, roller, or paint sprayer, following the manufacturer's instructions.
Allow the cabinets to cure completely before reinstalling the hardware and reattaching the doors and drawers. Curing time typically takes several days or even weeks, depending on the type of paint and topcoat used. Handle the cabinets carefully during this time to avoid scratching or damaging the finish.
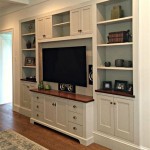
Reinstall the hardware and reattach the doors and drawers, ensuring that they are aligned properly. Adjust the hinges as needed to ensure that the doors open and close smoothly. Clean up any spills or drips with a damp cloth. With proper preparation, careful execution, and the right materials, painting dark wood kitchen cabinets white can transform the look and feel of the kitchen.

How To Paint Kitchen Cabinets White In 5 Days For 150 The Nutritionist Reviews

Painting Dark Kitchen Cabinets White My Weathered Home

How I Transformed My Kitchen With Paint House Mix

Painting White Kitchen Cabinets To Look Like Wood Repainting Makeover

Painting Dark Kitchen Cabinets White My Weathered Home

Painting Our Upper Cabinets White Young House Love

How To Paint Your Cabinets Like The Pros And Get Grain Out Decor

How To Paint Kitchen Cabinets A Step By Guide Confessions Of Serial Do It Yourselfer

Painting Our Upper Cabinets White Young House Love

White Painted Kitchen Cabinet Reveal With Before And After Photos 365 Days Of Slow Cooking Pressure
Related Posts