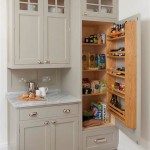
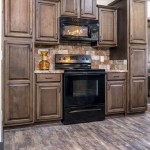
How To Refinish Wood Kitchen Cabinets
Refinishing wood kitchen cabinets is a cost-effective method to revitalize the heart of a residence. Rather than replacing entire cabinet systems, refinishing offers a substantial visual upgrade while preserving the original structure and character. This process involves a series of steps, each crucial to achieving a professional and lasting result. Understanding the necessary preparation, proper techniques for stripping existing finishes, and the application of new coatings are all paramount for a successful cabinet refinishing project.
The undertaking typically requires a commitment of time and effort, demanding meticulous attention to detail and adherence to safety guidelines. However, the payoff is a renewed kitchen aesthetic that aligns with current design preferences, adding value to the home and enhancing the overall living experience.
Assessment and Preparation: The Foundation of a Successful Project
Before embarking on the refinishing process, a thorough assessment of the existing cabinets is necessary. This entails inspecting the wood for damage such as scratches, dents, water stains, or warping. Identifying these issues allows for the formulation of a targeted repair plan. Cabinet hardware, including knobs, pulls, hinges, and latches, should also be evaluated. Decision-making regarding whether to clean, replace, or refinish the hardware should be made prior to beginning the stripping process.
Preparation of the work area is equally important. A well-ventilated space is crucial, particularly when working with chemical strippers and finishes. Covering countertops, flooring, and appliances with drop cloths or plastic sheeting will safeguard against spills and splatters. Adequate lighting is essential to ensure visibility during each stage of the refinishing process. Gather all required materials and tools, including chemical stripper, sandpaper (various grits), a scraper, cleaning solutions, brushes, rags, safety glasses, gloves, and a respirator mask. Organizing these supplies streamlines the workflow and minimizes interruptions.
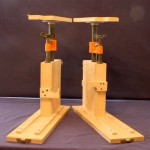
Disassembly of the cabinets is the next critical step. Remove all doors and drawers from the cabinet frames. Label each door and drawer with a corresponding identifier that matches its location on the frame. This practice is fundamental for ensuring proper reassembly. Remove the hardware from the doors and drawers, storing them in labeled containers to prevent loss or mixing of components. With the doors and drawers detached, they can be placed on a stable work surface for stripping and refinishing.
Cleaning the cabinet surfaces is vital for proper adhesion of the stripper. Use a degreasing cleaner to remove any grease, grime, or dirt buildup. This step ensures that the stripper effectively penetrates the existing finish. After cleaning, rinse the surfaces thoroughly with clean water and allow them to dry completely before proceeding to the next phase.
Stripping the Existing Finish: Removing the Old for the New
The selection of a suitable stripping method is paramount. Chemical strippers are a common choice for removing old finishes, as they soften the existing coating, allowing for easy removal. However, they must be used with caution, adhering strictly to the manufacturer's safety guidelines. Another option is sanding, which involves mechanically removing the finish with sandpaper. This method is less harsh but requires more physical effort and can generate significant dust. Heat guns can also be employed to soften the finish, but they require expertise to avoid scorching the wood. The appropriate method depends on the type of existing finish, the condition of the wood, and the user's experience level.
When using a chemical stripper, apply a generous, even coat to the cabinet surfaces, following the manufacturer's instructions for application and dwell time. This allows the stripper to penetrate and soften the existing finish. After the recommended dwell time, use a scraper to remove the softened finish. Work in the direction of the wood grain to avoid damaging the surface. For intricate areas or corners, use a detail scraper or a stiff brush to remove the finish effectively.
After scraping, a second application of chemical stripper may be necessary to remove any remaining finish. Repeat the process as needed until the wood is completely bare. Once the majority of the finish has been removed, use a solvent recommended by the stripper manufacturer to neutralize the surface. This step removes any residual stripper and prepares the wood for sanding. Allow the wood to dry completely before proceeding to the next step.
Sanding is crucial for achieving a smooth, uniform surface. Begin with a coarser grit sandpaper (e.g., 120-grit) to remove any remaining imperfections or finish residue. Progress to finer grits (e.g., 180-grit, then 220-grit) to refine the surface and prepare it for staining or painting. Sand in the direction of the wood grain, using consistent pressure. Avoid applying excessive pressure, which can create uneven surfaces. After sanding, remove all sanding dust with a tack cloth or a vacuum cleaner with a brush attachment. This step is essential for ensuring proper adhesion of the new finish.
Staining or Painting and Finishing: Applying the New Aesthetic
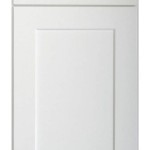
The choice between staining and painting hinges on desired aesthetic and the existing wood grain. If the objective is to highlight the natural grain of the wood, staining is the preferred option. If a solid color or a more contemporary look is desired, painting is the more suitable choice. Regardless of the selected method, it's critical to prepare the wood surface adequately for optimal adhesion and a flawless finish.
Before staining, apply a wood conditioner to the bare wood. This helps to ensure even stain absorption, preventing blotchiness and promoting a consistent color. Follow the manufacturer's instructions for application and drying time. Choose a stain color that complements the kitchen's overall design. Test the stain on an inconspicuous area of the wood to ensure it achieves the desired shade. Apply the stain evenly with a brush, rag, or foam applicator, working in the direction of the wood grain. Allow the stain to penetrate for the recommended time, then wipe away any excess with a clean rag. Multiple coats may be necessary to achieve the desired color intensity.
Before painting, apply a primer to the bare wood. Primer creates a smooth, uniform surface for the paint to adhere to, improving coverage and durability. Choose a primer that is compatible with the type of paint being used. Apply the primer evenly with a brush, roller, or spray gun. Allow the primer to dry completely before applying the paint. Choose a paint color and type that is suitable for kitchen cabinets. Oil-based paints offer superior durability and resistance to moisture, but they require longer drying times and can emit strong odors. Latex or acrylic paints are easier to clean up and have lower VOCs but may not be as durable. Apply the paint evenly with a brush, roller, or spray gun. Multiple coats may be necessary to achieve full coverage and a smooth finish.
After staining or painting, apply a protective topcoat to seal the surface and provide durability. Clear polyurethane is a common choice for wood cabinets, as it provides excellent protection against scratches, water damage, and wear and tear. Apply the topcoat evenly with a brush, spray gun, or wiping cloth, following the manufacturer's instructions for application and drying time. Multiple coats may be necessary to achieve the desired level of protection. Lightly sand between coats with fine-grit sandpaper (e.g., 320-grit) to remove any imperfections and ensure a smooth finish. Allow the final coat to dry completely before reassembling the cabinets.
Once the topcoat is fully cured, carefully reassemble the cabinets. Reattach the hardware to the doors and drawers, ensuring that the screws are tightened securely. Reinstall the doors and drawers onto the cabinet frames, using the previously applied labels as a guide. Adjust the hinges as needed to ensure that the doors and drawers align properly and close smoothly. Inspect the finished cabinets for any imperfections or areas that require touch-up. Make any necessary repairs or adjustments to ensure a professional and lasting result.
Proper ventilation throughout the entire process, from stripping to finishing, cannot be overstressed. Fumes from strippers, stains, and finishes can be harmful and should be minimized. Wearing a respirator mask provides protection against inhaling these fumes, promoting a safe and healthy work environment.

Cabinet Refinishing An 8 Step Guide For Pro Painters Ppc

Cabinet Refinishing Guide

Refinishing Kitchen Cabinets Modern Refacing Made Easy Wisewood

Refinishing Kitchen Cabinets A Beautiful Mess

The Fast Affordable Way To Upgrade Your Kitchen Cabinet Refinishing

How To Refinish Kitchen Cabinets N Hance

How To Refinish Kitchen Cabinets Diy

Staining Your Wood Cabinets Darker Young House Love

Should I Paint Or Refinish My Kitchen Cabinets

The Easy Way To Refinish Kitchen Cabinets
Related Posts