Router Bits for Smoother Shaker Cabinet Doors
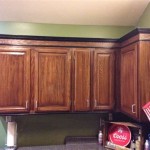
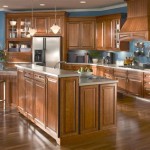
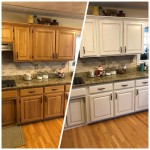
Shaker cabinet doors, characterized by their clean lines and minimalist design, are a staple in both traditional and contemporary kitchens and homes. Achieving a smooth, professional finish on these doors requires not only precision woodworking but also the selection of the right router bits. The choice of router bits directly impacts the quality of the profiles, the smoothness of the surfaces, and the overall appearance of the finished cabinet door. This article explores the various router bits essential for crafting smooth Shaker cabinet doors, focusing on their specific functions and the techniques that ensure optimal results.
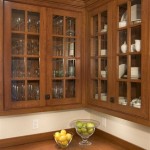
The construction of a Shaker cabinet door typically involves creating a frame consisting of four pieces: two stiles (vertical pieces) and two rails (horizontal pieces). Within this frame, a center panel is fitted, often recessed. The joinery methods commonly used include mortise and tenon, cope and stick, and dowel joints. Each of these construction phases benefits from the application of specialized router bits, maximizing efficiency and minimizing imperfections.
Selecting the Right Stile and Rail Router Bit Set
The stile and rail router bit set is perhaps the most critical for creating the framework of the Shaker cabinet door. These sets typically consist of two bits: one for profiling the cope (end) of the rails and another for profiling the edge of the stiles and the long edge of the rails. The profile created by these bits defines the characteristic inner edge of the Shaker door frame.
When selecting a stile and rail router bit set, it is crucial to consider the following factors: the desired profile, the shank size, and the material being worked. Shaker profiles are generally simple, often featuring a small bead, a slight chamfer, or a gentle round-over. More elaborate profiles can be used, but they deviate from the classic Shaker aesthetic. The shank size, typically ½ inch or ¼ inch, should match the router being used. A ½ inch shank offers greater stability and reduces vibration, especially when working with hardwoods. For softer woods or smaller projects, a ¼ inch shank may be sufficient.
The material of the router bit itself is also paramount. Carbide-tipped bits are highly recommended for their durability and ability to maintain a sharp cutting edge, even when working with abrasive materials like hardwoods and plywood. High-speed steel (HSS) bits are less expensive but dull more quickly and are better suited for softer woods or occasional use.
To achieve a smooth cut, ensure that the router bits are sharp and clean. Dull or dirty bits can cause tear-out, chipping, and a generally rough surface. Regular cleaning with a resin solvent and sharpening as needed will maintain the bit's performance and extend its lifespan. The feed rate, or the speed at which the router is moved across the workpiece, should also be carefully controlled. A feed rate that is too fast can overload the bit and lead to a poor cut, while a feed rate that is too slow can cause burning. Experimentation on scrap material is always advised to determine the optimal feed rate for a given material and router bit.
The alignment of the router table fence is also essential for achieving consistent results. The fence should be perfectly aligned with the router bit to prevent the workpiece from wandering and creating an uneven profile. Featherboards can be used to hold the workpiece firmly against the fence and the table, further enhancing accuracy and safety.
Router Bits for Panel Raising and Smoothing
The center panel of a Shaker cabinet door is often recessed, creating a visually appealing shadow line. The panel can be constructed from solid wood, plywood, or medium-density fiberboard (MDF). Panel-raising router bits are specifically designed to create this recessed profile.
Several types of panel-raising bits are available, each producing a different profile. A traditional raised panel bit creates a beveled edge that fits into the groove in the stile and rail frame. A simpler option is a flat panel bit, which creates a straight edge that fits into the groove. For Shaker doors, a flat panel bit or a very subtle raised panel bit is generally preferred, maintaining the clean, understated aesthetic.
When using a panel-raising bit, it is crucial to take multiple passes, gradually removing material with each pass. This technique minimizes the risk of tear-out and ensures a smoother surface. The depth of each pass should be adjusted based on the material being used and the power of the router. For hardwoods, shallower passes are recommended, while softer woods may allow for deeper cuts.
Back-cutting router bits can address the issue of tear-out. These bits are designed to cut in the opposite direction of the grain, effectively preventing splintering. However, they require careful handling and a firm grip on the workpiece, as they can be more prone to kickback than traditional router bits.
For smoothing the panel after routing, sanding is essential. Start with a coarser grit sandpaper (e.g., 120 grit) to remove any imperfections or router marks, then gradually progress to finer grits (e.g., 220 grit, 320 grit) to achieve a smooth, polished surface. A random orbital sander can be used for efficient and even sanding, but hand sanding may be necessary for intricate areas or delicate profiles.
The choice of panel material also influences the smoothness of the finished product. Solid wood panels can be prone to warping and expansion, especially in humid environments. Plywood and MDF are more stable and resist warping, but they may require additional edge treatment to conceal the layers of the material. Edge banding or veneer can be applied to plywood or MDF panels to create a more finished look.
Ensuring Smooth Joinery and Edge Profiles
The joinery used to assemble the Shaker cabinet door frame also plays a role in achieving a smooth, professional finish. Mortise and tenon joints, cope and stick joints, and dowel joints are all viable options, each with its own advantages and disadvantages.
Mortise and tenon joints are strong and durable, but they require precise cutting and fitting. A mortising machine or a router with a mortising jig can be used to create accurate mortises. The tenons can be cut on a table saw or with a tenoning jig. A well-fitted mortise and tenon joint should be snug but not too tight, allowing for easy assembly without gaps or distortions.
Cope and stick joints are often created using the same stile and rail router bit set used for profiling the door frame. The cope cut, which creates the profile on the end of the rails, must fit perfectly against the stick cut, which creates the profile on the edge of the stiles. Accurate setup and consistent feed rate are essential for achieving a tight, seamless joint.
Dowel joints are a simpler alternative to mortise and tenon joints, but they are generally less strong. Dowel joints are created by drilling holes into the mating pieces and inserting dowels to align and reinforce the joint. A doweling jig ensures accurate and consistent hole placement. The dowels should fit snugly into the holes without being forced, as excessive pressure can split the wood.
Regardless of the joinery method used, careful attention to detail and precise execution are crucial for achieving a smooth, seamless finish. Any gaps or imperfections in the joints will be visible in the finished product and detract from the overall appearance. A high-quality wood glue should be used to bond the joints, and clamps should be applied to hold the pieces together until the glue has fully cured.
After assembly, the edges of the cabinet door can be smoothed and rounded over using a round-over router bit or a chamfer bit. This softens the hard edges and creates a more comfortable and visually appealing profile. The choice of bit and the depth of cut will depend on the desired aesthetic. A small round-over bit can create a subtle, almost imperceptible rounding, while a larger round-over bit will create a more pronounced curve.
Similarly, a chamfer bit can be used to create a beveled edge. The angle of the chamfer can be adjusted to suit the design. A 45-degree chamfer is a common choice, but other angles can also be used to create different effects. As with all routing operations, multiple passes may be necessary to achieve the desired profile, especially when working with hardwoods.
In conclusion, crafting smooth Shaker cabinet doors hinges on the careful selection and application of appropriate router bits. The stile and rail bit set defines the frame's profile, panel-raising bits create the recessed panel, and various edge-profiling bits refine the edges. Proper technique, including consistent feed rates, multiple passes, and sharp, clean bits are critical factors. Sanding plays a pivotal role in achieving a glass-smooth surface, and attention to detail in joinery ensures a seamless, professional finish. A strategic approach to each woodworking process will yield Shaker cabinet doors that exude quality and enduring appeal.

Yonico 12249 Shaker 2 Bit Rail And Stile Router Set 1 Inch Shank

Mlcs Cabinet Door Router Bits Cove Panel Shaker Rail Stile 14536

Yonico 3 Bit Raised Panel Cabinet Door Router Set Bevel 1 2 Shank 12350

Raised Panel Cabinet Door Router Bits Set With Undercutter Mlcs Premium

How To Make A Diy Cabinet Door With The Router Tutorial Free

Yonico Raised Panel Cabinet Door Ogee 1 4 In Shank Carbide Tipped Router Bit Set 3 Piece 12338q

Ams 262 4 Pc Cnc Solid And Insert Carbide Simulated Mdf Shaker Door Router Bit Pack 1 2 Inch Shank

Cabinet Door Router Bits Sets Mlcs

Cnc Router Bits Set Cabinet Door Raised Panel 3 Bit Ogee 1 4 Inch Shank For Wood

Making Doors With Rail Stile Bits Woodsmith
Related Posts