Lighting Up Your Kitchen With LED Under Cabinet Tapes
Kitchen lighting is a crucial aspect of both functionality and aesthetics. Insufficient lighting can make food preparation difficult and hazardous, while overly harsh or poorly placed lighting can detract from the kitchen's ambiance. LED under cabinet tapes offer a versatile and efficient solution for addressing these common lighting challenges. These thin, flexible strips of light-emitting diodes provide targeted illumination precisely where it's most needed, enhancing visibility and adding a touch of modern elegance to any kitchen design.
The popularity of LED under cabinet lighting stems from a range of benefits they offer compared to traditional lighting options. These include energy efficiency, long lifespan, ease of installation, and design versatility. Unlike incandescent or fluorescent bulbs, LEDs consume significantly less power, resulting in lower energy bills and a reduced environmental footprint. Their extended lifespan also minimizes the need for frequent replacements, saving time and resources in the long run. Furthermore, the flexible nature of LED tapes allows for customization and adaptability to various cabinet configurations and kitchen layouts.
Selecting the appropriate LED under cabinet tapes requires careful consideration of several factors. These include brightness, color temperature, power consumption, and the type of adhesive backing. A well-informed decision will ensure optimal performance and longevity of the lighting system. This article will delve into the key considerations involved in selecting, installing, and maintaining LED under cabinet tapes, providing a comprehensive guide to achieving optimal kitchen illumination.
Key Points to Consider Before Buying LED Under Cabinet Tapes:
Before embarking on an LED under cabinet lighting project, it’s essential to carefully assess the needs and preferences to ensure the chosen product meets the desired outcome. Neglecting this pre-planning phase can lead to dissatisfaction and potentially necessitate costly adjustments later on.
Brightness and Lumens: The brightness of LED under cabinet tapes is measured in lumens. Higher lumens indicate a brighter light output. The ideal lumen output will depend on the size of the kitchen, the color of the countertops and cabinets, and the desired level of illumination. For task lighting, such as illuminating a countertop for food prep, a higher lumen output is generally recommended. Conversely, for ambient lighting or accent lighting, a lower lumen output may be sufficient. A good starting point is to aim for around 175-275 lumens per foot of cabinet space. Trial runs are often helpful in determining the precise level of brightness needed. Some LED tape options come with dimming capabilities, which can be advantageous in adjusting the light level to create different moods and accommodate various tasks.
Color Temperature: Color temperature is measured in Kelvins (K) and describes the warmth or coolness of the light emitted. Lower Kelvin values (2700K-3000K) produce a warm, yellowish light, resembling incandescent lighting. This color temperature is often preferred for creating a cozy and inviting atmosphere. Higher Kelvin values (4000K-5000K) produce a cool, white light that resembles natural daylight. This color temperature is ideal for task lighting as it provides better visibility and contrast. Selecting the appropriate color temperature depends on the overall kitchen design and the desired ambiance. It's crucial to maintain consistency in color temperature throughout the kitchen to avoid a jarring or disjointed appearance. Some LED tape models offer adjustable color temperature, allowing for customization based on preference and application.
Power Consumption and Voltage: LED under cabinet tapes typically operate on low voltage, such as 12V or 24V. This requires the use of a power supply or transformer to convert standard household voltage (120V) to the appropriate low voltage. It is essential to choose a power supply that is properly sized to handle the total wattage of the LED tapes. Exceeding the power supply's capacity can lead to overheating and premature failure. Power consumption is usually expressed in watts per foot. Lower wattage indicates greater energy efficiency. When calculating the required power supply capacity, it's prudent to add a safety margin of approximately 20% to account for potential voltage drops and ensure long-term reliability. Always consult the manufacturer's specifications for the recommended power supply and wiring.
Water Resistance (IP Rating): If the LED under cabinet tapes are to be installed near a sink or in an area prone to moisture, it is crucial to select tapes with an appropriate IP (Ingress Protection) rating. The IP rating indicates the level of protection against dust and water. For kitchen applications, an IP rating of IP65 or higher is generally recommended. This rating signifies that the tape is protected against water splashes and jets, making it suitable for use near wet areas. Using non-water-resistant LED tapes in damp environments can lead to corrosion, electrical shorts, and safety hazards.
Adhesive Backing: The quality of the adhesive backing is a critical factor in ensuring the LED under cabinet tapes remain securely attached over time. Low-quality adhesive can fail, causing the tapes to peel off and potentially damage the cabinets. Look for LED tapes with a strong, pressure-sensitive adhesive (PSA) backing. Before installation, thoroughly clean the underside of the cabinets with a degreasing cleaner to remove any dirt, grease, or residue that could interfere with adhesion. Some surfaces, such as unfinished wood, may require priming before applying the LED tapes. For added security, consider using supplemental mounting clips or brackets, especially in areas where the tapes are subject to flexing or strain.
Dimmability: If desired, select LED under cabinet tapes that are compatible with a dimmer switch. Dimmable LEDs allow for adjusting the light level to create different moods and accommodate various tasks. Ensure that the dimmer switch is specifically designed for use with LED lighting, as using a standard incandescent dimmer can damage the LEDs or cause flickering. Dimmable LED tapes usually require a compatible dimmable power supply as well. Check the manufacturer's specifications to verify compatibility and ensure proper functionality.
Installation Tips for LED Under Cabinet Tapes:
Proper installation is crucial for maximizing the performance and lifespan of LED under cabinet tapes. A meticulous approach will not only ensure optimal illumination but also prevent potential problems such as loose connections, uneven lighting, and premature failure.
Planning the Layout: Before beginning the installation process, carefully plan the layout of the LED tapes. Consider the placement of power outlets, switches, and any existing under cabinet wiring. Measure the length of each cabinet run and cut the LED tapes to the appropriate length. Most LED tapes can be cut at designated cutting points, usually marked with scissor symbols. Avoid cutting the tapes in between these points, as this can damage the circuit and prevent the LEDs from lighting up. Plan the routing of the power wires and ensure they are concealed and protected from damage. A well-planned layout will result in a professional-looking and functional lighting system.
Surface Preparation: Thoroughly clean the underside of the cabinets with a degreasing cleaner to remove any dirt, grease, or residue. This is essential for ensuring proper adhesion of the LED tapes. Allow the surface to dry completely before applying the tapes. For unfinished wood or other porous surfaces, consider applying a primer to improve adhesion and prevent the adhesive from being absorbed into the material. Use a clean, lint-free cloth to wipe down the surface and ensure it is free of any contaminants.
Installation Procedure: Peel off the backing from the adhesive strip and carefully apply the LED tape to the underside of the cabinet. Press firmly along the entire length of the tape to ensure good contact with the surface. Avoid stretching or bending the tape excessively, as this can damage the internal circuitry. If necessary, use supplemental mounting clips or brackets to provide additional support, especially in areas where the tape is subject to flexing or strain. Secure the power wires using cable clips or ties to keep them neatly organized and prevent them from dangling. Ensure that the wires are not pinched or damaged during installation.
Connecting the Power Supply: Connect the LED tapes to the power supply according to the manufacturer's instructions. Ensure that the polarity is correct, connecting the positive (+) wire to the positive terminal and the negative (-) wire to the negative terminal. Incorrect polarity can damage the LEDs. Double-check all connections to ensure they are secure and properly insulated. Use wire connectors or solder the wires together for a reliable connection. Conceal the power supply behind a cabinet or in a convenient location where it is easily accessible for maintenance. Test the lighting system to ensure that all the LEDs are functioning correctly before completing the installation.
Maintaining LED Under Cabinet Tapes:
Proper maintenance is crucial for ensuring the longevity and optimal performance of LED under cabinet tapes. Regular cleaning and periodic inspections can help prevent potential problems and extend the lifespan of the lighting system.
Cleaning: Periodically clean the LED tapes with a soft, damp cloth to remove any dust or grease that may accumulate on the surface. Avoid using harsh chemicals or abrasive cleaners, as these can damage the LEDs or the adhesive backing. Gently wipe the tapes in the direction of the LEDs to avoid scratching or damaging them. Ensure that the tapes are completely dry before turning on the power.
Inspections: Regularly inspect the LED tapes for any signs of damage, such as loose connections, cracked or peeling adhesive, or flickering LEDs. If any problems are detected, address them promptly to prevent further damage. Check the power supply for any signs of overheating or malfunction. Replace any damaged or malfunctioning components as needed.
Troubleshooting: If the LED tapes stop working, check the power supply to ensure it is functioning correctly. Verify that the connections are secure and that the polarity is correct. If the LEDs are flickering, check the dimmer switch to ensure it is compatible with LED lighting. If the problem persists, consult a qualified electrician or contact the manufacturer for assistance.
By carefully selecting, installing, and maintaining LED under cabinet tapes, homeowners can enhance the functionality and aesthetics of their kitchens while enjoying the benefits of energy efficiency and long-lasting performance. The flexibility and versatility of these lighting solutions make them an ideal choice for any kitchen remodeling or renovation project.

How To Install Above Cabinet And Under Led Strip Lighting Super Bright Leds

Led Strip Light Installation Tips Armacost Lighting

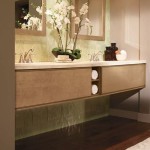
Under Cabinet Led Lighting

Under Cabinet Led Lighting

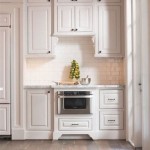
How To Install Led Under Cabinet Lighting

How To Choose And Install Led Strip Lights For Kitchen Cabinets

Strip Lighting Vs Puck Which Is Better For Undercabinet

Under Cabinet Led Lighting

Super Easy Above And Under Kitchen Cabinet Lighting Solution Harbour Breeze Home

The Difference Between Led Strip Lights And Linear Light Bars Super Bright Leds
Related Posts