Transform Your Kitchen Cabinets With Contact Papers
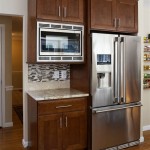
Kitchen cabinets are a significant feature in any home, greatly impacting the overall aesthetic and functionality of the space. Over time, however, these cabinets can become worn, outdated, or simply not reflect your desired style. Fortunately, there is a cost-effective and relatively simple solution to revitalize your kitchen cabinets: contact paper. This versatile material can be applied to existing cabinet surfaces to create a fresh, updated look, without the need for costly and time-consuming renovations.
Choosing the Right Contact Paper
The success of your kitchen cabinet transformation depends heavily on the selection of the right contact paper. The market offers various designs, textures, and materials, catering to different tastes and needs. Here are some key considerations:
- Design: Contact paper is available in a wide range of patterns, from minimalist solids to intricate woodgrains and vibrant prints. Choose a design that complements the overall style of your kitchen and your personal preferences.
- Texture: Consider the texture of the contact paper. Some options offer a smooth finish, while others mimic the look and feel of natural materials like wood or stone. The texture should align with the desired aesthetic and the existing kitchen elements.
- Material: Contact paper is typically made from vinyl or paper. Vinyl contact paper is more durable and water-resistant, making it ideal for high-traffic areas like kitchens. Paper contact paper, while less durable, can be a good choice for areas with less exposure to moisture and wear.
- Adhesive: The adhesive used on contact paper varies in strength. For cabinets, it's advisable to choose a contact paper with a strong adhesive that will ensure a secure and long-lasting bond.
It is also crucial to purchase enough contact paper to cover the entire surface of your cabinets. Measure the area you intend to cover, and add a few extra inches to account for any potential waste during application.
The Application Process
Once you've chosen the ideal contact paper, the next step is careful application. Proper preparation and technique are crucial for a successful and professional-looking finish.
- Clean and Prepare the Surfaces: Thoroughly clean the cabinet surfaces with a mild detergent and water to remove any grease, dirt, or residue. Allow the surfaces to dry completely before proceeding.
- Measure and Cut: Measure each cabinet door or drawer panel and carefully cut the contact paper to size. Add a few inches to each side for a smooth application and to account for any irregularities in the surface.
- Peel and Apply: Slowly peel back the protective layer of the contact paper, exposing the adhesive side. Starting from one edge, carefully align the contact paper with the cabinet surface and slowly smooth it down, working your way outwards. Avoid trapping air bubbles by smoothing the contact paper from the center towards the edges.
- Remove Air Bubbles: If air bubbles form, use a squeegee or a credit card to gently push them towards the edges. Avoid pressing too hard, as this could damage the contact paper.
- Trim Excess Contact Paper: Once the contact paper is securely applied to the entire surface, trim any excess material with a sharp utility knife.
It's essential to work slowly and carefully, ensuring the contact paper is properly aligned and smooth. Take breaks if necessary to avoid fatigue that can lead to mistakes.
Tips for Success
Here are some additional tips for achieving a seamless and professional-looking finish when transforming your kitchen cabinets with contact paper:
- Use a Cutting Mat: Use a cutting mat to protect your work surface while cutting the contact paper. This will prevent any scuffs or scratches on your countertop or table.
- Apply in Small Sections: Apply the contact paper in small sections to ensure proper alignment and smooth application. This technique helps prevent wrinkles and bubbles.
- Use a Heat Gun: Use a heat gun to gently warm the contact paper after application, especially around corners or edges. This will help to create a smoother, more professional look.
- Protect the Contact Paper: Consider applying a clear sealant to protect the contact paper from scratches and wear, especially in areas with high traffic.
Transforming your kitchen cabinets with contact paper is a cost-effective and relatively easy way to refresh the space. By carefully selecting the right contact paper, following the application steps, and implementing these tips, you can achieve a stunning and updated look for your kitchen cabinets.

Using Contact Paper To Transform Your Kitchen Cabinets Home Texture

How To Contact Paper Cabinets Tips Remove Them Er Friendly Decor

How To Install L And Stick Contact Paper Countertop Backsplash Makeover Er Friendly

Simple Diy Drawer And Shelf Liners

Contact Paper Kitchen Makeover

How To Install Contact Paper Countertop The Diy Mommy

21 Diy Affordable Ways To Redo Kitchen Cabinets Extra Space Storage

Diy Small Galley Kitchen Remodel Sarah Hearts

Wallpaper Cabinets Transform Your Kitchen With Style

21 Diy Affordable Ways To Redo Kitchen Cabinets Extra Space Storage
Related Posts

