Build Your Own Cabinets: A DIY Guide
Building your own cabinets is a rewarding and cost-effective way to enhance the aesthetics and functionality of your home. Whether you're embarking on a kitchen remodel, bathroom renovation, or simply adding storage space to a room, crafting custom cabinets provides a sense of accomplishment and allows you to personalize your living space. This comprehensive guide will walk you through the essential steps, materials, and techniques for successful cabinet construction.
Step 1: Planning and Design
The foundation of any successful DIY project lies in meticulous planning. Before diving into construction, dedicate time to conceptualize your cabinet design. Take into account the following considerations:
- Purpose and location: Determine the intended use of the cabinets, their placement within the room, and the desired dimensions.
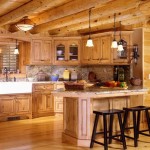
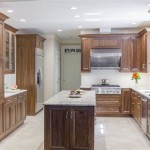
- Style and materials: Choose a style that complements your home's décor and select durable materials that meet your needs. Consider factors like wood type, finish, and hardware.
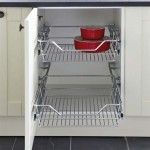
- Functionality: Plan for efficient storage by incorporating features like adjustable shelves, drawers, and pull-out baskets.
- Budget: Set a realistic budget and research material and tool costs to ensure affordability.
Drawing detailed plans and sketches will help visualize the final outcome and make the construction process smoother. Consider using software like SketchUp or AutoCAD for virtual modeling or opt for traditional hand-drawn plans. The more detail you include in the design, the easier the construction will be.
Step 2: Gathering Materials and Tools
Once the design is finalized, gather the necessary materials and tools for cabinet construction. This list may vary depending on the complexity of your project, but here are some essentials:
- Wood: Choose a stable and durable wood like plywood, MDF, or cabinet-grade hardwood for the cabinet boxes and doors.
- Hardware: This includes hinges, drawer slides, knobs, and pulls. Select durable and aesthetically pleasing options that match your style.
- Fasteners: Use screws, wood glue, and nails for secure assembly.
- Finishing supplies: Select paint, stain, or varnish to protect and enhance the appearance of the wood.
Tools required may include:
- Saw: A circular saw, miter saw, or table saw for cutting wood accurately.
- Drill: A cordless drill with various drill bit sizes for drilling pilot holes and attaching hardware.
- Measuring tape: Essential for accurate measurements and cutting.
- Level: Ensure all components are plumb and level for a professional finish.
- Sandpaper: Smooth out rough edges and prepare surfaces for finishing.
- Clamps: Secure pieces of wood during assembly and gluing.
- Safety equipment: Eye protection, ear protection, and gloves are crucial for safe operation.
Step 3: Construction Process
With the materials and tools ready, begin the assembly process, following the detailed plans you created. This involves:
- Cutting the wood: Accurately cut the pieces of wood to the specified dimensions using your chosen saw.
- Assembling the cabinet boxes: Join the side, top, bottom, and back panels using wood glue and screws or nails. Reinforce corners with corner brackets for added stability.
- Adding shelves and drawers: Cut and install shelves and drawer boxes according to your design. Use drawer slides for smooth operation.
- Building the cabinet doors: Cut and assemble the door panels using the chosen wood and hardware. Include decorative features like raised panels or molding if desired.
- Installing the doors and hardware: Attach the doors to the cabinet boxes using hinges. Install the drawer pulls and knobs.
- Finishing: Sand the surfaces smooth, apply paint, stain, or varnish, and allow it to dry completely.
Consider using a cabinet making jig for accurate and consistent joinery.
Step 4: Installation
Once the cabinets are finished, install them in their designated locations. This may require:
- Preparing the walls: Ensure the walls are level and free of obstructions.
- Attaching the cabinets: Use screws, nails, or specialized cabinet clips to secure the cabinets to the walls or floors.
- Leveling and alignment: Carefully adjust the position of the cabinets to ensure they are level and aligned.
- Finishing touches: Install any remaining hardware, trim, or molding to complete the installation.
Remember to wear appropriate safety gear throughout the installation process. Follow the manufacturer's instructions for mounting the cabinets, and use appropriate tools and techniques to ensure a secure and aesthetically pleasing installation.

Build Cabinets The Easy Way How To

How To Diy Build Your Own White Country Kitchen Cabinets

How To Build Cabinets In Under 30mins The Easy Way

How To Build Cabinets

How To Build A Custom Diy Built In Cabinet Angela Marie Made

How To Diy Build Your Own White Country Kitchen Cabinets

Diy Built In Cabinet Just Call Me Homegirl

How To Build Cabinets Mwa Woodworks

How To Build Diy Pantry Cabinets Part 1 Building Base

How To Diy Build Your Own White Country Kitchen Cabinets
Related Posts