Stripping Paint From Old Kitchen Cabinets To New Build House
Moving into a new build house is exciting, but it often comes with the task of personalizing a blank canvas. One common challenge is finding ways to incorporate existing furniture and fixtures into the new space. This can be especially tricky when dealing with older pieces like kitchen cabinets that might have outdated paint finishes. While replacing cabinets entirely is an option, stripping the paint off old cabinets can offer a cost-effective way to breathe new life into them, allowing them to seamlessly blend into your new home's aesthetic.
Stripping paint from old kitchen cabinets is a labor-intensive process that requires patience and attention to detail. However, with the right tools and techniques, it can be a rewarding experience, resulting in a fresh, refinished cabinet surface that complements your new home's design. This article provides a comprehensive guide to stripping paint from old kitchen cabinets, covering essential tools and techniques, safety precautions, and tips for successful results.
Tools and Materials You'll Need
Before embarking on the paint stripping project, gather the necessary tools and materials. Depending on the type of paint on the cabinets and your preference, you might need a combination of these items:
- Paint Stripper: Available in liquid, gel, and paste forms, paint stripper effectively softens and removes paint. Choose a stripper appropriate for the type of paint on your cabinets (oil-based or latex).
- Paint Scraper: This tool helps remove loosened paint after applying the stripper. Opt for a scraper with a sturdy handle and a sharp blade for efficient removal.
- Putty Knife: A putty knife comes in handy for scraping stubborn paint and smoothing out the surface.
- Wire Brushes: Wire brushes are useful for removing stubborn paint residue and cleaning crevices.
- Chemical-Resistant Gloves: Protect your hands from the chemicals in paint stripper by wearing gloves.
- Eye Protection: Wear safety goggles to protect your eyes from paint stripper splashes and dust particles.
- Ventilation: Ensure adequate ventilation in the work area, as paint strippers can release harmful fumes.
- Drop Cloths or Plastic Sheeting: Protect your workspace from spills and drips by covering it with drop cloths or plastic sheeting.
- Sandpaper: After stripping, use sandpaper to smooth out the surface and prepare it for refinishing.
- Wood Filler (Optional): If the cabinets have any scratches or imperfections, use wood filler to repair them before painting.
- Cleaning Rags: Keep cleaning rags handy for wiping away paint stripper residue and cleaning the tools.
- Paint Thinner (Optional): Use paint thinner to clean up tools after use, but only if the paint stripper recommends it.
Key Steps for Stripping Paint from Old Cabinets
Stripping paint from old kitchen cabinets involves a series of steps. Follow these instructions carefully to achieve successful results:
- Prepare the Work Area: Choose a well-ventilated area where you can safely work. Cover the surrounding space with drop cloths or plastic sheeting to protect it from paint stripper spills and dust. If possible, work outdoors for better ventilation.
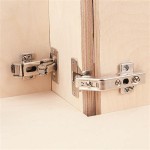
- Remove Hardware: Before applying paint stripper, remove all the cabinet hardware, including hinges, knobs, and pulls. This will allow you to access the entire surface of the cabinets for stripping.
- Apply Paint Stripper: Apply the chosen paint stripper generously to the cabinet surfaces, working in small sections. Follow the instructions on the product label regarding application time and thickness.
- Scrape and Remove Paint: After applying the stripper, wait for the recommended dwell time (usually 15-30 minutes). Use a paint scraper to remove the softened paint. Work carefully and avoid applying too much pressure, as you don't want to damage the wood underneath. If needed, use a wire brush to remove paint from crevices and hard-to-reach areas.
- Repeat the Process: If some paint remains after the initial scraping, apply a second coat of paint stripper and repeat the process.
- Clean and Neutralize: Once all the paint has been removed, use a cleaning rag to wipe away the stripper residue. If the paint stripper instructions recommend it, use paint thinner to clean tools. Then, neutralize the surface with a solution of water and baking soda or a commercial neutralizer. This helps prevent further damage to the wood and ensures the surface is ready for refinishing.
- Sand and Prepare for Refinishing: After cleaning, sand the cabinet surfaces with sandpaper to smooth out any remaining imperfections or roughness. Use different grits of sandpaper, starting with coarse grit and gradually progressing to finer grit. This creates a smooth, even surface that's ready for painting or staining.
Safety Precautions
Paint strippers contain harsh chemicals that can irritate the skin, eyes, and respiratory system. Always prioritize safety when stripping paint, taking the following precautions:
- Wear Protective Gear: Always wear chemical-resistant gloves, safety goggles, and a respirator mask when working with paint strippers. The mask should have the proper filtration for paint stripper fumes.
- Work in a Well-Ventilated Area: Ensure adequate ventilation in the work area to prevent the buildup of fumes. If working indoors, open windows and doors, or use a fan to circulate air.
- Avoid Skin Contact: Minimize skin contact with the paint stripper. If it does come into contact with your skin, wash it immediately with soap and water. Contact a doctor if irritation persists.
- Store Properly: Store paint stripper in its original container, in a cool, dry place, away from children and pets.
- Dispose Properly: Dispose of paint stripper and its containers according to local regulations. Check with your local waste management department for proper disposal instructions.

How I Updated My Oak Cabinets Without Paint By Using Briwax Easy Budget Kitchen Makeover Only 24

Painted White Cabinets Before And After Reveal Photos Renovated Faith

How To Update Your Kitchen Cabinets Without Replacing Them Real Estate U S News

How To Paint Kitchen Cabinets Best Color Ideas Cost

Avoid These Mistakes How To Paint Cabinets That Are Already Painted Grace In My Space

21 Diy Affordable Ways To Redo Kitchen Cabinets Extra Space Storage

How To Strip Paint From Cabinets Angi

A Step By Guide To Painting Kitchen Cabinets With Kilz Primer Blog

How To Prep And Paint Kitchen Cabinets Lowe S

How To Paint Old Kitchen Cabinets Save Yourself 1 000s Builds By Maz
Related Posts

